550sx to 750 "All or Nothing" build

holygoat

Site Supporter
Location
Indiana, USA
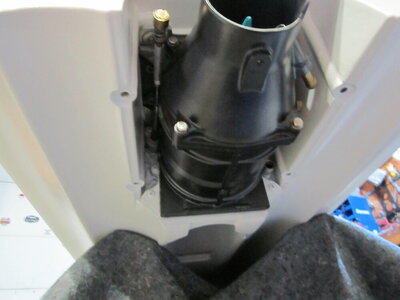
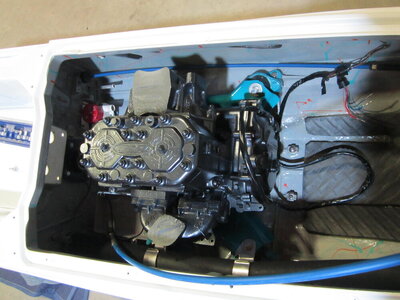
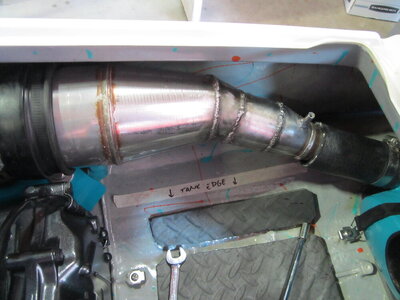
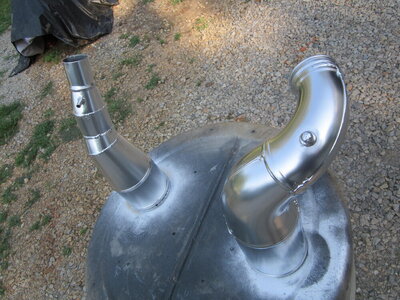
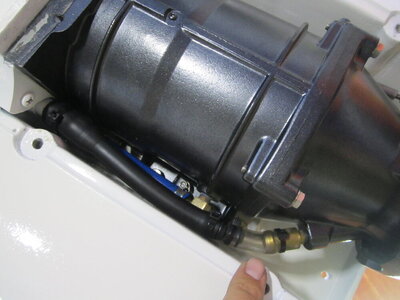
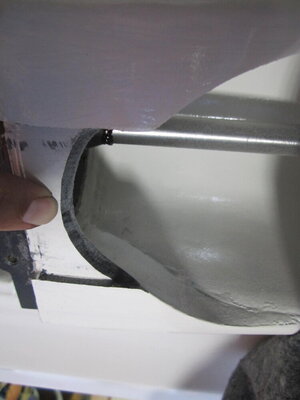
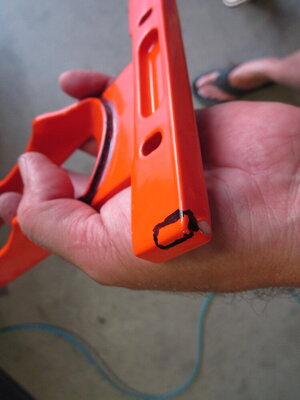
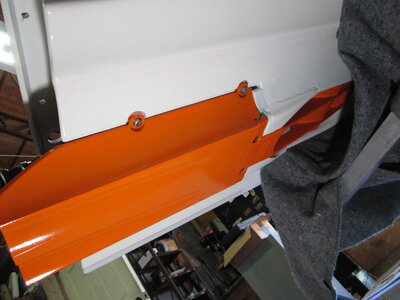
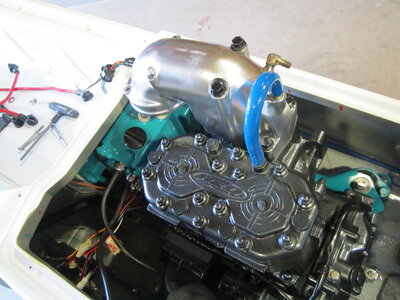
I just came in, I'm just exhausted. Temp in my shop.....in front of fans..= miserable! Anyway, I got some brackets screwed down. I got some pads cut and glued down. I marked and V cut the center pad under the gas tank so it would sit flat in the hull. Got the waterbox strapped in and exhaust hose run. Also got the pole bracket and fuel neck installed. Now I pretty much can't do anything until the driveline is installed. DANGIT!

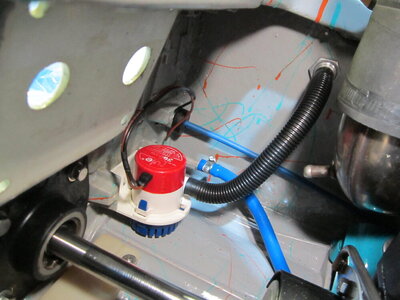
What material for those pads? Looks nice. Glued down with Weldwood?
 

Myself

manic mechanic
Location
Twin Lakes AR
Little update. I got the replacement impeller and still had issues. I set up a stand on the workbench and tested runout on pump shaft, completely dis-assembled the pump to make sure ALL bearings were fully seated and square, tried another pump shaft........came to the conclusion possibly it was in the driveshaft splines this whole time. Another driveshaft is on the way and hopefully this will solve it.
 

Myself

manic mechanic
Location
Twin Lakes AR
I got most of today in working on this project. Pump is mounted, driveshaft and bearing/seal installed, engine dropped in, and all of it lined up to perfection!
 

Attachments

  • IMG_2988.JPG
    IMG_2988.JPG
    84.6 KB · Views: 44
  • IMG_2989.JPG
    IMG_2989.JPG
    128.6 KB · Views: 34
  • IMG_2992.JPG
    IMG_2992.JPG
    135 KB · Views: 32

Myself

manic mechanic
Location
Twin Lakes AR
I tested the starter and it sounded pretty weak......took it apart and found the main brass power strap broke. Well, I had another starter here that worked good but had boogered gear teeth. SOOoooo, I took 'em both apart and made one good one!
 

Attachments

  • IMG_2990.JPG
    IMG_2990.JPG
    189.6 KB · Views: 28
  • IMG_2991.JPG
    IMG_2991.JPG
    94.5 KB · Views: 26
Last edited:

Myself

manic mechanic
Location
Twin Lakes AR
And since everything is in it's permanent home I mocked up the exhaust so I can decide exactly where I want to cut it. Do you HAVE to cut it.........NO. BUT, I want it bent and pointing straight at the waterbox inlet. Plus I wanted to add a bit more volume to it as well.
 

Attachments

  • IMG_2993.JPG
    IMG_2993.JPG
    132.9 KB · Views: 27

Myself

manic mechanic
Location
Twin Lakes AR
I got about 5 hours in today on the exhaust. If you remember WAAaayyy earlier I might have eluded to a special trick up my sleeve for it. Well, the stock 650sx pipe does NOT point the right direction for the waterbox inlet. AND,....I wanted to add a bit of length for a better overall power delivery but the pipe belly sits TOO CLOSE to the gas tank. Adding a bit of length to the cone should still add to the lower end power while also adding a bit of RPM for better peak power. This 750 setup should like that. Cut, form, weld, and paint today. Pipe is done!
 

Attachments

  • IMG_2996.JPG
    IMG_2996.JPG
    109 KB · Views: 19
  • IMG_2997.JPG
    IMG_2997.JPG
    108.9 KB · Views: 17
  • IMG_2999.JPG
    IMG_2999.JPG
    98.4 KB · Views: 20
  • IMG_3000.JPG
    IMG_3000.JPG
    123.5 KB · Views: 19
  • IMG_3001.JPG
    IMG_3001.JPG
    115.2 KB · Views: 19
  • IMG_3003.JPG
    IMG_3003.JPG
    199 KB · Views: 18
Last edited:

Myself

manic mechanic
Location
Twin Lakes AR
I got a few more hours in on this build today. Of course it was already sweltering hot because first thing I did was run over to a buddies shop to help check out a no reverse issue on a 700r4 in his 72 Chevelle. I found a stuck spool in the reverse boost valve, and a couple valves in the valve body were sticky as well. Hopefully I got that sorted for him. Anyway.........I got the steering nozzle, cooling, and siphon hoses hooked up on the pump. The stock siphon hose is too short to reach with a 750 pump swap. You can see I just added a barb and a short section of hose. I also set the steering cable right in the center of travel and locked down the adjusters on the extension that comes with the 750 pump swap kit. You can also see in that pic that the modded 750 steering nozzle fits nicely with plenty of clearance to the hull.
 

Attachments

  • IMG_3009.JPG
    IMG_3009.JPG
    110.8 KB · Views: 13
  • IMG_3010.JPG
    IMG_3010.JPG
    90.2 KB · Views: 16
Last edited:

Myself

manic mechanic
Location
Twin Lakes AR
After that I fit the intake grate and ride plate up. The ride plate was all good no issues. The intake grate needed some fine tuning. I'd guess for most folks a fat bead of silicone and mount it up is "Good Enough". Well, I don't do things like that. The edge of the pump shoe was making some contact with the radiused portion on the intake grate (marked with sharpie) so I got out the die grinder and clearanced a little at a time until it fit nice. With that done, the rear of the intake grate would hit JUST the edges of the ride plate BEFORE being fully seated in. In the closeup shot you can see how the ride plate edge sits just a bit higher than the pump surface. A wee bit of careful grinding on that as well. And now the bottom side is finished out.
 

Attachments

  • IMG_3007.JPG
    IMG_3007.JPG
    70.9 KB · Views: 17
  • IMG_3004.JPG
    IMG_3004.JPG
    85 KB · Views: 17
  • IMG_3006.JPG
    IMG_3006.JPG
    83.6 KB · Views: 18
  • IMG_3008.JPG
    IMG_3008.JPG
    116.7 KB · Views: 16
  • IMG_3012.JPG
    IMG_3012.JPG
    104.8 KB · Views: 21

holygoat

Site Supporter
Location
Indiana, USA
Looks excellent as always. Looking forward to seeing it finished. I can't wait to fix my ski up properly over winter. I've been sort of half assing things to get as much ride time in possible, then I'm gonna come back through and finish it up properly in winter.
 

Myself

manic mechanic
Location
Twin Lakes AR
Dang......July hit me hard. Everybody and their cousin brought broken skis out of the woodwork to get fixed. Been doing 60+ hour weeks all month. Finally got more progress in this weekend. I heated the aluminum around this fitting and pulled it out. Then drilled and tapped the hole so I could thread in this 90* fitting to point up towards the stinger. I also drilled an 1/8" hole inside the headpipe. If using PWCr's 750 headpipe you will need to do this to add waterflow INSIDE the pipe so you don't burn rubber couplers!
 

Attachments

  • IMG_3069.JPG
    IMG_3069.JPG
    140.5 KB · Views: 9
  • IMG_3070.JPG
    IMG_3070.JPG
    130 KB · Views: 10
  • IMG_3071.JPG
    IMG_3071.JPG
    117.9 KB · Views: 10
  • IMG_3072.JPG
    IMG_3072.JPG
    124.8 KB · Views: 10

Myself

manic mechanic
Location
Twin Lakes AR
I made a solid gasket out of stainless shim stock for the 750 to 650 pipe adaptation.
 

Attachments

  • IMG_3073.JPG
    IMG_3073.JPG
    115.7 KB · Views: 10
  • IMG_3074.JPG
    IMG_3074.JPG
    152.1 KB · Views: 10
  • IMG_3075.JPG
    IMG_3075.JPG
    91.2 KB · Views: 12

Myself

manic mechanic
Location
Twin Lakes AR
Today I spent several hours going through wiring diagrams and loading everything back into the e-box. Buttoned up the holes with new aluminum grommets, and tried fitment out with the headpipe in place.
 

Attachments

  • IMG_3082.JPG
    IMG_3082.JPG
    175.3 KB · Views: 14
  • IMG_3083.JPG
    IMG_3083.JPG
    140 KB · Views: 17
  • IMG_3084.JPG
    IMG_3084.JPG
    139.6 KB · Views: 25
Today I spent several hours going through wiring diagrams and loading everything back into the e-box. Buttoned up the holes with new aluminum grommets, and tried fitment out with the headpipe in place.
What the make, model, and year Buick did you pull that electrical box out of?
 

Myself

manic mechanic
Location
Twin Lakes AR
I worked a long hard day today. Got 6 hours in on this between helping/supervising my son doing a brake job and replacing a vent actuator on his girlfriends Buick.
First things first, get this e-box reinstalled. I noticed the 750 e-box bracket stands off the original 550 mount about 1/8". I put a fine tooth blade in the hackzall and trimmed the bosses down. This also required a little notch for a bolt head on the conversion mount. And of course the bracket needed some clearancing for the back of the 550 fuel switch. You can see how the switch protrudes further than the rest of the mount.
 

Attachments

  • IMG_3085.JPG
    IMG_3085.JPG
    110.7 KB · Views: 9
  • IMG_3086.JPG
    IMG_3086.JPG
    84.5 KB · Views: 9
  • IMG_3088.JPG
    IMG_3088.JPG
    125.6 KB · Views: 9
  • IMG_3087.JPG
    IMG_3087.JPG
    98.6 KB · Views: 9
Top Bottom