650SX/X2 build

tom21

havin fun
Location
clearwater FL
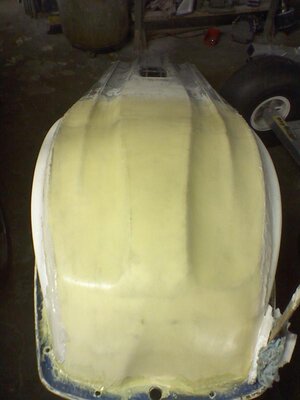
Mike I know jack squat about hull design, but I would think that the way you have them curved inward would act like a brake. If it were mine I would just go into the foam an inch or two- whatever, but as it hits the foam I would start tapering it down and make it disappear. you don't need the hull to steer that far up. you have the center and the outside lip and eventually the tubbies helping to steer.:highhorse:
 

Vumad

Super Hero, with a cape!
Location
St. Pete, FL
I'm pretty much done with the shape and am ready to lay glass. I ended up shortening and smoothing the chines as Tom suggested. I'm happy with the shape as it is right now but I'm hoping to get someone to look at it.

There's plans to lift a mold and make a few parts from this. I believe there will be some interest?
 

Attachments

  • 0729082124.jpg
    0729082124.jpg
    46.6 KB · Views: 111
  • 0729082124a.jpg
    0729082124a.jpg
    45.6 KB · Views: 140
  • 0729082124b.jpg
    0729082124b.jpg
    49 KB · Views: 108
  • 0729082124c.jpg
    0729082124c.jpg
    41.9 KB · Views: 118
  • 0729082123.jpg
    0729082123.jpg
    31.3 KB · Views: 118

Vumad

Super Hero, with a cape!
Location
St. Pete, FL
I took the ski to Tom's shop... here's a preview of the skishoprules.com custom X2 sponsons with my new bottom.

Need to do a bit more sanding before the glass goes down. The closer to perfect it is now, the easier it'll be to finish later.
 

Attachments

  • 0729082315.jpg
    0729082315.jpg
    43.6 KB · Views: 137
  • 0729082315a.jpg
    0729082315a.jpg
    57.6 KB · Views: 126

Vumad

Super Hero, with a cape!
Location
St. Pete, FL
I layed up the glass on the hull. Here are the pics.
 

Attachments

  • 0808080130a.jpg
    0808080130a.jpg
    49.3 KB · Views: 144
  • 0808080130c.jpg
    0808080130c.jpg
    40.7 KB · Views: 135
  • 0808080130b.jpg
    0808080130b.jpg
    38.6 KB · Views: 251
  • 0808080130.jpg
    0808080130.jpg
    47.7 KB · Views: 147
  • 0808080129.jpg
    0808080129.jpg
    39.7 KB · Views: 135

WFO Speedracer

A lifetime ban is like a lifetime warranty !
Location
Alabama
Lokks good to me ,I ran my strakes all the way to the front,whether that feature is good bad or makes any difference I do not know,I do know that the handling difference was amazing and it now carves harder and the nose rides higher and it tracks well even at wide open speeds,I am happy with it,thats all that matters.
 

Vumad

Super Hero, with a cape!
Location
St. Pete, FL
Since my last post... I mixed glass microspheres with epoxy resin to make a puddy and covered the hull where I layed glass. Then I sanded it until it was smooth.

The "what should have been the final coat" is drying right now. I mixed epoxy resin and applied it like paint to the hull. This coat has dried and super smooth like paint. However, I'm extremely annoyed that the brand new brush I was using lost bristles while I was applying the epoxy. As a result, I'm now going to have to sand and apply another coat of resin to get the smooth finish I'm after before I can lift a mold.

Here's pics. They are a bit deceiving. You can see the weave of the glass and it's much more yellow than in the picture. However, it does shine just like in the picture. It's super smooth and glossy (except where those damned fibers are stuck).

This project has turned out extremely well I think.
 

Attachments

  • 0824081413.jpg
    0824081413.jpg
    35.6 KB · Views: 184
  • 0824081413a.jpg
    0824081413a.jpg
    51.8 KB · Views: 164
  • 0824081413b.jpg
    0824081413b.jpg
    52.7 KB · Views: 168
Last edited:

Vumad

Super Hero, with a cape!
Location
St. Pete, FL
Are you doing an entire bottom deck mold or just the nose?

Just the nose. It will be something that can be installed like tubbies.

I'm currently at a stand still. I don't have anywhere to work the mold. It will take a few hours to wax it out and spray the PVA. I have to find someplace I can do the work so I don't end up with bugs in the final product... as which seems to happen every time I work...
 

madscientist

chilling with these guys.
Location
good old p'cola
looks good. why didn't you just go ahead and do the tubbies at the same time?

the finished part should insatll just inside the chines and not over the chines like the jap peice.

shoot me a price for a peice, i am getting ready to do the bottom myself
 

Vumad

Super Hero, with a cape!
Location
St. Pete, FL
Prep surface

Prep sponsons

Test fit + sand foam so sponson lays smooth

Position sponson, make sure holes are pre marked

drill holes (I did 1-2 holes at a time, sponson will slide slightly as screws are inserted)
 

Attachments

  • 0910081950a.jpg
    0910081950a.jpg
    58.4 KB · Views: 123
  • 0910082030a.jpg
    0910082030a.jpg
    29.6 KB · Views: 122
  • 0910082030.jpg
    0910082030.jpg
    37.9 KB · Views: 123
  • 0910081953.jpg
    0910081953.jpg
    49.1 KB · Views: 134
  • 0910081950.jpg
    0910081950.jpg
    50.1 KB · Views: 138
Last edited:

Vumad

Super Hero, with a cape!
Location
St. Pete, FL
Countersink holes

Install screws

ensure sponson placement, remove sponson, mix epoxy with glass microspheres until peanutbutter consistancy (I used 6 oz of resin with 10oz, give or take, microspheres per sponson), smear paste all over backside, scre sponson back on, wipe up excess

Notes:
It's important to be careful installing the screws across the bottom. The chine is narrow and a drill bit or a screw that is too long could go through the bottom of the ski.

The last screw closest to the back end can't be installed because it will go through and be exposed into the tray. The fit was snug and a piece of rubber wedged in held it tight enough to dry.
 

Attachments

  • 0910082228.jpg
    0910082228.jpg
    53.1 KB · Views: 134
  • 0910082030c.jpg
    0910082030c.jpg
    34.6 KB · Views: 103
  • 0910082030b.jpg
    0910082030b.jpg
    28.6 KB · Views: 105
Last edited:

Vumad

Super Hero, with a cape!
Location
St. Pete, FL
Sponsons installed. I still need to do the body work to blend them in.
 

Attachments

  • 0910082343a.jpg
    0910082343a.jpg
    54.5 KB · Views: 113
  • 0910082344.jpg
    0910082344.jpg
    44 KB · Views: 105
  • 0910082344a.jpg
    0910082344a.jpg
    51.9 KB · Views: 108
  • 0910082344b.jpg
    0910082344b.jpg
    36.8 KB · Views: 118
  • 0910082344c.jpg
    0910082344c.jpg
    58.9 KB · Views: 106
Last edited:

Vumad

Super Hero, with a cape!
Location
St. Pete, FL
I stopped by the shop to see what was up with the X2. Tom had called me and mentioned there was a clearance problem with the pipe and the tank. I'll have to bring him a few more parts before he can finish.

Here's the pics as it sits now. That pipe makes me happy in the pants, especially since I had that little tiny westcoast 650 pipe in it before.
 

Attachments

  • 0920080742.jpg
    0920080742.jpg
    51.9 KB · Views: 145
  • 0920080741.jpg
    0920080741.jpg
    36.9 KB · Views: 146
  • 0920080741a.jpg
    0920080741a.jpg
    38.8 KB · Views: 145

Crab

thanks darin...noswad!
Location
Seattle
I stopped by the shop to see what was up with the X2. Tom had called me and mentioned there was a clearance problem with the pipe and the tank. I'll have to bring him a few more parts before he can finish.

Here's the pics as it sits now. That pipe makes me happy in the pants, especially since I had that little tiny westcoast 650 pipe in it before.
Heat that mofo up and reshape it.
 

Vumad

Super Hero, with a cape!
Location
St. Pete, FL
I asked Tom to make a bilge bracket for me. This will mount to the back set of bolts that hold in the braces. It's also spaced enough that I can still run the stock siphon. Built to spec. I am quite pleased. GJ Tom! :beerchug:
 

Attachments

  • 1006081812.jpg
    1006081812.jpg
    55 KB · Views: 160

shawn_NJ

Chasing waves.
Location
Daytona Beach
You guys going to be making any nose piece parts? Coming along nicely. Bracket is a great idea.
 
Top Bottom