650SX/X2 build

Vumad

Super Hero, with a cape!
Location
St. Pete, FL
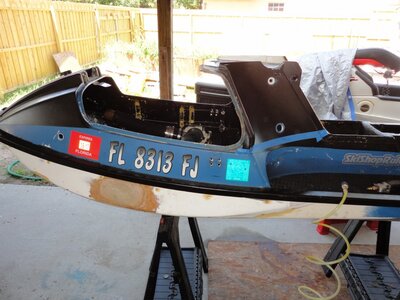
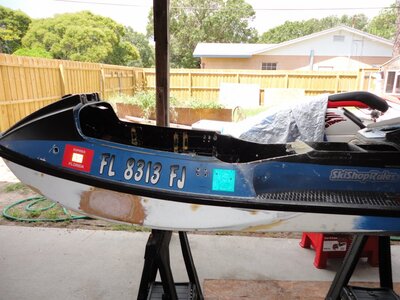
So, I recently purchased a 2004 Superjet. It is all stock. I have never been very impressed by my X2, so naturally my expectations of it have been set pretty low. However, the X2 demanded a little more respect from my when it was raced against my 2004 Superjet. The X2 (with my 220lbs friend as a rider) easily pulled away from my Superjet (I'm 170). I can't radar or GPS it, but I would estimate the difference in top speed was about 5-7 MPH on glass. The X2 accelerated much harder than the Superjet as well. Yes, the Superjet is stock and my X2 is very modified, so don't think I'm saying anything negative about the Superjet. Dollar for dollar, remember my X2 was built from parts skis, so the Superjet already has a far larger amount of $ invested. The Superjet did go straight into the water and didn't take my 3.5 years to get to perform the way it does, so it scores major points over the X2 in that catagory.

Someday I will build up the Superjet, but for right now I have my X2 for performance and my SJ as super reliable.
 

Vumad

Super Hero, with a cape!
Location
St. Pete, FL
You need an 85mm nozzle with the sxr prop to really get some low hit.

This is for sure accurate. I was having issues with low end power. The motor didn't want to produce power, or would wind up but not actually accelerate from low speeds. I had lots of power in the mid range.

Today I bolted on my 650sx PJS racing nozzle which is a tad bigger in diameter. I now have consitant power throughout the RPM range. I have much more power at lower speeds and it doesn't have that cavitation feeling that it had before.

However, the SX nozzle has a steering bracket closer to the hull than the X2, so my steering cable is too long, and I thus cannot turn left. I need a solution (w/o cutting down the cable) or to cut the stock nozzle.

I have a 13/18 SXR prop. I haven't put it on yet because it is not yet cut. I have access to a 750 pump and am going to look into the pump conversion instead of cutting my prop first.
 

Vumad

Super Hero, with a cape!
Location
St. Pete, FL
However, the SX nozzle has a steering bracket closer to the hull than the X2, so my steering cable is too long, and I thus cannot turn left. I need a solution (w/o cutting down the cable) or to cut the stock nozzle.

It took $10 in stainless steel bolts/nuts/washer, a piece of scrap sheet aluminum and about 2 hours of my time but I made the PJS nozzle work. And it is working good.

I measured it out to be 87mm, and stock to be 83mm. It definately improved how my motor ran. Before the motor seemed boggy until about 20mph when a light switch was flipped and pulled hard. I hated how it always jumped onto and fell off pipe. I took Crab's suggestion about pump loading and nozzle size and he was right. The pump was overloading and the motor couldn't move the water. Now my motor jumps right onto pipe and stays on pipe, throttle control is much smoother. It's obvious, now that the motor can actually run the way it is suppose to, that it is a bit lean on the bottom end and it is very under proped. I have a 13/18 solas to go in it and am waiting to hear back from Impros. Obviously the motor tuning is simple, and just needs to be done soon.

Stock...........................PJS
1002011325a.jpg1002011325.jpg1002011326.jpg
The solution
1002011324.jpg1002011512.jpg1002011513.jpg
 
Last edited:

Vumad

Super Hero, with a cape!
Location
St. Pete, FL
Getting that prop in is key, Also advance the timming.
I run a pjs on my ski, add some 750 wedges to give you more trim

I had a R&D 6 degree timing advance kit. It made my motor run hot. I had to make it way fat and it still ran lean. It detonated at high RPM. I later found out that the early 750 models could use the timing kit, but the later 750 models came stock with 6 degree advance timing. I believe the explination for my leanness is that I have a later model 750 that is already advanced stock.
 

Vumad

Super Hero, with a cape!
Location
St. Pete, FL
UPDATES


I was asked to update my build thread. I expect some criticism and that is okay. This project is a hobby. I ride my superjet and tinker with my X2. I have learned a lot about composites over the past several years and am hoping to take what I have learned from this project to the next level....

Anyway.... Many years ago (7 years, 2007) I was looking into a B1 style hood for the X2. I drew up some ideas but didn't have any of the skills to make it happen, or the time, or resources. Here is the ideas in their design stages....

http://www.x-h2o.com/index.php?threads/modified-x2-build-stripped-the-hull.28358/

attachment.php
 
Last edited:

Vumad

Super Hero, with a cape!
Location
St. Pete, FL
I spent several years looking at my X2, thinking of the best way to make this idea come to life. I would have liked to have done a few things differently, but back then, it was outside of my skill set. Working with the stock hood seal was the best way to make the idea come to life.

So, I made the necessary cuts and the evolution began...

index.php

index.php
 

Attachments

  • DSC01409.JPG
    DSC01409.JPG
    144.1 KB · Views: 108
  • DSC01410.JPG
    DSC01410.JPG
    169.7 KB · Views: 108

Vumad

Super Hero, with a cape!
Location
St. Pete, FL
The stock X2 control system runs through the top of the bulk head to the squirrel cage. This design had to go for my hood to work. The only way to make this change was to open the back deck and remove all of the stock controls. I also removed the stock cooling tubes while I was in there.

In hind sight, a grinder would have been a better took for cutting the bulk head. All I had back then was a reciprocating saw, so I unfortunately cracked my bulk head. Luckily, only a small amount of the cracked area was to be part of my new bulk head.

index.php
 

Attachments

  • DSC01412.JPG
    DSC01412.JPG
    146.7 KB · Views: 112

Vumad

Super Hero, with a cape!
Location
St. Pete, FL
Designing a new hood seal on an otherwise fully intact ski was a complicated process. I had to remove the steering portion of the hull to begin the design, but I also needed it in place to make my new hood seal lip. I couldn't build the new hood until the hood seal was complete as I would otherwise be unable to access the seal with the hood on.

The compromise was to use the tower as a mold for the new hood seal. I used bondo on the tower to make a mold for the seal. The hull was prepped for layup and the tower was waxed like a mold. I made a jig out of plywood to hold the tower in place while I did my layup.

Using the tower as a mold allowed me to make my hood seal, then remove the tower for the finishing work. Completing this project took 3 steps. Once for the left, once for the right, and once for the back. After each step, I would finish the lip, then test fit the seal. The left was done, then the right, right will not be shown. The back portion of the seal was done later as it would interfere with the controls upgrade.

index.php

index.php

index.php

index.php

index.php

index.php
 

Attachments

  • DSC01416.JPG
    DSC01416.JPG
    118.9 KB · Views: 109
  • DSC01418.JPG
    DSC01418.JPG
    121.2 KB · Views: 106
  • DSC01421.JPG
    DSC01421.JPG
    119.9 KB · Views: 104
  • DSC01422.JPG
    DSC01422.JPG
    133.3 KB · Views: 105
  • DSC01425.JPG
    DSC01425.JPG
    147.8 KB · Views: 108
  • DSC01429.JPG
    DSC01429.JPG
    147 KB · Views: 107

Vumad

Super Hero, with a cape!
Location
St. Pete, FL
After both sides of the hood seal were completed, it was onto the next step of upgrading the control and cooling.

index.php

index.php
 

Attachments

  • DSC01438.JPG
    DSC01438.JPG
    162.3 KB · Views: 108
  • DSC01439.JPG
    DSC01439.JPG
    141.1 KB · Views: 104

Vumad

Super Hero, with a cape!
Location
St. Pete, FL
I salvaged the control parts removed from the ski during the demo. They were heavily corroded. I treated them in a substance called "chem-dip". It is available at the auto parts store for about $25. I soaked the parts for a total of 3 or 4 days, removing them each day to clean them with a wire brush. The far left is the condition of the parts at start, the two on the right are the parts I actually used after treating them.

index.php
 

Attachments

  • DSC01471.JPG
    DSC01471.JPG
    132.5 KB · Views: 118

Vumad

Super Hero, with a cape!
Location
St. Pete, FL
I then started mocking up my cooling and control systems. For cooling I would be using 3 tubes (2 cooling, 1 for siphon). They are 3/8" thin walled marine stainless steel. These tubes still use the 3/8" cooling line but are about twice the inner diameter of the stock cooling lines.

I cleaned the hull inside and out prepping it for fiberglass. I sealed the holes with glass so that I could re-drill fresh holes for a better result. My plan was to use 2 650sx steering cables to run both the trim and the steering. This system would be stronger, with a better seal, and more easily replaced than a 5200 brake cable like many other trim systems use.

index.php

index.php

index.php

index.php

index.php

index.php

index.php
 

Attachments

  • DSC01446.JPG
    DSC01446.JPG
    155.2 KB · Views: 121
  • DSC01473.JPG
    DSC01473.JPG
    131.1 KB · Views: 121
  • DSC01515.JPG
    DSC01515.JPG
    63 KB · Views: 121
  • DSC01534.JPG
    DSC01534.JPG
    158.3 KB · Views: 124
  • DSC01536.JPG
    DSC01536.JPG
    150.8 KB · Views: 120
  • DSC01545.JPG
    DSC01545.JPG
    137.1 KB · Views: 121
  • DSC01552.JPG
    DSC01552.JPG
    111.3 KB · Views: 125

Vumad

Super Hero, with a cape!
Location
St. Pete, FL
Before I would continue with final installation of the cooling and control systems, I moved on to mocking up the battery tray.

Previously, my battery was under the seat but on the out side of the ski. The battery would still be in the same location but would now be protected inside the ski.

Unfortunately, I had a small repair to the bulk head to make as I mentioned in a previous post. A very minor job compared to many other aspects of this project.

index.php

index.php
 

Attachments

  • DSC01557.JPG
    DSC01557.JPG
    157 KB · Views: 134
  • DSC01595.JPG
    DSC01595.JPG
    134.8 KB · Views: 134

Vumad

Super Hero, with a cape!
Location
St. Pete, FL
Did this ever get finished? I’m putting a 951 in my x2 and we are looking at doing the same thing! Very nice work!

Yes and no. I did complete the hood, it did all work, I did ride it. Water did come in the hood around the back of the seal, on the left and right most parts on the last picture I posted. It was a tolerable situation. The steering worked fine with that cable. I still have the hull and it still would be usable. I think the best my X2 ever ran was in this configuration because I had a 2" right side exhaust with a superjet waterbox and I think those things worked much better than the stock waterbox.

I did go back to a stock hull, and started playing with some other things. I had my own left in left out waterbox with a B1 outlet on the left side. I had it running pretty good but I got hurt about 2015 and had kids in 2016. I have been doing a lot less riding and working. I still have both X2 configurations but I haven't been using them.

I wouldn't really suggest this for a 951 conversion because moving the hood seal actually takes another 3/4" from the pipe area. It can work but if you have any clearance issues at all with the hull, they are going to get even thighter. It did make tuning easier, and if I messed with the seal more, I could have got it dryer.

I would definately suggest the GP1200 seat latch. The XL760 waterbox on the 44s was also a great mod. I would also suggest using a Superjet waterbox and a B1 outlet on the right side. Getting a high spot on the exhaust makes it work a lot better and I believe all of my water ingestion issues on my X2, and what blew up my 650sx, was not the intake but rather the poor exhaust design. I think the @JetManiac Superjet waterbox could awesome in a X2 but I still haven't seen anyone put one in.

Ever see the Red Green show?

Yes.
 

Vumad

Super Hero, with a cape!
Location
St. Pete, FL
This is where my project time went starting 2016 which is why I stopped working on the X2.


Vumad

Super Hero, with a cape!
Location
St. Pete, FL
Thanks for the response!! Good info. And we ended up changing our mind on that anyways.

That's for the best. There's no performance benefits and the time you save accessing the motor will never make up for the amount of work to modify the hull. I wouldn't recommend the job unless you were doing it for some other reason. For me it was like a class project at homeschool. I learned a lot of things from project and wouldn't have been able to build the baby jet without the things I learned from modifying my X2.
 
Top Bottom