Another Freakin Foothold Installation

chart102

I wish I thought of that
Location
Ruston, LA
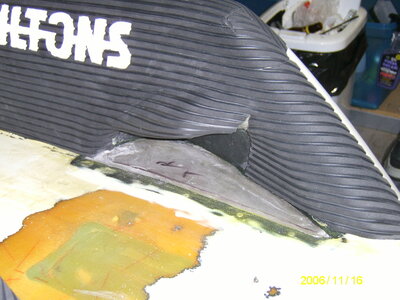
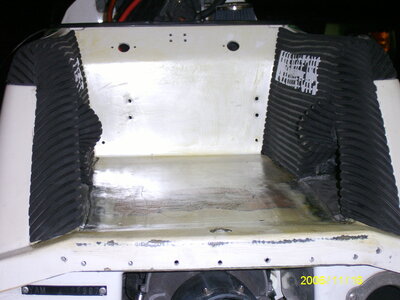
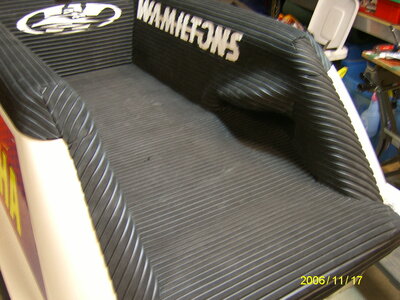
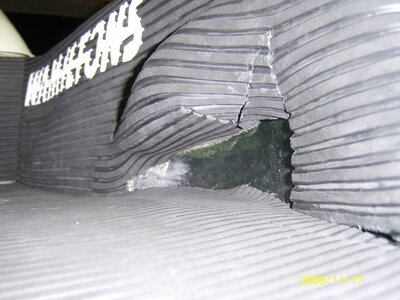
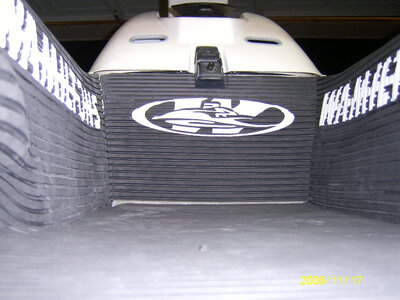
So here's my progress so far on my holds. Just got done a little earlier. Just got done stickin them in there. Planning on glassing tommorrow. I cut a litttle high so some of the rivets are pretty close to the edge. This is my first time working with expoxy resin.

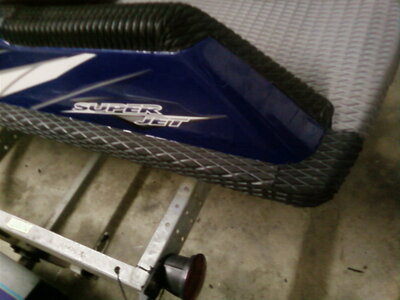
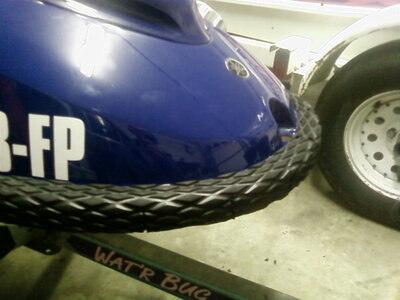
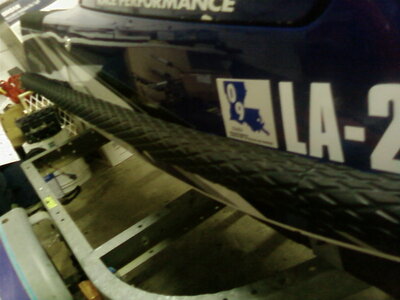
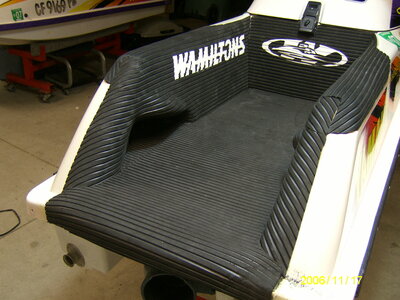
Looks good to me. Although thats comin from a one-timer here. Here are my bumpers i did them last night.
 

Attachments

  • SP_A0106.jpg
    SP_A0106.jpg
    80.3 KB · Views: 47
  • SP_A0107.jpg
    SP_A0107.jpg
    82.4 KB · Views: 53
  • SP_A0108.jpg
    SP_A0108.jpg
    79.7 KB · Views: 47

chart102

I wish I thought of that
Location
Ruston, LA
dude, got to say that you have done a brilliant job!
well done!

thanks bro. i guess im not a virgin turfer/FH installer anymore. I did have a hard time gettin the turf to wrap around the front. I had to cut it here and there to allow it to wrap.
 

oxnard111

Creative RE Purchasing
So i'm about half way through my turf install. I'm a first timer also. The right side was the first side layed. The left looks better. I used under matting to build up the top of the gunwhale to give it an even surface and also for a little more cush on the elbows. Mmmm cush :439: But anyways... I would be done already but we ran out of contact cement. Need to finish turfing and put her all back together by sunday to go riding.
 

Attachments

  • SA700654.JPG
    SA700654.JPG
    370.1 KB · Views: 27
  • SA700652.JPG
    SA700652.JPG
    300.9 KB · Views: 34
  • SA700651.JPG
    SA700651.JPG
    319.7 KB · Views: 28
  • SA700650.JPG
    SA700650.JPG
    266.4 KB · Views: 28
Last edited:

yamanube

This Is The Way
Staff member
Location
Mandalor
So for you guys that turf with just a sheet versus a pre-cut pattern, how do you go about making it match the body line on the outside of the rail (where the caps used to be)? I was thinking maybe glue it down to the inside of the tray and to the top but leave that half inch or inch on the outside of the rail unglued and just wrap it over, cut it then glue it. Any help?
 

oxnard111

Creative RE Purchasing
So for you guys that turf with just a sheet versus a pre-cut pattern, how do you go about making it match the body line on the outside of the rail (where the caps used to be)? I was thinking maybe glue it down to the inside of the tray and to the top but leave that half inch or inch on the outside of the rail unglued and just wrap it over, cut it then glue it. Any help?


Even with my precut kit i had to let it over hang to compensate for the extra padding I put on top of the gunwales. It hung over about 1/2 inch, just went down and cut the over hang with an exacto knife and then stuck it down. Didn't even need to re glue.
 

yamanube

This Is The Way
Staff member
Location
Mandalor
Make sense, has anybody else have a ton of trouble getting the stock rail caps off? I had to use a razorblade and actually cut them off, leaving a thin layer of rubber wherever they where glued down to. Even with them cut in half and me grabbing it with both hands I could not tear them off!!
 

oxnard111

Creative RE Purchasing
Make sense, has anybody else have a ton of trouble getting the stock rail caps off? I had to use a razorblade and actually cut them off, leaving a thin layer of rubber wherever they where glued down to. Even with them cut in half and me grabbing it with both hands I could not tear them off!!


Yes, they can be a pain in the arse to get off. My buddy just ripped his off earlier this week and he said it was a pain. He had to use a lot of Goof-Off and some loving to get it striped.
 

DR3

Xscream Braaaap
Location
palm harbor, Fl
Make sense, has anybody else have a ton of trouble getting the stock rail caps off? I had to use a razorblade and actually cut them off, leaving a thin layer of rubber wherever they where glued down to. Even with them cut in half and me grabbing it with both hands I could not tear them off!!

yep razor blade, thats about all you can do. pull back and cut, pull back and cut :bs2:
 

yamanube

This Is The Way
Staff member
Location
Mandalor
Sort of off topic, but Im going to be using aluminum rivets on my footholds but am also shortening my pole...I have heard alum. rivets are not strong enough for this, is there a place to get SS rivets?
 

Mark44

Katie's Boss
Location
100% one place
Sort of off topic, but Im going to be using aluminum rivets on my footholds but am also shortening my pole...I have heard alum. rivets are not strong enough for this, is there a place to get SS rivets?

Use self tapping sheet metal screws to hold the foot holds in till epoxy dries then pull the screws out and put a couple layers of glass around the edge. 10oz.

In the pole use 1/4"-20 Button head screws with nylocks on the inside of the pole with epoxy. McMaster Carr has all of that. Rivets Blow.

Mark44
 
Last edited:
Rivets

Aluminum rivets will rust. You can use them on the footwells because they are being glassed over. As for the pole I just shorten mine and used S.S rivets, with the help of oxnard111 because the S.S rivets are tough. I got rivet gun and all rivets at Home Depot.
 

yamanube

This Is The Way
Staff member
Location
Mandalor
Has anybody used the SS rivets? It seems most use nuts and bolts but that seems like a headache getting the nuts to stay in the pole and to thread straight in on every one! Ooops sorry blue, forgot you used them....work good?
 

demolition_x

Not After Fame & Fortune
im going to go with the nuts and bolts. no matter what rivets will work their way loose over time. just spend the money you would use on buying the gun and the rivets and buy the ss hardware.

trust me its the best way.
 

oxnard111

Creative RE Purchasing
Here are pics of the final product. Like I said previously the right side was the first to go down and it didn't turn out as good as the left. I also got the front dash cover a little off center so I filled end the gap with a little sliver of HT. Let me know what you think.
 

Attachments

  • SA700655.JPG
    SA700655.JPG
    328.4 KB · Views: 17
  • SA700657.JPG
    SA700657.JPG
    326.7 KB · Views: 26
  • SA700658.JPG
    SA700658.JPG
    328.1 KB · Views: 22
  • SA700659.JPG
    SA700659.JPG
    301.4 KB · Views: 39
  • SA700661.JPG
    SA700661.JPG
    294.6 KB · Views: 28
Top Bottom