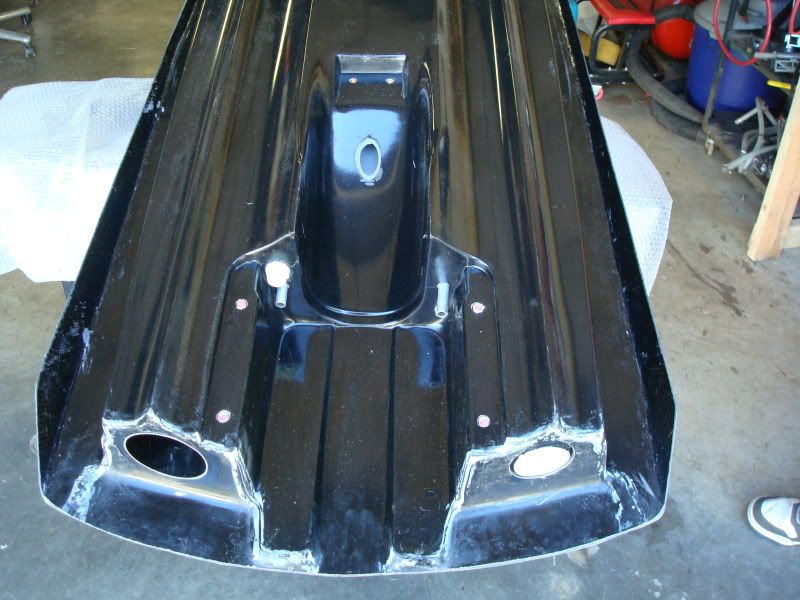
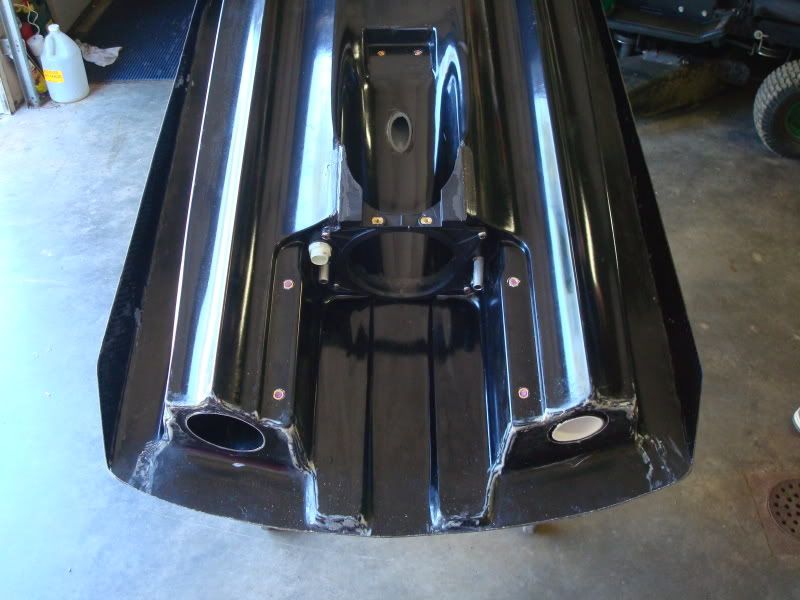
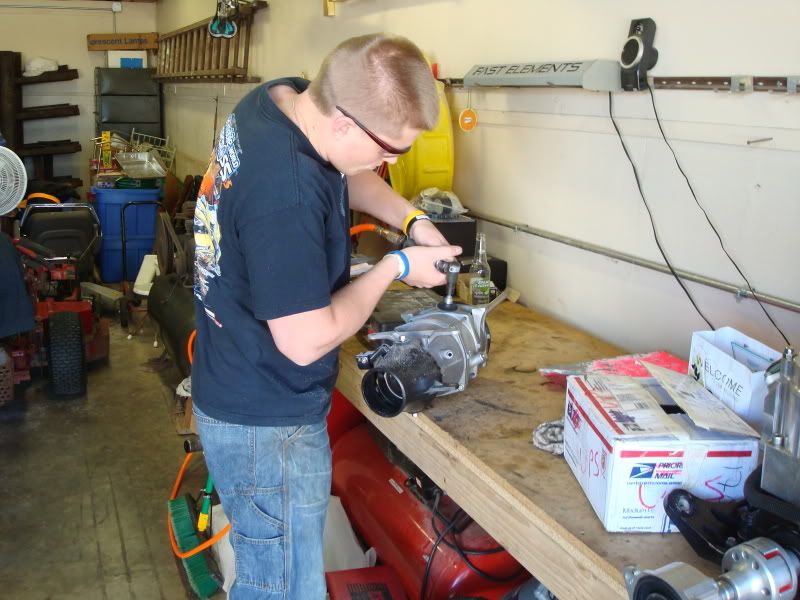
Custom/Hybrid Erok's Fast Elements Superfreak Build

nice what that cost e rok

A pretty penny, Tem will have a cheaper glass version available in the near future hopefully. I feel with these skis you actually get your moneys worth when you spend the extra $ for the carbon version.

sweet!
will you git er done by wavedaze?

Hopefully, I made quite a bit of progress last night. Hopefully will start sanding it tomorrow night then paint it this weekend.

Damn you Eric.

You know you'll get to take it for a spin or flip!

Sweet New Hull Man!! I like the over the head pics... check it out.... Hahahaha


View attachment 160744

That is awesome! I already miss that hull....
 
You have to turf the rails, what else would you do with them?

Carl's Freak with painted rails looks pretty sweet. But I know I bang the rails on mine frequently enough that the paint would get messed up pretty quickly. In fact, I initially left the nose unturfed (painted).
It lasted for a month before I had to cover up scratches/gouges with turf.
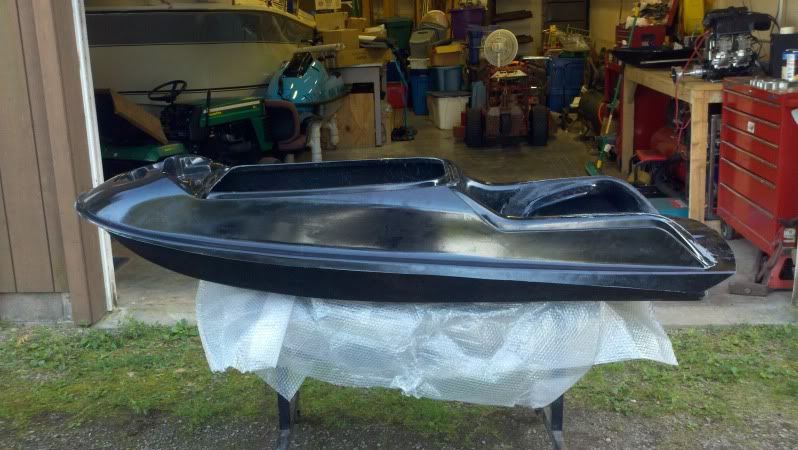
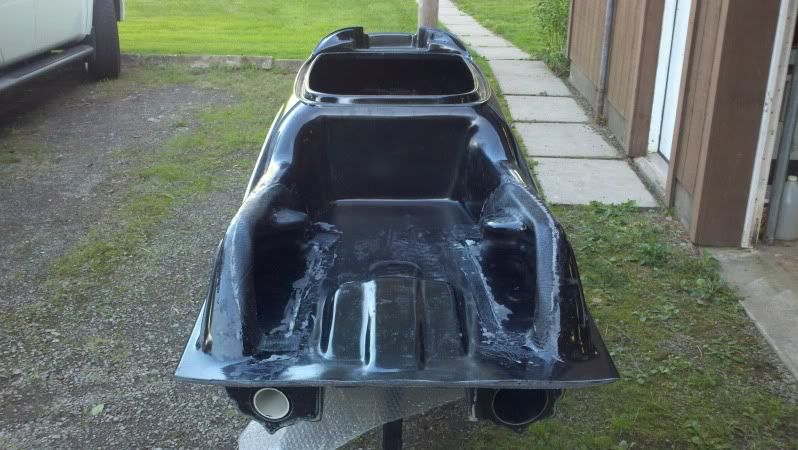
Just paint them pink, I like the look of the ski with no turf on the rails. My only thought is exactly what Matt has me worried about, chipping them like crazy. I know I will be rather careful with the hull but I'm sure it won't be long until it has some sort of cosmetic damage. For now I'm leaning towards just leaving them pink, can always go back and turf them later.
 
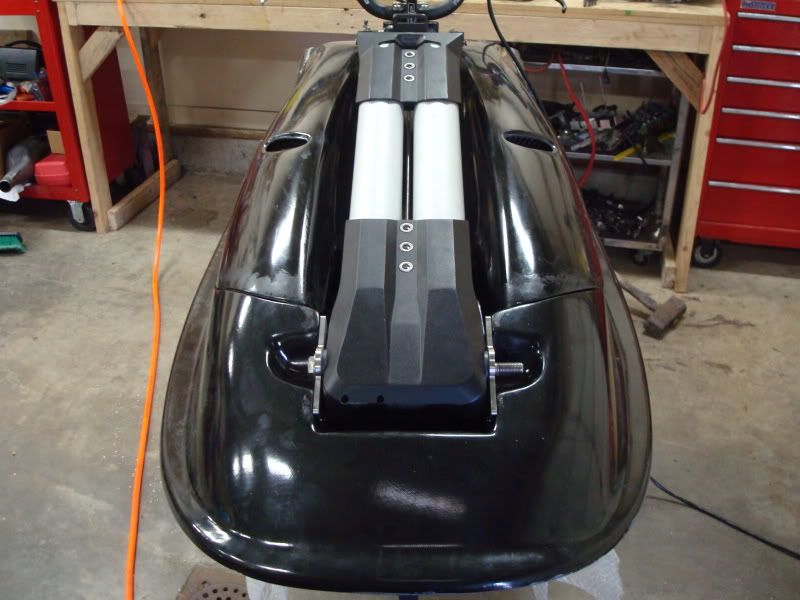
Left work early yesterday and got right to work. The more I look at this hull the more excited I am to ride it. I can not get over the size of the tray! For me it was either the XFR or this, so far I am very pleased with my decision.

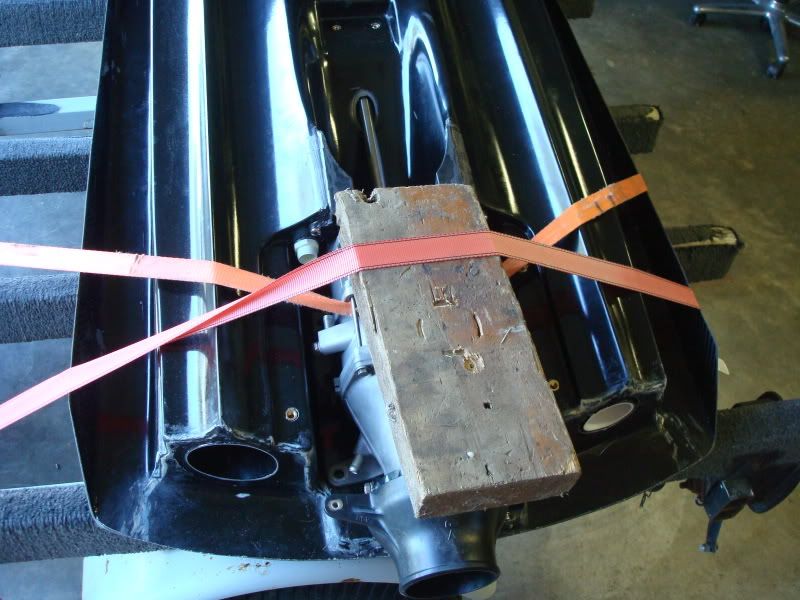
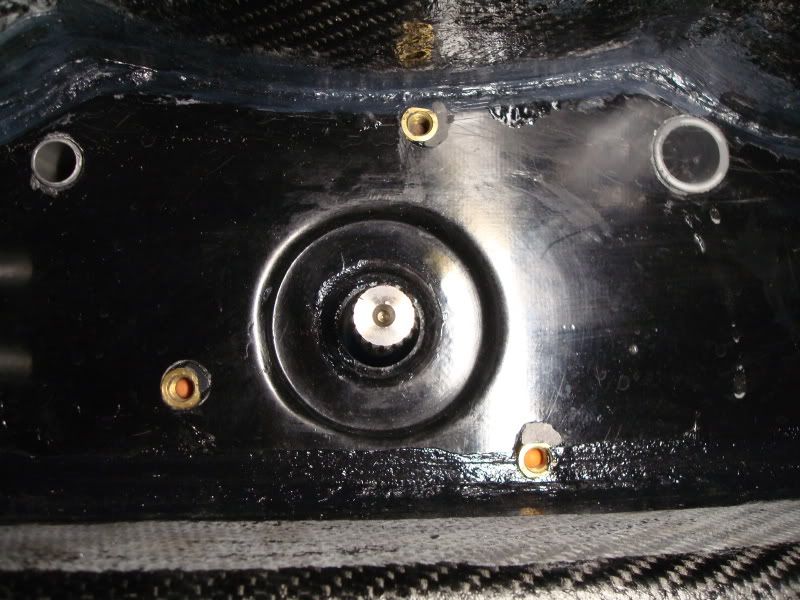
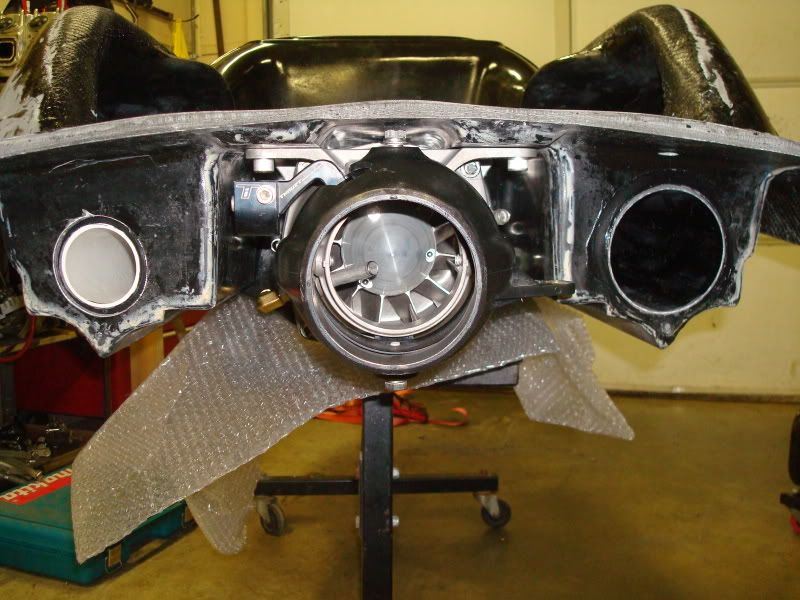
First thing I tackled was installing the oem plastic pump shoe. This was rather straight forward especially compared to installing other ones in the past. After that was strapping the pump down and into the hull. Grabbed a couple ratchet straps and strapped it to a little trailer I have. Worked well and was able to drill the holes for the pump inserts rather easily. Driveshaft and midshaft are almost perfect, might have to drill out the pump bolt holes a little to get it absolutely perfect. For those guys with Freaks, how much are you grinding the pump seal down? We went too far on the first one, right through the metal ring.

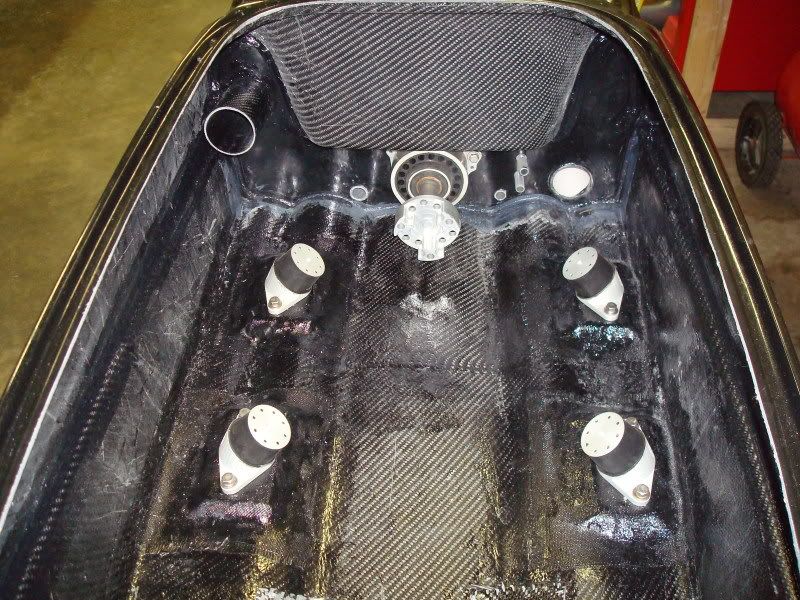
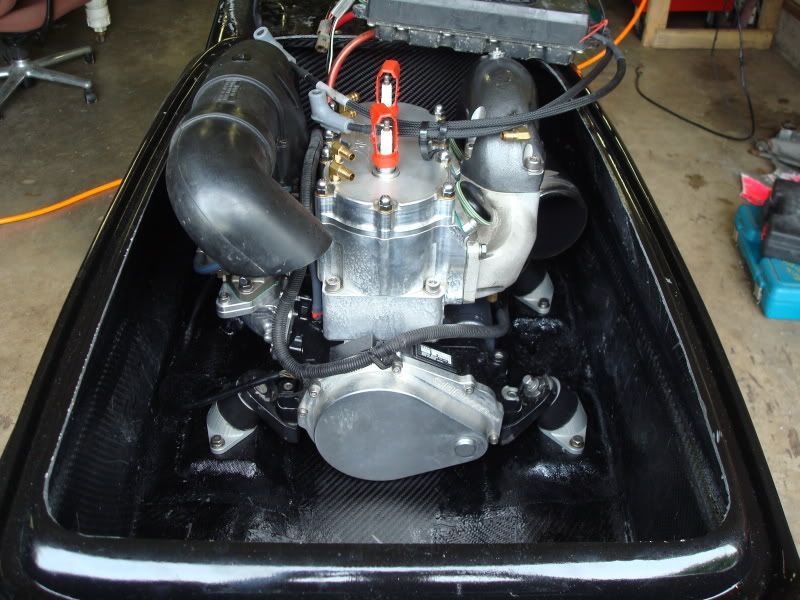
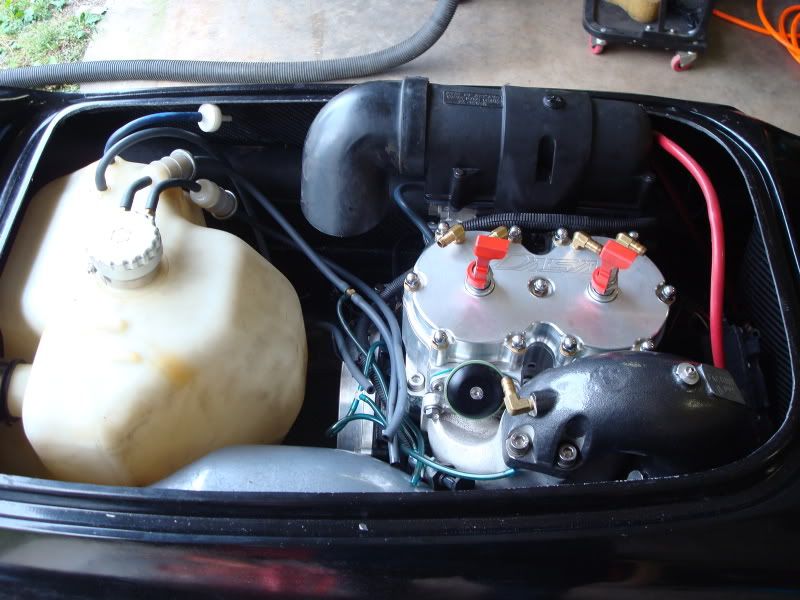
After the pump was installed I flipped it over and got cranking on the top of it. I first wanted to tackle my handlepole issue. I am running an RRP cast pole but want to run a single thru bolt for simplicity and I just like single bolts. I had to grind down the pole bushings a bit but eventually got it to fit with the supplied brackets. Dropped the pole in place drilled the holes and bolted it all up. What does everyone do for a pole stop??? I am thinking nothing just using the limiting rope. From there I started installing every inside the hull. Grabbed some shorter motor mount bolts, knew about this already. After that everything was rather straight forward. I mocked it up with a b pipe for now, will be running this until the powerfactor comes in which I don't think will be for a while. I would actually prefer this just so I can feel the difference from my motor setup in a new hull. Well enough jibberish, I'll let the pictures do some talking. If anyone has any questions just let me know.

2011-09-16_18-03-04_516.jpg

2011-09-16_18-03-18_758.jpg

DSC00262.jpg

DSC00264.jpg

DSC00265.jpg

DSC00267.jpg

DSC00269.jpg

DSC00274.jpg

DSC00272.jpg

DSC00276.jpg

DSC00280.jpg

DSC00281.jpg
 

Matt_E

steals hub caps from cars
Site Supporter
Location
at peace
I ground about 1/3 through the metal ring on the pump seal. You might need to grind on the pump itself for a bit, too.
Why did you want to install the pump inserts yourself?
Looking good so far. I want either a single pole bolt with spring or a Cold Fusion spring setup.

Edit: Don't forget to put nose foam in!!!!
 
Last edited:
I ground about 1/3 through the metal ring on the pump seal. You might need to grind on the pump itself for a bit, too.
Why did you want to install the pump inserts yourself?
Looking good so far. I want either a single pole bolt with spring or a Cold Fusion spring setup.

Edit: Don't forget to put nose foam in!!!!

Ya I had to grind the pump but obviously went through too much on the seal, we'll try again.

I did the pump inserts myself just to try and make everything perfect with no grinding of the pump. This was Tem's idea and I was absolutely fine with it, so far so good.

What did you use for nose foam, a stock roundnose foam and hacked up?
 

Matt_E

steals hub caps from cars
Site Supporter
Location
at peace
I had given my stocker away, so I used one of those sheets of pink extruded polystyrene you buy at Home Depot - the stuff people use to refoam their ski with.
I cut it into slices, glued them together with EPS glue, and then shaped it to fit.
 
Looking good Eric ! Can't wait to see you ride the ski and get a ride report .

Thanks, I am trying my best to have it on the water some time next week.

I had given my stocker away, so I used one of those sheets of pink extruded polystyrene you buy at Home Depot - the stuff people use to refoam their ski with.
I cut it into slices, glued them together with EPS glue, and then shaped it to fit.

This is exactly what I was thinking, I will make sure to do that before everything goes back in. Thank you for giving me the heads up.

Thru bolt with spring works good on mine.

View attachment 160837

I was talking about your exact setup with a buddy of mine. I feel if you run a thru bolt and tighten the pole down as I like to you will be putting quite a bit of pressure on the two brackets. I will not be running a spring but I am definitely going to run the pole spacer for the RRP pole, that way when tightening you are bottoming out against something. In your case it might not matter because you have a billet pole. This was my dilemma whether or not to run a single or two bolts.
 

Sanoman

AbouttoKrash
Location
NE Tenn
The wide trays are the bomb! l love mine on the Rok hull.Hard to go back to a sj tray! Can you take a pic of the tray to see the pump insert install from the top? thanks
 
I can't remember now if I use SN or RN nose foam. I think it was RN. I just hacked the top of it off with a saw and it seemed to fit pretty decent.

I am using a limiting rope, but I with my X metal pole a little piece of turf glued to the hull seems to work as somewhat of a pole stop. I prefer to rely on the limiting rope though.
 
The wide trays are the bomb! l love mine on the Rok hull.Hard to go back to a sj tray! Can you take a pic of the tray to see the pump insert install from the top? thanks

Out of all the pictures I took I don't have one showing the top of the tray. I will snap a picture or two for you this evening.

I can't remember now if I use SN or RN nose foam. I think it was RN. I just hacked the top of it off with a saw and it seemed to fit pretty decent.

I am using a limiting rope, but I with my X metal pole a little piece of turf glued to the hull seems to work as somewhat of a pole stop. I prefer to rely on the limiting rope though.

I'll check the square hull when I get home to see if it still has the foam in it, good idea. I plan on building one heck of a limiting rope just to insure the pole doesn't cause any damage what so ever.
 
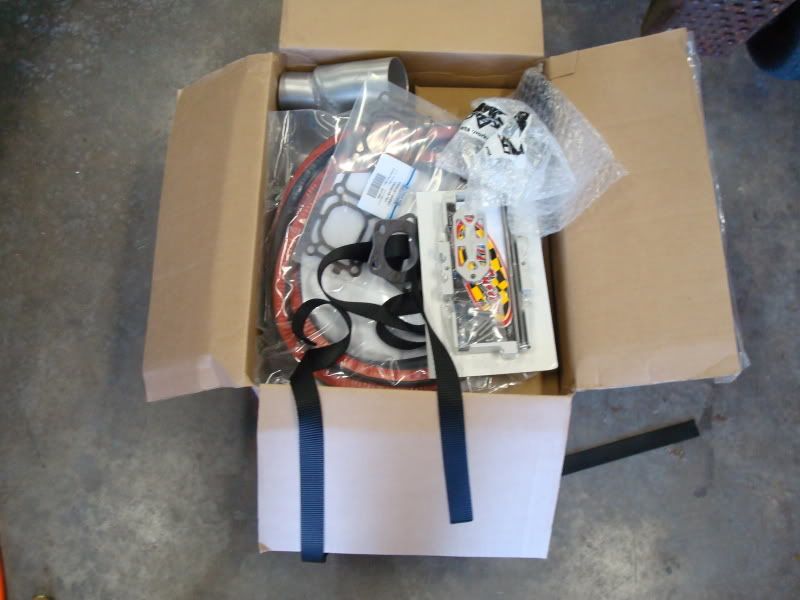
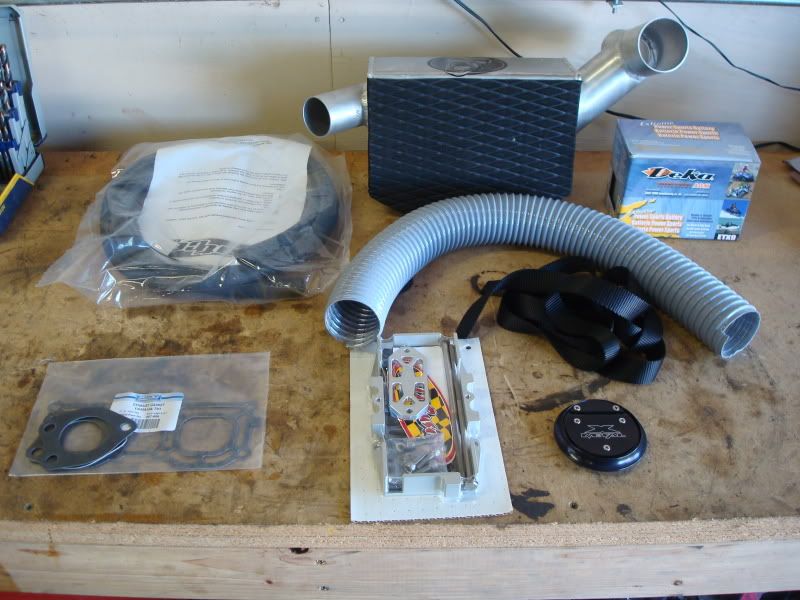
Came home yesterday to a box full of stuff from Fast Elements. Can't say thank you enough to Steve @ FE for all the help he has given me so far on this build. Everything I asked for he had in stock and even gave me some choices on a few parts. Decided to go with the Xmetal scupper and waterbox. I can't believe how well the waterbox fits in there, shame it will only be in there for a month or so.

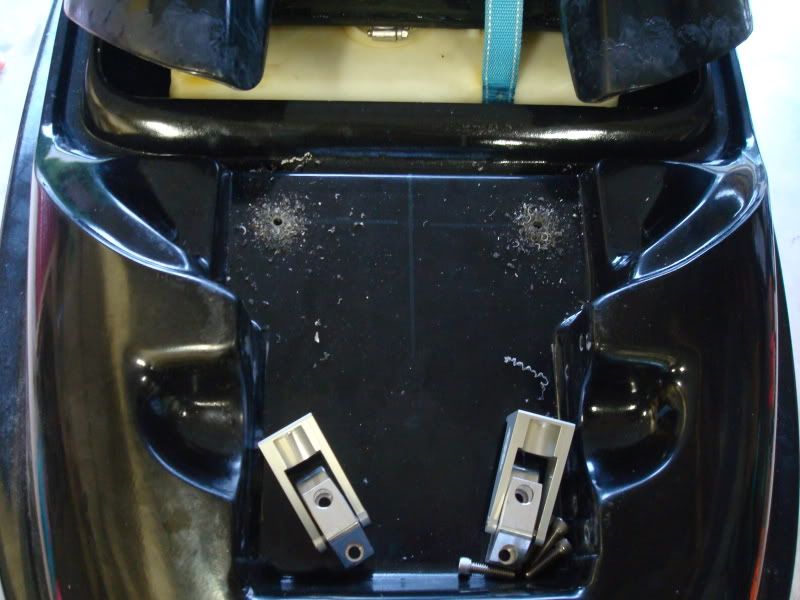
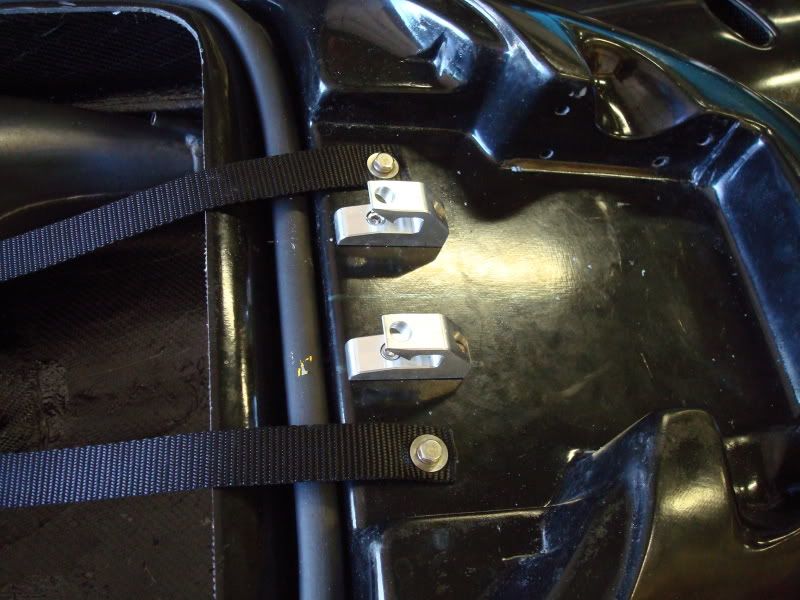
I was able to work on it for a little while before dinner last night. I installed the hood hooks, hull and hood side. This was not too difficult just took my time to make sure I only had to drill once. Also put the hood straps on and the stainless ratchet. After that I started taking things back apart. Before it was completely gutted I started brainstorming where to put my Deka etx9. I came to the conclusion that it is going under the exhaust tube, only issue is where exactly to position it and how to hold it down. While at work today I will see what we have in aluminum and hopefully get a box welded up for it.

DSC002871.jpg

DSC002881.jpg

DSC00285.jpg

DSC002891.jpg
 
Top Bottom