FX1/144mm Bottom Replacement

Flash-FX

No Square..No Round..FX-1
Thanks for the props guys...a few answers. NO, I do not do this for a living. When you want to ride something you cannot buy,you must build it yourself. About working with this stuff...well it's all chemicals that can/will be hazardous to you. When you work with these materials be sure to follow ALL the safety suggestions! This stuff will kill you.

About 2 years ago myself and a riding buddy "straight pipe Mike", tried to buy 2 of these FX1's made from carbon for about 5k each. The guy that supposedly had a mold and tooling to make them NEVER returned the follow up calls. What was I going to do...Talk about it forever? How about NO. Now here I am. And I do now have a RUNNING BOAT! It was a lot of work,Ask any builder. That's why those good aftermarket hulls cost so much. You get what you pay for.
 

Flash-FX

No Square..No Round..FX-1
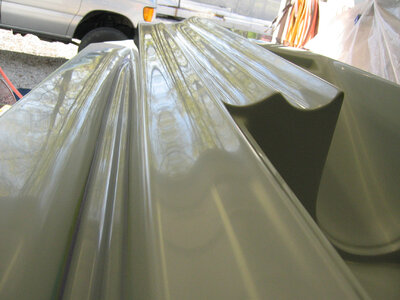
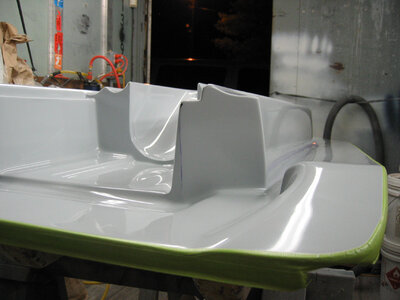
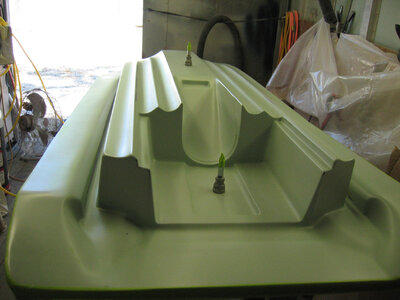
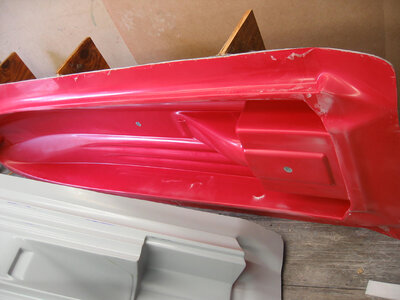
Time to get the hull finished. The hull tooling was the same as the ride plate. Except that the original designers threw in a little snag. Rule #1, When you make a mold of something, be sure to provide a "positive draft" on all your parts. (The finished part needs to come out somehow). The Kawasaki 440/550 has glue on "extensions" in the rear of the boat. Since the FX1 is basically a big 550, Yamaha did away with these "add ons" and incorporated them into the hull. I really didn't want to make this a 2 piece mold. This could be a problem.

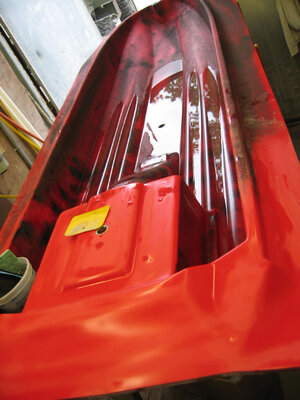
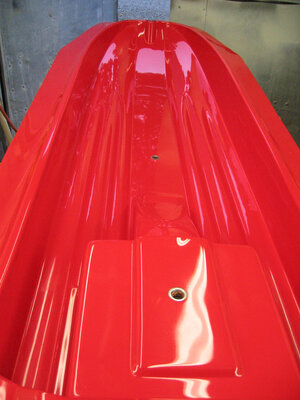
So I made the tail of the plug so it would allow the mold to "pivot off" without getting trapped or locked on. Also I added 3 ports for using water or compressed air to get the pieces seperated. :sneaky: The middle hole works great as a drain while WET SANDING....

Rule #2 The smoother the finish the easier the parts come apart.
 

Attachments

  • IMG_1520.JPG
    IMG_1520.JPG
    616.6 KB · Views: 405
  • IMG_1521.JPG
    IMG_1521.JPG
    623.9 KB · Views: 415
  • IMG_1606.JPG
    IMG_1606.JPG
    825.9 KB · Views: 599

Flash-FX

No Square..No Round..FX-1
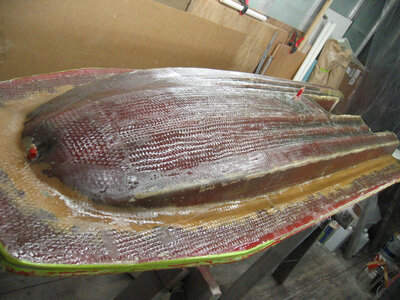
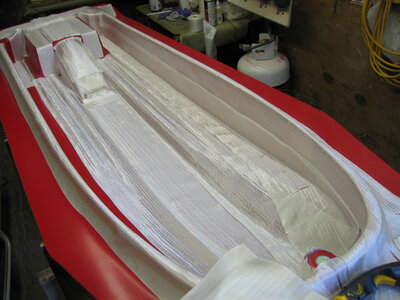
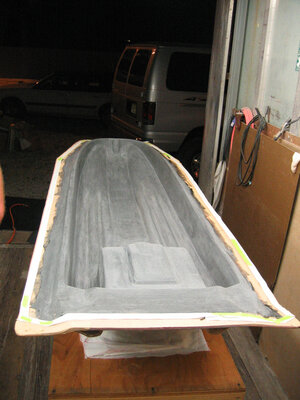
After the many layers are built up (this took about a week to prevent shrinkage in the polyester tooling coats) I built a cheezy framework to cradle this thing, so when it came time to SAND and POLISH it wasn't rolling all over the place.

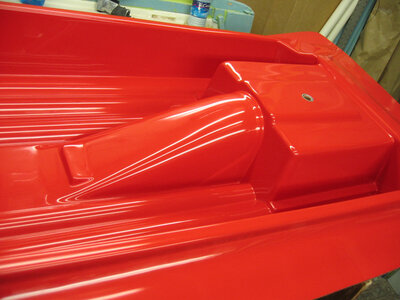
Now the moment of truth...was it going to come apart easy?? Amazingly enough with minor coaxing it popped right off! :woot: :woot: :woot: Things were looking good. The plug was in perfect condition. The mold had a minor texture left from the release materials that would be WET SANDED and POLISHED out...

The materials can be found at most boat/fiberglass supply companys. The problem with getting the Divinylcell foam is that the sheets are pretty large 4' x 8' and to ship it must be cut down for UPS. I'm lucky that there is a major supplier about 5 miles from me.
 

Attachments

  • IMG_1642.JPG
    IMG_1642.JPG
    459 KB · Views: 413
  • IMG_1650.JPG
    IMG_1650.JPG
    460.2 KB · Views: 510
Last edited:

Dirtybird

Ex*ta*ski
Location
St. Clair, MI
man, this is crazy everything is so smooth and just awesome. At first I was like wtf why would you buy that rat trap............................< This is me eating my words :haha: Awesome job!
 

Flash-FX

No Square..No Round..FX-1
Ready?...More fun with WET SANDING!! :scared: After your mold pops off without a hitch and things are going sweet..It's time for more SANDING! WOW!! :cheer: Start with 220 then 400 then 600 and if it really needs it, finish up with 800 or 1000. :banghead: :banghead: :banghead: I know, really boring stuff. One of my buddy's turned me on to this "guide coat in a can". Just spray it on then sand it off. It fills in the scratch marks and while you sand it off, you sand away the imperfections. Use it between grit grade changes. Another no-brainer job... After that step, move on to polishing and waxing. Just like on a car. Make it shine.

Ok..Time to lay up a "splash layer". Just a couple layers of some cheap cloth and resin to make sure the finished lay-up will be cool, and to condition the mold. I used 2 layers of 6" wide 6oz. cloth for this step. Why?..I don't know, but it's recommended.
 

Attachments

  • IMG_1983.JPG
    IMG_1983.JPG
    491.4 KB · Views: 389
  • IMG_1692.JPG
    IMG_1692.JPG
    574 KB · Views: 334
  • IMG_1716.JPG
    IMG_1716.JPG
    663.3 KB · Views: 435
  • IMG_1724.JPG
    IMG_1724.JPG
    919.8 KB · Views: 370

Flash-FX

No Square..No Round..FX-1
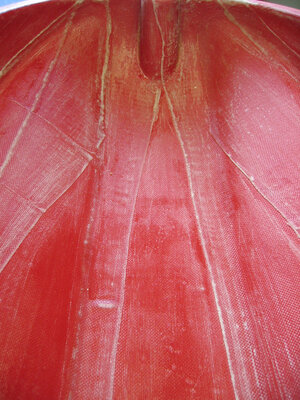
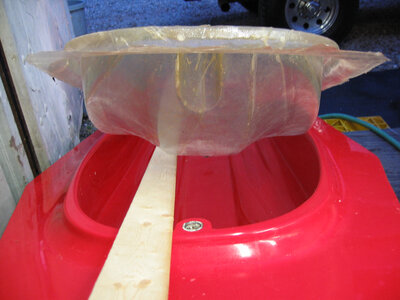
Who wants to buy the worlds first and only DOUBLE BACKFLIP 9 Lb. transparent FX-1 hull??


:joke: That sounded good.
 

Attachments

  • IMG_1733.JPG
    IMG_1733.JPG
    561.8 KB · Views: 656

Flash-FX

No Square..No Round..FX-1
Thanks Bob. I'm wondering why no one has ever posted a project like this before. I can't be the only one. Is this stuff all :sneaky: "top secret"?? :sneaky:
 

Flash-FX

No Square..No Round..FX-1
Enough of that...Now ready to prep for the real thing. I hope I'm not making this thread sound like some sort of classroom jive. Clean up the mold real good, then wax on wax off..... There are details I'm skipping here, but you get the idea. (Lots of prep is key). :hail:

Since the finished hull is going to be epoxy, you need to lay down some sort of "gel coat". This is just (in this case) regular West Systems 105 resin/slow hardener mixed with Cabosil and Graphite powder. It gives the final finish a dark charcoal color.(but you can make it almost any color, I chose black ) Simple, mix up this stuff real well and just brush it on, evenly. After it cures, (like a day later) wash the surface with lots of fresh water using a red Scotch Brite pad. Dry off the water then use 80 grit to scuff the surface. The cloth layers need to stick to this real well.
 

Attachments

  • IMG_1984.JPG
    IMG_1984.JPG
    634.9 KB · Views: 261
  • IMG_2058.JPG
    IMG_2058.JPG
    645.1 KB · Views: 428

Flash-FX

No Square..No Round..FX-1
I never had Home Ec in high school (where they teach you how to sew and bake a cake or something) but here's where I needed some of those "skills". Pattern making...Hmmm. To make the hull a nice uniform thickness (where it needed to be)without BIG lumps and ridges, I needed to make a template to lay on the fiberglass for cutting. So I headed over to the local fabric store. :smile: Another adventure. I was looking for something that wouldn't shift too much but would fold like 12 oz fiberglass. Just to cut up for a pattern. This older sales woman really helped out by showing me some stuff a seamstress would use in shirt collars. Its a non woven polyspun material that looks like a 2 oz weed barrier fabric. But softer. This "simple" job ended taking 2 days to finish.
 

Flash-FX

No Square..No Round..FX-1
Ok..Now for "tip of the day". Buy them. Cheesy looking electric sissors with carbide cutting inserts. Super lightweight, cuts almost any thickness of glass or carbon with ease. Cut a real straight line FAST....

Even with these It took HOURS to cut the fabric layers for the bottom.
 

Attachments

  • elecSissor1715.JPG
    elecSissor1715.JPG
    607.4 KB · Views: 463
Top Bottom