Gabe & Steff's Krash Predator Build

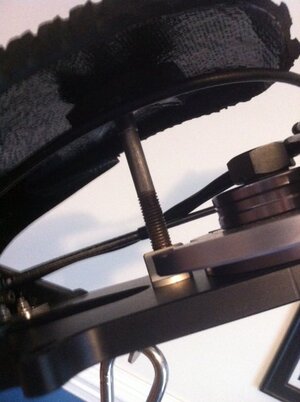
Spring is designed for OEM handlepole on an OEM bracket, so they must be modified when using non OEM parts.

Assembling a pole with a HD spring is tricky on any hull, the Predator and old Footrocket make it worse since you can't do it with the pole bracket attached to the ski. after you do it 4-5 times you figure it out and its not soooo bad, the new 50 cal hood design allows the bracket to stay on the hull and install/remove pivot bolt.

Nice looking ski!!!
 
Location
NC
Thanks! Fab'ed up e box mount with some spare .125 aluminum. Put some 3/8" thick 1.5" wide nylon spacers behind the plate to stand it off the bulkhead. Would've loved to put some lightening holes in it and pretty it up more but my deadline looms. I'll do that next winter along with other mods. Time to move on to wiring the bilge...
photo100.JPG
 
Location
NC
Wired up my e box for bilge. Still debating whether I want to go with this setup or not...just didn't want a switch on the dash.
e box.JPG
 

Attachments

  • Screen Shot 2016-03-15 at 11.19.32 PM.png
    Screen Shot 2016-03-15 at 11.19.32 PM.png
    50.6 KB · Views: 54
Location
NC
Didn't like my first attempt at the bilge wiring. Redid last night running it to a rotary switch I stole from an SXR.
photo 1.JPG
Engine in hopefully for good until fall *knock on wood*.
photo 2.JPG
Bilge switch and primer bulb installed in dash. Only holes left to drill should be the hood straps...
photo 3.JPG
 
Location
NC
Thank you. It's getting closer!
Pipe hooked up last night (again).
image.jpg
Last holes drilled in the hull: hood straps installed.
image.jpg
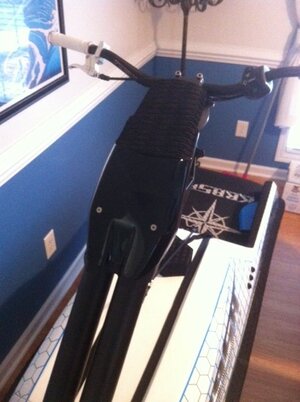
KP pole together. Blowsion steering with $35 rockymountain atv 1 1/8 inch bars. They're called "Chub" lol. Going to cut about an inch off each side.
image.jpg
 
Location
NC
G-flex and zip tie holders (with peel-n-stick removed).
photo 1.JPG
Hood pad on at a jaunty angle to clear the hood straps.
photo 2.JPG
e box in!
photo 4.JPG
Limited Slip tank strap bracket cut and bent.
photo 1.JPG
All done! Almost...need spiral wrap for plug wires and water lines.
photo 2.JPG
...and the other way.
photo 3.JPG
 
Location
England
Build is looking good dude. Just one thing i see is those hood straps, i've seen loads fail and hoods come off....I'd run a ratchet type instead. Last thing you want is your hood coming off from a said landing :eek:
 
Location
NC
White ODI Ruffians. Always seems like a great idea until you take them out of the package and they instantly get dingy. If someone has a foolproof grip cleaning method, hook a brother up!
photo 2.JPG
My @CrazyJoesRacing chin pad is (may I borrow a phrase from the 80's) TOTALLY AWESOME!
photo 3.JPG
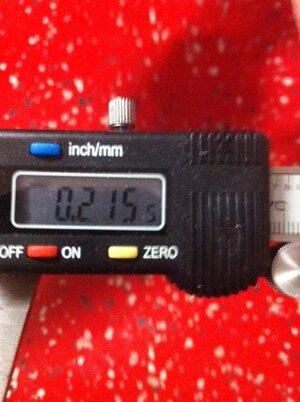
Clearanced stop/start housing with my Dremel so I could move it down the bars. Outboard hole is 0.90 inches and inboard is 1.05 inches. Cut about 3 inches total off the bar width so I'm down to a respectable 29 inches wide. Test ride will reveal if the width is acceptable. Still have room for a future trim lever...
photo 1.JPG
Needed a place to hook the bungee on my limiting rope so I made a bracket at the bottom of the pole.
photo 2.JPG
$40 RRP steering stop? Not budgeted for this build! Improvised to get this "Ninja"-style chine pad where I needed it.
photo 3.JPG
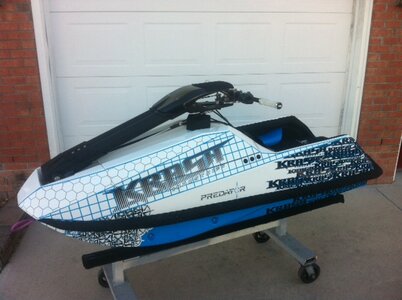
Done-ski! Ready for test ride but of course it's raining today!
photo 1.JPG
 
Location
NC
As we're loading up for WaveDaze this week, I wanted to thank everyone that provided advice on this build. It definitely helped us meet our deadline.
Also, we wanted to give a shout out to all the vendors that supplied us some top-notch parts. Thanks to:
Krash for hooking us up with Joe Grace at Wildwood SeaDoo for the hull, hood latch, hood seal & Chris Grace @chrisgrace for the warranty support on the ride plate!
Fast Elements for the H2O waterbox & Cold Fusion motor mounts!
Nathan @LimitedSlip7 for the #amazingPRECISIONwelds fuel tank!
Thrust Innovations @THRUST for the RRP water fittings, bars, breather tubes, spring tensioner, Blowsion hd spring, & limiting rope with #bee'sknees customer service!
Cold Fusion for their #doubleB (beautiful billet) hood hooks!
Brent @Knoxie for his #fierce handlepole!
@CrazyJoesRacing for their #sexy chin pad!
& late addition @ShowtimeStocks face saver pad to save what's left of my face!
Thanks everyone see you at WD!
photo-32.JPG
 
Last edited:
Location
NC
I had to fab up my own mounts and for it to fit, I had to mount it forward so that the bar mount is past the pad. But it looks really nice and the quality is great!
 
Sweet build man. Maybe pm me what you did exactly?

I have kp pole and I really like crazyjoes chin pad. I don't mind some fabbin'. Just not setup to weld aluminum, maybe SS tho.

Thanks again
 
Location
NC
Report from first ride in the surf. Location: Wavedaze Virginia Beach, VA
Disclaimer: I wimped out. I can ride at home so I didn't risk hypothermia on Sat and Sun! I did ride a whole gas tank (~5 gallons) on Friday when the air temp was at least in the 50s. Supposedly the water temp was 51 degrees. I wouldn't argue with that.

Overall: awesome!
Pros: Really stable and buoyant. Airs out super stable. The 701 came alive compared to when it was in a RN SJ. The tray is roomy just like an SXR. Nice kick tail at the back of the tail. Just like on my flat water test ride, no spray in the face thanks to the chine on the nose rocker. Love the KP pole in 36" length pivot to pivot with Blowsion fat bar steering and stock width RRP 4 degree fat bars.

Cons: The footholds are weird. I talked to a bunch of folks at the freeride and got some mod ideas. I see extra padding, turf, and maybe a Dakine footstep in my future.
The ride plate is a weak point. For as tough and smooth as the hull is, the plate looks like it was an afterthought. First, a chunk cracked off just sliding it from a carpeted stand to carpeted trailer bunk. Second the fitment is so bad, it's hard to believe it comes from the same factory. The middle of the plate it 0.3 inches below the back of the WORX intake grate. The gaps between the hull and plate are ~ 0.3 inches around as well. I get much closer fitment with WORX/R&D and Kawasaki hulls. This is Krash/Krash so it should be as good or better I would hope. Finally, when I got home, 2 of the 4 center ride plate bolts were loose and 1 was gone. The two, outer side bolts were still tight. My guess is that the gap around the pump area caused the pressure to loosen the bolts. Pics are below.

Build self-reporting gripes: My Tusk LTR 450 Li battery didn't let me down, but it had me worried. The 150 CA isn't enough to make me comfortable, so I'll be shopping for another battery and leave this one in my (single-cylinder, 4 stroke) quad full-time.
I had a mystery over-night fuel leak where approximately .5 gal escaped from my tank into the engine compartment. I suspected my slick motocross one-way I had on the tank as the culprit. I discovered that after I got home and could follow the hissing sound to my primer fuel tee from my return line to primer bulb. I am going to replace my plastic tee with a brass one and clamp with Oietker clamps and ditch the zip ties. Never been a problem before. Weird.
photo 1.JPG photo 2.JPG photo 3.JPG photo 4.JPG photo 1.JPG photo 3.JPG photo 1.JPG photo 2.JPG photo 3.JPG
 

Attachments

  • photo 5.JPG
    photo 5.JPG
    61.2 KB · Views: 33
I agree with you on the rideplate fitment and hardware choice. When I build a Krash ski I take a dremel and open the hole up as necessary to get fitment to my liking, I then use a countersink bit and drill a countersink centered over bolt hole. I use tapered allen head fasteners and have had little issue. When done this way the heads don't protrude out past rideplate.
 
6e21cb2f89d9e62059f254d78a553473.jpg


Last one I did
 
Location
NC
Nice, I'll have to give that a go. It's too bad it has to be done though.
 
Top Bottom