ksarge's superjet build

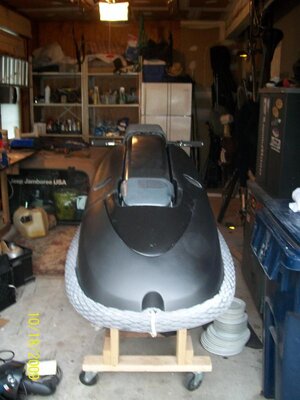
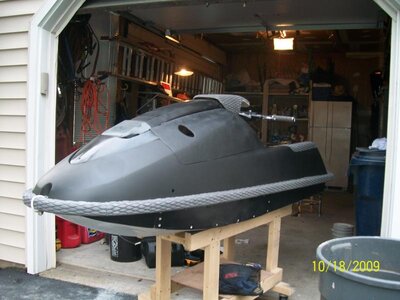
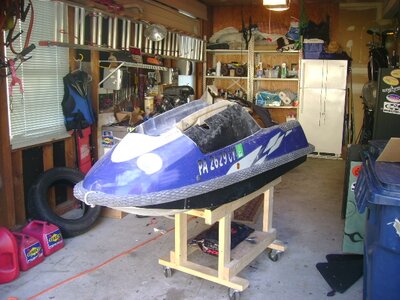
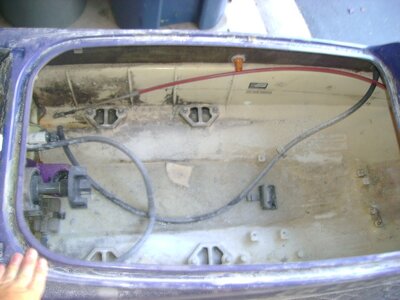
Time to bring this ski back to life.

Most of these mods are already done but the finished product will be:

Hull:
Lowered stock hood w/ new liner and nosepiece
Fresh paint and some graphics
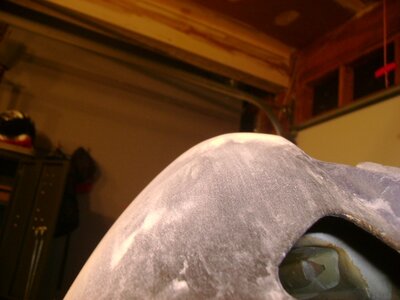
Polystyrene foam w/ re-inforced rear, drain plugs
fresh turf
-5 stock pole, completely reinforced and wrapped
4* bars w/ ODI grips.
D-cut stock plate
Reinforced sides, nose, and bracket area
WDK lowered bracket
Internal fuel filler (2-lick style)
Carter keepers
ratchet straps
24/7 hood hooks
X-metal hood catch
24/7 footholds
Caker Front foothold
Blowsion 2001 side sponsons
8 lb battery

Pump:
C.A.T.S trim system
Solas concord 13/17
Bored nozzle (85mm)
Worx grate 201

Engine:
milled head
Protec A body exhaust w/ FCV
stock 38's
Jet Works FCV
Girdled head soon

Stay tuned!!!
 

Attachments

  • 2sj2010.JPG
    2sj2010.JPG
    259.2 KB · Views: 436
  • 3sj2010.JPG
    3sj2010.JPG
    212.3 KB · Views: 308
  • 1sj2001.JPG
    1sj2001.JPG
    237.4 KB · Views: 456
Last edited:
glassed the bottom of the hood. I'm doing acouple layers on the bottom, one pre-cut on the top, then some filler to smooth it all out. Hopefully it won't weight as much as my last hood at 19, I'm shooting for 17
 

Attachments

  • 4sj2010.JPG
    4sj2010.JPG
    216 KB · Views: 526
  • 5sj2010.JPG
    5sj2010.JPG
    204.6 KB · Views: 475
Last edited:
I cut two strips of cardboard long enough to go the legth of the hole. Next I covered the cardboard with duct tape because the epoxy won't stick to it. Then I taped the cardboard down securley from the top and layed the glass. I just pulled the tape and cardboard off and it came out really nice. Have filler on it curing right now then it's sanding time.

To make the cuts I put the nosepiece on and masked the hood off to match it. The rear corners are where you have to do some thinking or else it will come out looking way to flat. I am going for a little bit of a corner kind of like a blowsion jk hood but still want it to look like it's supposed to be that way. Next, mask the lines on the inside and make the cuts. I used a jig saw. Then I went to town with a file to get them perfect, not that it really makes any difference.

Since I had pre-existing holds I just glassed over half of them and will cut it to match. Hopefully, it will come out pretty good.


seems easy enough, just need creativity i guess. and some fiberglass skills. I think ill have to give this a try once i get a roundie.
 
It's really not that diffficult. The hardest part is keeping the weight down but still making it strong.

Pics.... Still need to do alot more sanding to get it looking good.
 

Attachments

  • 11sj2010.JPG
    11sj2010.JPG
    218 KB · Views: 520
  • 10sj2010.JPG
    10sj2010.JPG
    199.7 KB · Views: 294
  • 9sj2010.JPG
    9sj2010.JPG
    202.3 KB · Views: 281
  • 8sj2010.JPG
    8sj2010.JPG
    228 KB · Views: 301
How are you doing the liner?

Making a flat piece of cardboard with a rectangle cut out in the middlefor the extinguisher holder. Then use duct tape all around the edges and make it almost like a ramp. Then cover the middle in duct tape so the epoxy doesn't stick. Pop it out of the mold and remove the tape and cardboard. Glue it back in with 5200. Using pool hose for the baffles. I raise the baffles up an inch as well so any water that gets in between the liner and the hood just sloshes against the baffles and runs right back out the rear intake holes as oppoes to getting dumped directly into the engine compartment like the stock design. I made one before and it turned out pretty good. Hopefully this one will be better though. Should be starting that next week. Stay tuned.
 
Last edited:
Might try and make some cuts tonight to the part where the pole rests to try and make it sit lower. Also gonna cut out the extinguisher holder cavity and re-glass that flat. Not sure if anyone's done that before so we'll see how it turns out.....
 
Last edited:
Cardboard stencil, then just cut. Right now they're just holes.

On my last hood made a 2x3" box covered it in duct tape and glassed over it. Once it cured I popped the glass away from the box and glassed it to the inside of the hood. I'll be doing the same for this hood

Today I sanded some more, then sprayed some epoxy based paint to fill in the air bubbles from the filler. Tomorrow I'll sand some more, have a little filler work to do, then I'll start painting the hull.
 

Attachments

  • 13sj2010.JPG
    13sj2010.JPG
    250.3 KB · Views: 349
  • 14sj2010.JPG
    14sj2010.JPG
    240.2 KB · Views: 327
  • 15sj2010.JPG
    15sj2010.JPG
    228.7 KB · Views: 265
Last edited:

jerzey

Squares For Life
Location
South Carolina
Dang Kev, someone's been hard at work!! Lookin good man can't wait to see the end result. Still haven't put my skis away i rode today. Maybe one more..lol! Once i finish my basement project on the house i'll start tearin into my other square hull. Hopefully in a few months. Definately gettin footholds , shorter pole, and some more brap over the winter. May have to come see you for a lesson in turfing..can't be that hard.
 
Painted the hull today. Flat black like a true gangster. Total cost was $2. I didn't even invest in the good stuff, haha. Nosepiece and pole are gloss black right now but need a fresh coat, not sure if they're staying gloss black or maybe something else. I'm considering white. Or maybe silver. Or maybe brown, ehh?

Hood still needs alot of work but it's coming along nicely.

Internal fill is done. Not sure if I'm gonna run a reserve line yet. The selector gave me some crap last season so I might just ditch it and run a single line.

Filled in the bilge outlet holes on either side. They were too low and sunk it before so they're going alot higher this time.

Next thing on the list is to finish the liner and hood and reinforce. Then it's time for some engine goods
 

Attachments

  • sk1.jpg
    sk1.jpg
    54.3 KB · Views: 388
  • sk2.jpg
    sk2.jpg
    55.1 KB · Views: 288
  • sk3.jpg
    sk3.jpg
    59.1 KB · Views: 464
  • sk4.jpg
    sk4.jpg
    67.2 KB · Views: 414
  • sk5.jpg
    sk5.jpg
    53 KB · Views: 357
Last edited:
I did consider that. Decided against it just cause I don't think my skills are far enough along yet to get it looking nice. What would I have to do? vacuum bag it? I considered wrapping the pole in carbon too so it would be one piece but saw one where a guy wrapped it in kevlar and put red dye in the resin. I'm considering doing that.

The goal is to read enough of Shawn_NJ's posts and threads that next winter I'll be able to make my own hood from scratch, haha.

I was looking at you're thread this morning. Nice job on the rear sides and front bumper!
 
Last edited:

haggis

its raining again!
I did consider that. Decided against it just cause I don't think my skills are far enough along yet to get it looking nice. What would I have to do? vacuum bag it? I considered wrapping the pole in carbon too so it would be one piece but saw one where a guy wrapped it in kevlar and put red dye in the resin. I'm considering doing that.

The goal is to read enough of Shawn_NJ's posts and threads that next winter I'll be able to make my own hood from scratch, haha.

I was looking at you're thread this morning. Nice job on the rear sides and front bumper!


Thanks! I couldnt say much about vacum baging as ive never done it but i would hand lay the carbon and use a squeegie to pull the epoxy through and to mannipulate the weave till it looks nice and even. I would def plan how your going to do it first like where your going to have seams etc.

Pole would be a good first time as its a pretty simple shape.
 
Top Bottom