You are using an out of date browser. It may not display this or other websites correctly.
You should upgrade or use an alternative browser.
You should upgrade or use an alternative browser.
my -4 years SN project - no rocker, no short ;-)
- Thread starter jetfreak78
- Start date


are the tubbies allready installed? i carboned mine before installation.
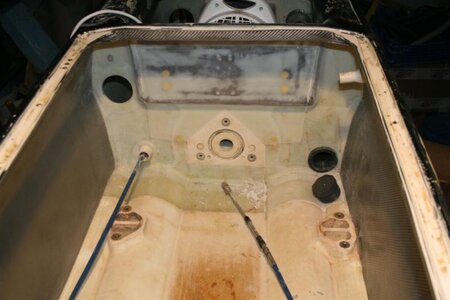
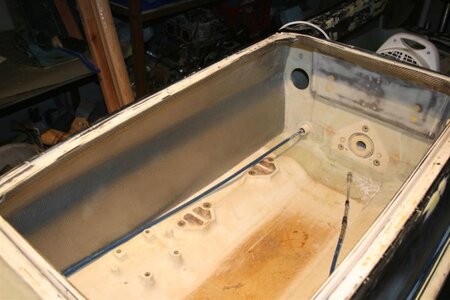
i turned down (and glued) the carbon to the foam on the inner side of the tubbies, so there is an extra flange of carbon (and not only the foam) as a glue surface to the hull. its not easy to wrap the carbon around the close edges of the tubbies without folds. i used a layer of "abreissgewege" (don´t know the english word - @matt_e: help us please!) that i tied together on the inner side of the tubbies. later you can easily remove this "Abreissgewebe" and you will have a rough surface for the topcoat or an other layer of carbon. unfortunately my english is not as good to explain you the hole process.....so here are some pics fore you.
Eh.....whatever the name of that tape is you put on top of resin & glass and rip it off later.
I forgot the english term.
BruceSki
Formerly Motoman25
- Location
- Long Island
Oh I didn't realize you had already had the hull covered in carbon before you installed you tubbies.
I am thinking about glueing the tubbie on the hull with resin and filler(and screws), then covering the tubbie and the hull with a carbon overlay.(thin stuff)
As of right now i have a bare white hull, but i like the look of the carbon on the sides.
I am thinking about glueing the tubbie on the hull with resin and filler(and screws), then covering the tubbie and the hull with a carbon overlay.(thin stuff)
As of right now i have a bare white hull, but i like the look of the carbon on the sides.
Eh.....whatever the name of that tape is you put on top of resin & glass and rip it off later.
I forgot the english term.
"abreissgewege" : peel ply ;-)
Yes! That's the word.
Very good, thank you!!!!
Oh I didn't realize you had already had the hull covered in carbon before you installed you tubbies.
I am thinking about glueing the tubbie on the hull with resin and filler(and screws), then covering the tubbie and the hull with a carbon overlay.(thin stuff)
As of right now i have a bare white hull, but i like the look of the carbon on the sides.
I think its a lot easier to do the hull and the tubbies separate. then glue, fill, screw the "carboned" tubbies to the allready "carboned" hull. then prime the surfaces and do your topcoat over all together. this way you dont have to manage with so many close edges in one piece of carbon. its the savest way to avoid any air-bubbles under the carbon....


- Location
- Sweden, Skane
Sick fiberlay-skills, i wouldnt have the patience to do all those modds.
Have to take ages. Keep up the good work and keep the pictures coming!
:fing02:
Have to take ages. Keep up the good work and keep the pictures coming!
:fing02:

Boris
The Good Old Days
- Location
- The surf-less coast
You have some mad skills and patience my friend.
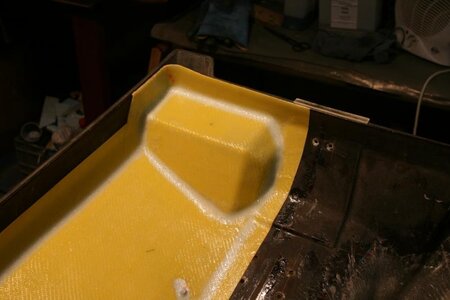
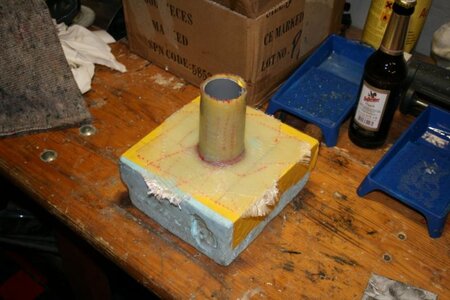
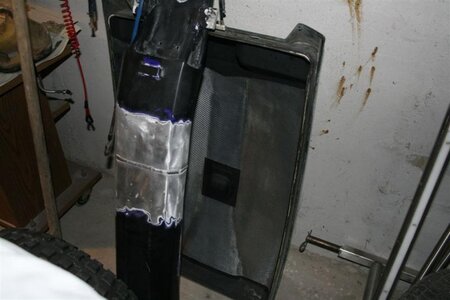
What is that yellow stuff in that hood ?
Is it some plastic you shaped to use as a mold ??
I hope you have some more pictures of this thing coming up.
What is that yellow stuff in that hood ?
Is it some plastic you shaped to use as a mold ??
I hope you have some more pictures of this thing coming up.
Looks like kevlar.What is that yellow stuff in that hood ?
Is it some plastic you shaped to use as a mold ??
You have some mad skills and patience my friend.
What is that yellow stuff in that hood ?
Is it some plastic you shaped to use as a mold ??
I hope you have some more pictures of this thing coming up.
Thank you my friend ;-) More pics coming up next week. I have done the complete reinforcing on the inside (tray, engine bay, pole mount area), the hood is almost done and now I’m in the process of sealing all through hull components in the tray (scupper, water lines, my new exhaust outlet, etc.). I´m a little perfectionist, so it takes all longer than i thought, but i want it done right the first time.
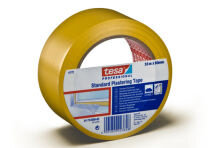
That yellow stuff is duct tape for plastering. It comes in white and yellow. I found that the epoxy does not stick on it, so i use it as mould release agent. I build the mold out of thin pvc sheets (flat surfaces) and extruded foam pieces (air intake on the back of the hood) and then covered the entire mould in this plastering duct tape. Then i laid my glass/carbon/epoxy over it. After the epoxy has dried i can easily remove my composite part from the mould, peel the duct tape of and go on.
I also use this tape in my glass work sessions to produce even terminations to other components. I cover the abutting surfaces with this tape, glass over it and after the epoxy has dried i can carefully cut on the edge of the tape (through the laminate) and peel the excess of (together with the tape).
Hope, this is understandable ;-).
See post #3: picture 1, 4 and 5 and post #41: picture 2 and 3
Attachments
Boris
The Good Old Days
- Location
- The surf-less coast
Than you Sir, are a master of the duct tape.
When I saw it in post #48 I thought it was some plastic that you shape with heat to get such clean molds but it's just tape applied by a perfectionist. Love it.
Maybe it's taking you longer than you'd like but it looks great. It will be worth the wait, I'm sure.
When I saw it in post #48 I thought it was some plastic that you shape with heat to get such clean molds but it's just tape applied by a perfectionist. Love it.
Maybe it's taking you longer than you'd like but it looks great. It will be worth the wait, I'm sure.


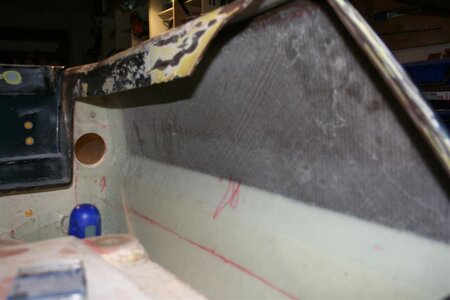
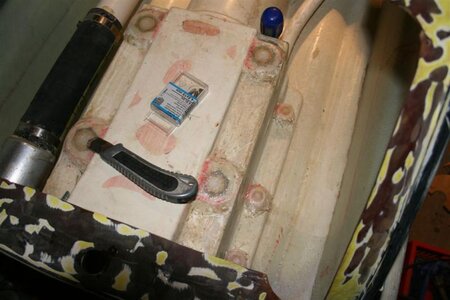
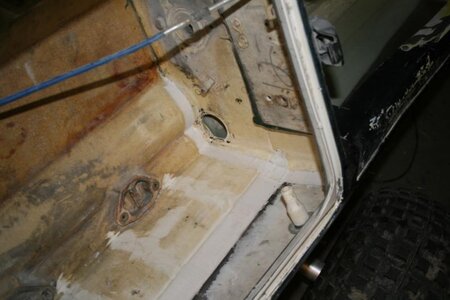
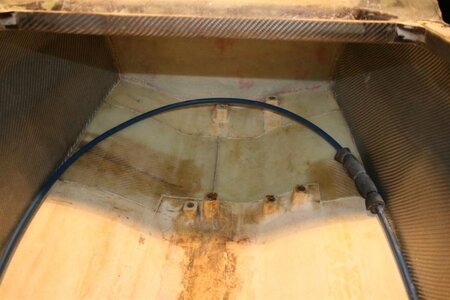
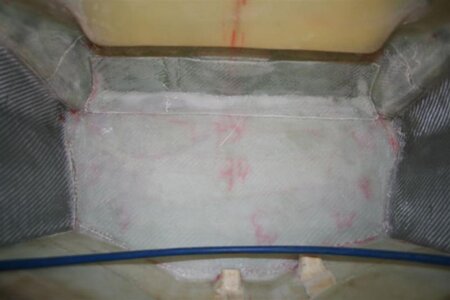
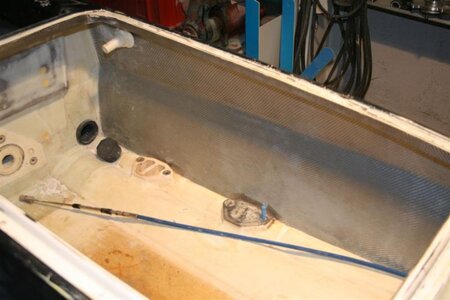
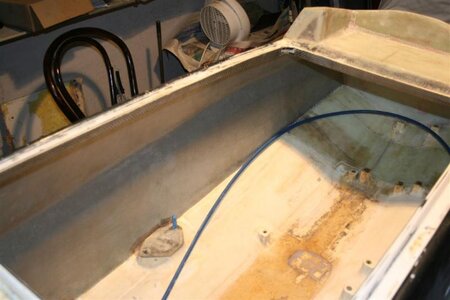
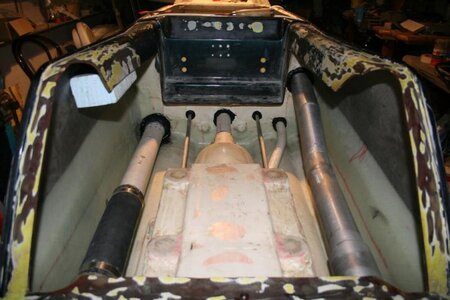
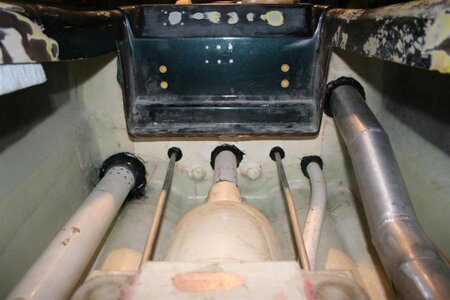
engine bay completely reinforced - partially with silver textile, nose foam glassed in
Attachments


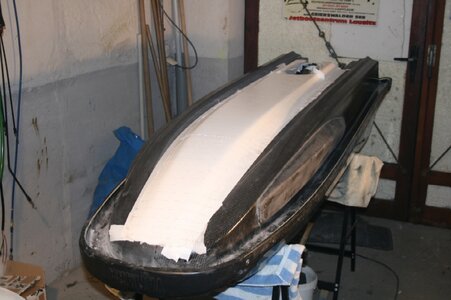
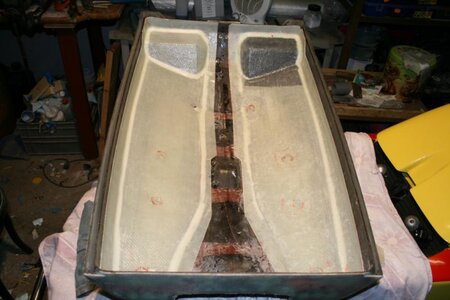
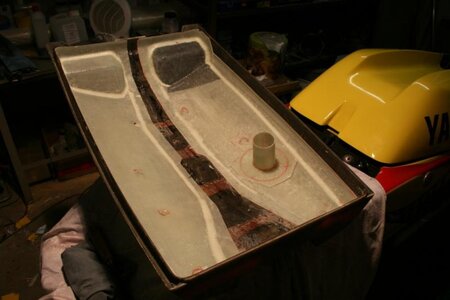
") hood liner allmost done, shortened ac pole -5cm
hood liner allmost done, shortened ac pole -5cm
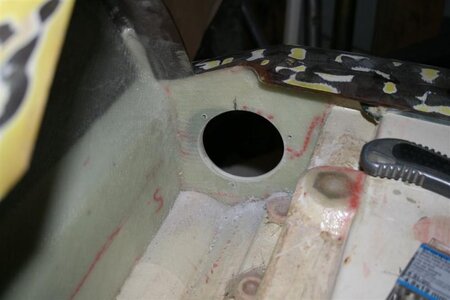
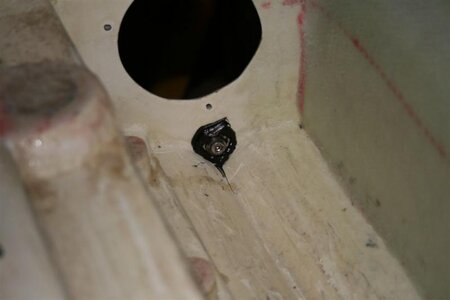
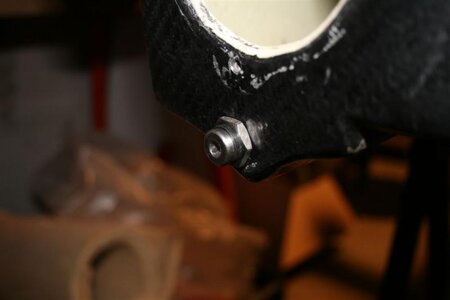
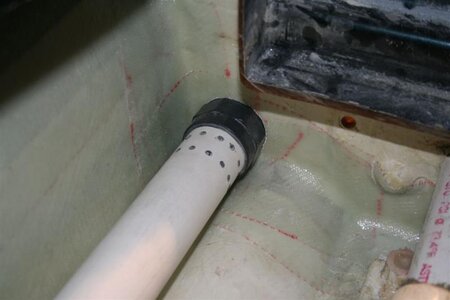
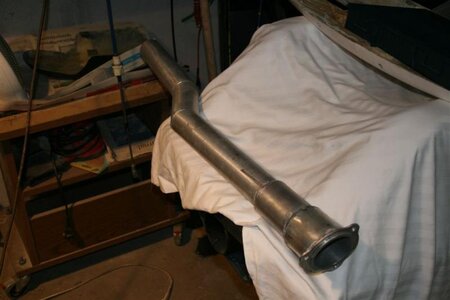
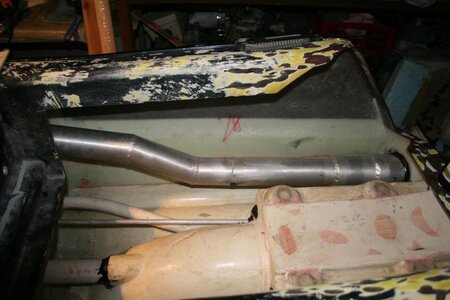
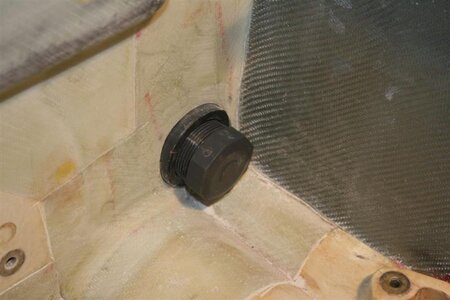
enclosable atp scupper (ABS fittings), custom aluminium exhaust (wanted the look of the RN exhaust), everything sealed good with polyurethan sealant
Attachments
-
 IMG_3473.jpg40.2 KB · Views: 83
 -
 IMG_3467.jpg36.1 KB · Views: 81
 -
 IMG_3463.jpg40.1 KB · Views: 82
 -
 IMG_3478.jpg42 KB · Views: 86
 -
 IMG_3477.jpg33.5 KB · Views: 78
 -
 IMG_3498.jpg54.2 KB · Views: 79
 -
 IMG_3489.jpg56.1 KB · Views: 82
 -
 IMG_3496.jpg58 KB · Views: 104
 -
 IMG_3488.jpg50.2 KB · Views: 95
 -
 IMG_3461.jpg46.4 KB · Views: 85