Not another Chan, build.

Location
NH
Well since all the drama has died down for the time being, I post up some progress of my long long long awaited Backie Chan.

Ill start with the un-crating
IMAG0031.jpg IMAG0033.jpg IMAG0036.jpg IMAG0037.jpg IMAG0039.jpg IMAG0040.jpg

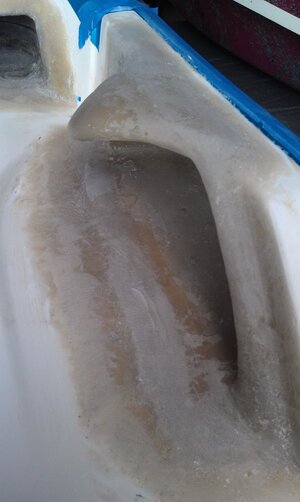
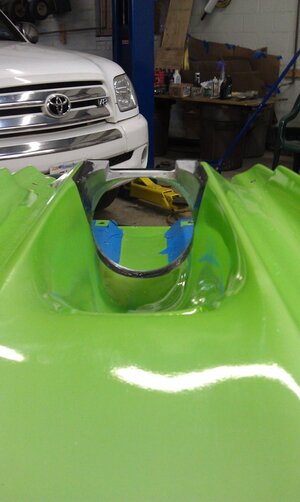
First impressions were, Paint job was very cool but quality was ehh ( not a complaint as it was free) The footholds looked like a complete rush job, its hard to tell from the pictures but they were lumpy as hell and turf would not hide it. Ride plate fit is pretty poor (but better than nothing) and the hood pins and lower bracket were mia. Other than that it is a beautiful hull and what I waited a very long time for.
 
Location
NH
We started the project with a nice relaxing afternoon of sanding, grinding and shaping the lovely lumpy footholds. Not a fun job but made everything alot better looking.
IMAG0050.jpg IMAG0050.jpgIMAG0048.jpg

After that we decided we were not comfortable with the tray thickness. It had a fair amount of flex and didnt instill alot of confidence when stood on. It may have never been an issue but we both agreed there was never gonna be an easier time to address it. We made a trip to Soller Composites with one of the hulls and were advised on what material to use, the best methods to apply tips and tricks. The owner John could not have been more helpful, I highly recommend them for any composite work supplies.
IMAG0074.jpg
IMAG0071.jpg

We started off small and built ourselves some tank pods
IMAG0075.jpg IMAG0086.jpg IMAG0080.jpg IMAG0078.jpg IMAG0092.jpg

After we finished laying em up, we build a very sophisticated kiln to cure them
 

Attachments

  • IMAG0051.jpg
    IMAG0051.jpg
    74.6 KB · Views: 100

Byeai

"Cheetos-Man"
Location
Melbourne FL
All the plates suck at fitting make sure you use all six bolts to hold in the plate if u not running a intake grate make sure u fill the gap between the shoe and plate or you going to rip it off (don't ask how I no)

Sent from my SAMSUNG-SGH-I337 using Tapatalk
 

88kawi5fiddy

pew pew lazers!
Location
So Utah
how much does that flywheel weigh, and is it an ATP? do you hvae to retorque it ever couple hours of runtime? stainless steel or aluminum hub where it sits on the crank?
 
Location
NH
Flywheel is ATP, weighs 1lb even all aluminum with steel ring gear. No special instructions given as far as re torquing.

More updates to come
 

Sanoman

AbouttoKrash
Location
NE Tenn
Looks great!

Used Soller before and like there products.I used their 12 oz carbon sleeves to make my exhaust under the tray.Great to do business with!
 
Location
NH
Now time for the pump shoe, definitely the most challenging step thus far. I was convinced to go with the JD Aluminum 144 shoe. It took a healthy amount of grinding to fit to the hull but nothing to crazy with the right tools. You may also notice the black billet plate attached to the back. Got this from Tony over @ Tigercraft. It completely replaces the rubber packing ring and has four holes in it that bolt to the pump. The setup of the shoe becomes a lot more important but once its in the pump never has to be shimmed again. Just bolt pump to the shoe and its perfectly aligned. The other time consuming part of this process was making the 144mm shoe and 148mm ring match the 150MM Maxx pump. Many many piles of aluminum shavings were made in the process.

IMAG0142.jpg
IMAG0146.jpg IMAG0145.jpg
 

Attachments

  • IMAG0149.jpg
    IMAG0149.jpg
    82.5 KB · Views: 98

Mxsx25

wreckless
Location
NH
Couple from my phone to add... And since we didn't get any further help as to our missing hood pin pieces , I contacted Jeff from wdk and he came through immediately for us and two day shipped us our brackets and pins... Now if only I had pfp insert layup as requested from day 1...

nebamaja.jpg
ehadapa4.jpg
zevepysu.jpg
qa8uma3a.jpg
gamy2ere.jpg


Sent from my iPhone using Tapatalk
 

Mxsx25

wreckless
Location
NH
nice ski...did you guys buy 3!?


Kurt, myself, and zach (uncle WB's illegitimate son) all ordered together...
Kurt and I requested hybrid carbon/glass
And zach requested full carbon/Kevlar

Kurt did not have a donor ski either so every single bolt, nut and washer is all brand new..

This ski is going to be beautifully built


Sent from my iPhone using Tapatalk
 
Nice work.... A little reinforcement goes a long way. If you reinforce the inside and handle pole be careful with the acetone it makes a HUGE MESS when mixed with zolatone.
 

88kawi5fiddy

pew pew lazers!
Location
So Utah
Flywheel is ATP, weighs 1lb even all aluminum with steel ring gear. No special instructions given as far as re torquing.
More updates to come

T/L aluminum hubs are known to loosen up after a bit of riding in race conditions and need to retorqued or they will grenade themselves and the front of the cases. just pull the cover once every few hours and check it.
 
Location
NH
Nice work.... A little reinforcement goes a long way. If you reinforce the inside and handle pole be careful with the acetone it makes a HUGE MESS when mixed with zolatone.

Did you reinforce yours? I was on the fence about doing the pole bracket area too
 
Yes ... used 19 oz carbon twill bottom , sides and under the pole area. After you sand the zolatone do not do a acetone wipe . The zolatone will start comming up like you put paint stripper on it . I found out the hard way and had to completely strip the motor compartment .
 
Top Bottom