- Location
- Airdrie, Alberta, Canada
You are using an out of date browser. It may not display this or other websites correctly.
You should upgrade or use an alternative browser.
You should upgrade or use an alternative browser.
Super Jet SN build, Rocker, Chopped rear, this website made me do it!
- Thread starter Sven
- Start date
- Location
- Airdrie, Alberta, Canada


 Finally feel like I'm getting somewhere! Now that by bottom end caps are done I got some 2.5" holes drilled. Tested the exhaust I had previously tacked, figured out my middle length ran to work tacked the pipe changed the oil on my truck. It's midnight and I not have a tacked up pipe that fits just need to trim the end off.
Attachments
- Location
- Airdrie, Alberta, Canada
- Location
- Airdrie, Alberta, Canada
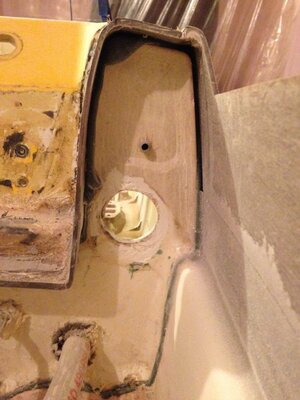
So I punched a few holes, test fitting the exhaust, scupper, and trim line. Might have to modify the trim line location once I figure out how the trim works and goes together. I wanted to get more photos of the trim but my phone is only and low on memory so I can't at the moment. But to me it seems that the trim will actually tilt down more than up. Can anyone chin in on protec trim? Every little step from this point on I'm just getting more and more pumped for the day I get to ride this fricken thing.


- Location
- Airdrie, Alberta, Canada


 Hardly got anything done in the last week with having a nasty cold a d working way way to much. I managed to find some filler wire and tigged one more pass on each weld of the exhaust to make sure I won't leak at all inside the hull. And did about 3 hours of sanding to clean of the engine bay ( yamaha just gobs on the glue around the fire wall). Also trimmed up the exhaust tube I like how it fits now. Before and after photos of some sanding.
Attachments
- Location
- Airdrie, Alberta, Canada
- Location
- Airdrie, Alberta, Canada
 I got this 61x motor on eBay a while back and did nothing to it but give it a little scrub down on the outside. I figure with all the working in doing to the hull I better take it apart and at least make sure I'm putting a ok motor in my hull. It looks pretty good and stillness useable but while it seems apart I think I will powder coat a few things, do some porting, all fresh gaskets, new pistons and rings. Freshen up the old girl. Hopefully I'll get to porting this week.
Just4Fun
First World Problems...
- Location
- Southern Oregon
I'd throw a new crank in for piece of mind.
Old unknown hour crank=sketchy..
Old unknown hour crank=sketchy..
- Location
- Airdrie, Alberta, Canada
I'd throw a new crank in for piece of mind.
Old unknown hour crank=sketchy..
I'm trying to be on a budget I was jus trying going to re gasket the motor but figure while it's open I'll do new pistons ans rings. A crank ain't to cheap.
- Location
- Airdrie, Alberta, Canada
- Location
- Airdrie, Alberta, Canada


 Being that this was the first time I ever ported anything I was nervous to take out to much but I contacted yamanube and did some more grinding and think I got it now. Also have it some shine!!!!! Picked up this slightly used wetsuit for cheap locally too! Did a bit more glass reinforcement too but no pics cause it looks no different. Ohh also some stainless goodies for my carb!!
iangdesign
Cats, lots of cats!
- Location
- United States
I'm trying to be on a budget I was jus trying going to re gasket the motor but figure while it's open I'll do new pistons ans rings. A crank ain't to cheap.
I agree...crank on an unknown motor is risky, but since you have it apart I would check tolerances in it. If you do not know how maybe take it to a shop and see if they can tell you if it's in good shape or not. Hate to see this dope project get on the water and blow an engine quickly.
- Location
- Airdrie, Alberta, Canada
Ok I will inspect the crank and measure for out if tollarance wear. Thanks for the heads up guys.
- Location
- Edmonton, Alberta
If you need any measuring tool swing by bud.Ok I will inspect the crank and measure for out if tollarance wear. Thanks for the heads up guys.
Sent from my SM-G900W8 using Tapatalk
- Location
- Airdrie, Alberta, Canada


 Not much of an update I have been busy with life and work lately. I did get a midshaft ordered finally. Tonight at about 10pm I started scraping off all the calcium build up or what ever it is in the cooking passages on my cylinders so when it's all back together it can cook as it should. I ended up scraping out about a table spoon worth of junk out.
- Location
- Airdrie, Alberta, Canada
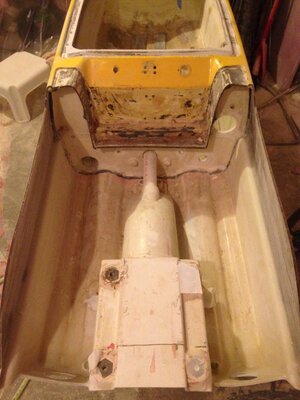
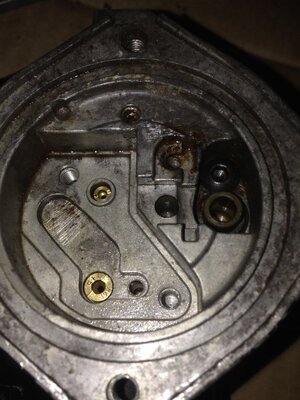
Just did 3.5 hours of work on the ski tonight. I got some sanding done here and there around the entire ski. Figured it was time to pull the pump shoe and when I did reading on that everyone said it's hard to do and will come off in a million pieces, well it took 5 minutes and is still all 1 part and could easily be reinstalled. Later down the road my new blowsion pump shoe will go in, sometime after paint. After removing the pump shoe I move up into the tray with the plan of finishing up everything inside so I can build the tray and get ready for footholds, that did not happen as I envisioned. Both cooking lines were loose and would have had leaks at each end, same with the steering tube. So I ripped all that out and will install some new cooling lines and seal them up tight, the steering tube will be cleaned up and reused. And finally I got my (DIY) scupper installed. That finished off my night as the 5200 I used to seal up the scupper tube on the inside of the tray take 2 days to get tacky and 7 days to cure. Oh and I also got my carb back, I had brought it to my buddies dad who build custom choppers to remove the broken bolt and he was able to drill it out, tap it larger and lathe down a Allen bolt to use as a hold down for the seat of the needle and seat. Sorry this is all the photos I took while working on it.
Attachments
- Location
- Airdrie, Alberta, Canada
- Location
- Airdrie, Alberta, Canada
- Location
- Airdrie, Alberta, Canada
Finally feel like I have done something worth making sn update about. I had previously pulled the cooling lines and steering cause they were all loose and leaking. Installed some new stainless cooking lines and trim tube, installed exhaust tube and sealed everything up. I'm excited that I was able to keep room as planned for a lowered tray!! Just running low on glass supply's but hopefully I can start to shape the tray up soon now that this is all done.


- Location
- Airdrie, Alberta, Canada
Shout out to Hull_b for hooking me up with the stainless tube as well as selling me some other goodies along the way!


