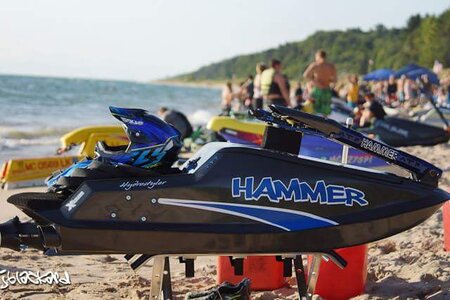
Custom/Hybrid the -HAMMER- with a touch of carbon

hydrostyler

X-
Site Supporter
Location
Central Illinois
Amazing thread man!!!

Thanks. You must have been bored to dig up a year old thread. Haha.
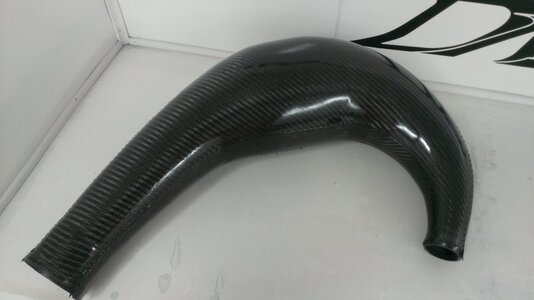
I rode the hell out of this thing all summer and it never let me down. I upgraded to a 155 mag pump and built new foot holds to start the year off. I also designed and built a carbon exhaust chamber, but did not finish my curing oven before riding season started. Maybe late this winter I can get back on that project. I will post a few more build and maybe some ride pics up in the next few days.
 

hydrostyler

X-
Site Supporter
Location
Central Illinois
Ok. So maybe I can throw a few foothold build pics up to give a little wintertime inspiration to some of you composite jockeys.
WP_20151219_004 (1).jpg WP_20151219_005 (1).jpg
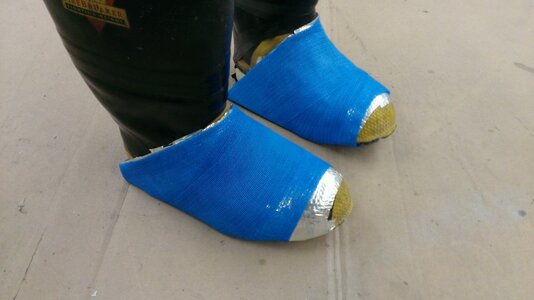
First you start off with a good set of fireman boots. Keep in mind that your finished part has to come out of a mold, and your foot needs to kick in and come out. You may need to add some panels to correct these angles.

WP_20151220_002 (1).jpg WP_20151220_004 (1).jpg
After protecting the boots and panels with aluminum hvac tape, I wrapped those sections with water activated medical casting tape. You have to work fast because this stuff cures quickly.
WP_20160102_001.jpg
At this point, I Added a little glass and resin to start bulking them up and start shaping for the design I was looking for.
WP_20160130_002 (1).jpg WP_20160130_003.jpg
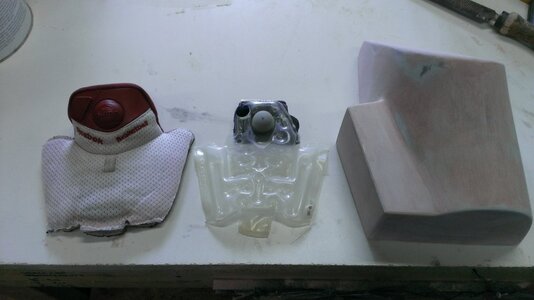
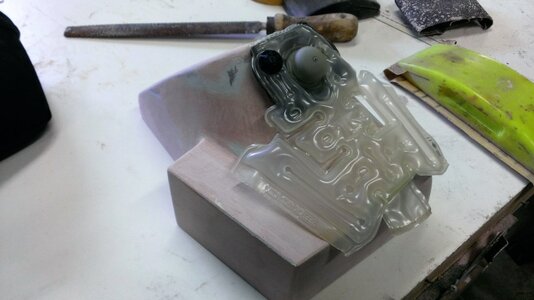
This is where things get crazy. You tear apart an old set of reebok pumps to take the air bladders out and make sure they are going to fit properly in your final parts.
6tag_020316-225700 (1).jpg WP_20160302_004.jpg
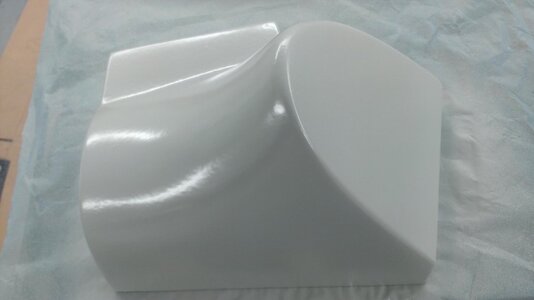
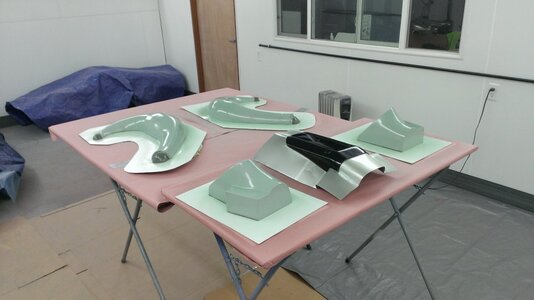
Here are the completed plugs. I forgot to take pics of the part where I added the blocks on to allow for proper spacing in the adjustable pocket and to correctly align the holds.
WP_20160309_011.jpg Here are the plugs laid out with pva applied, waiting for a nice orange gelcoat bath.
 

hydrostyler

X-
Site Supporter
Location
Central Illinois
WP_20160310_001 (1).jpg
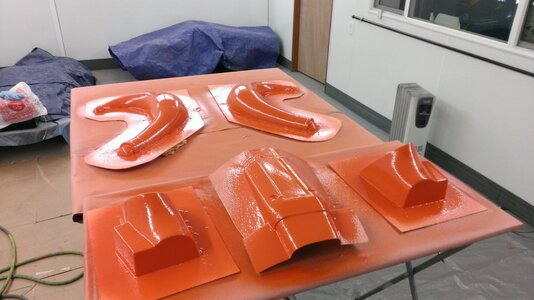
Here is the gelcoat waiting to be glasses over after it reaches the tacky stage.
WP_20160703_001.jpg
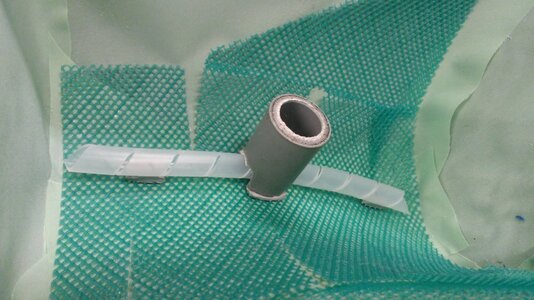
Again, I didn't take many pics of completing the molds or the layups, so I'll throw a trick I use in for you. I cut a piece of 1/2 pvc and create my own inlet port to infuse parts that lack flat spots for the larger flanged ports available.
WP_20160704_001 (1).jpg
I also found that cutting a box up to suspend your mold is quicker than glassing legs onto them to let them sit flat on the work bench. It also gives you a spot to stuff a space heater in if you want to heat up the molds to let that resin flow nicely.
WP_20160705_002.jpg WP_20160707_006.jpg WP_20160707_002.jpg
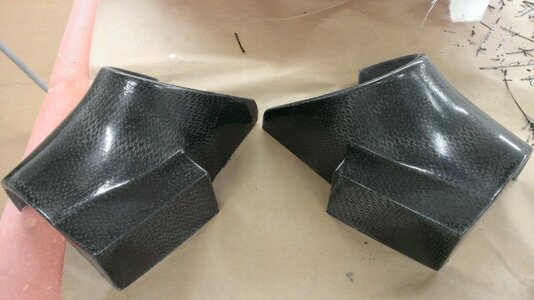
Here are the final parts popped out of the molds and trimmed up.
WP_20160719_005 (1).jpg WP_20160726_005 (1).jpg
This is a test fit and a final turf job. Oh yeah, if you're paying attention and are wondering where the reebok pump bladders come into play, that was just a wild idea I had that I decided was unnecessary. But, in the future, if it becomes the next big thing, remember you saw the idea here first!!
WP_20160808_003.jpg
And here is the final product installed. When laying these holds up, I did not use any core material and lighter layers on the inside panels. This allows them to flex open to accommodate a larger shoe. I wear a size 9.5 and even our own Georgia Jet Pirate @Captain PegLeg was able to kick his #13 air jordans in with no effort.

Over all I like the fit and feel better than the rickter holds I've ridden. I have had a couple xmetal guys mention that the tops rub the front of their shins when they lean forward. You've seen how much wedge those guys run. It would be an easy fix to trim that down and returf, but it doesn't affect my riding at all.
 
My only complaint about this thread is that you don't post more pictures. You do some amazing work and I'm quite envious of your spray booth.

Make sure you show us that pipe when it's done.


Sent from my iPhone using Tapatalk
 
View attachment 322621
Here is the gelcoat waiting to be glasses over after it reaches the tacky stage.
View attachment 322622
Again, I didn't take many pics of completing the molds or the layups, so I'll throw a trick I use in for you. I cut a piece of 1/2 pvc and create my own inlet port to infuse parts that lack flat spots for the larger flanged ports available.
View attachment 322623
I also found that cutting a box up to suspend your mold is quicker than glassing legs onto them to let them sit flat on the work bench. It also gives you a spot to stuff a space heater in if you want to heat up the molds to let that resin flow nicely.
View attachment 322624 View attachment 322625 View attachment 322626
Here are the final parts popped out of the molds and trimmed up.
View attachment 322627 View attachment 322628
This is a test fit and a final turf job. Oh yeah, if you're paying attention and are wondering where the reebok pump bladders come into play, that was just a wild idea I had that I decided was unnecessary. But, in the future, if it becomes the next big thing, remember you saw the idea here first!!
View attachment 322629
And here is the final product installed. When laying these holds up, I did not use any core material and lighter layers on the inside panels. This allows them to flex open to accommodate a larger shoe. I wear a size 9.5 and even our own Georgia Jet Pirate @Captain PegLeg was able to kick his #13 air jordans in with no effort.

Over all I like the fit and feel better than the rickter holds I've ridden. I have had a couple xmetal guys mention that the tops rub the front of their shins when they lean forward. You've seen how much wedge those guys run. It would be an easy fix to trim that down and returf, but it doesn't affect my riding at all.


Size 11.... I'm not that freakazoid! Although my wife prob wishes I was a size 13.....
 

hydrostyler

X-
Site Supporter
Location
Central Illinois
First off, thanks @EvanKrefski. Since you mentioned you previously rode a micro, it looked like you had no problems adapting to this powered knee board with handlebars. It is entirely different from anything that was built from a superjet platform. Most guys can't get past that in a couple minute test ride, but that's cool. You are more than welcome to ride it again anytime.

Pegleg, maybe I was confusing your shoe size with how many beers you drank each night? Either way some big a$$ feet have kicked in without breaking anything.

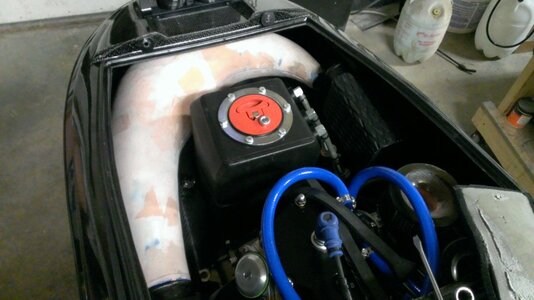
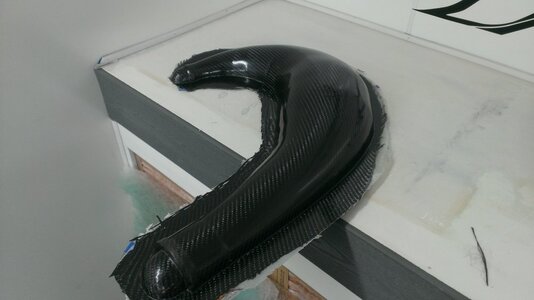
Now its @Nate_D's turn. I guess I hold back on the pictures because everything I build is usually a trial and error type of thing. I don't want to build up some hype over something that might not work out. I'm more apt to lay low online and then show up to a free ride and blow minds in person. When you see every detail of a project on the web, you're more prone to glance at it and say "that's so and so's ski" as you walk on by. As far as the pipe project, I'll give a brief explanation before I throw up some pics. 1st off, I'm no motor guy or exhaust builder. However, I've seen so many designs out over the years, that I don't think you can go horribly wrong by not straying away too far. The need for me to build my own chamber is because my ski is so tiny that I have to loosen the motor to pull the pfp chamber out. Also , once its installed it is pushing pretty tightly against my pole breather tubes and cables. I wanted a chamber that is about 1 1/2" shorter. I'm thinking mod vs. limited, right? The other aspect is that most big motor guys cut the pfp chambers up and reweld them to use the outer chamber wet, much like the rrp pipe. The smaller motors are said to work better on the inner chamber. I have a Dasa 850, so I wanted something right in the middle. So far the pipe is complete with the exception of needing a little more bulking at the ends. Then I need to finish my oven to post cure it. I'll let the pictures do the talking.
WP_20160201_004.jpg WP_20160211_005 (1).jpg WP_20160218_004.jpg WP_20160222_004 (1).jpg
WP_20160309_001 (1).jpg
6tag_020316-224956 (1).jpg
WP_20160708_006 (1).jpgWP_20160714_004 (1).jpg

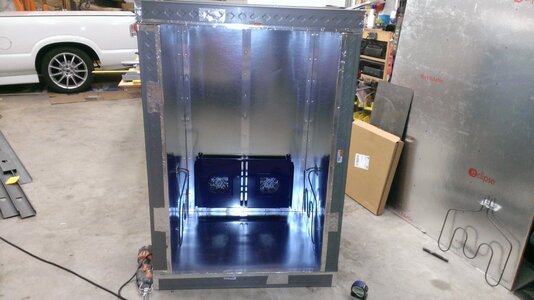
WP_20160321_003.jpg And here is as far as I got on my curing oven last spring. Hopefully I get caught up on my winter projects and can get back on this in the spring.
 

Attachments

  • WP_20160714_003 (1).jpg
    WP_20160714_003 (1).jpg
    63.8 KB · Views: 114
Top Bottom