12 ft ceilings with 16 ft top of gable. Those would probably be overkill but I have 1500 sq ft to light up and for a shop I feel like I need all the light I can get. Once building is up I am on my own for all the interior finishing and this is a steel building to give some reference. Are the boxes necessary or just part of flushing them into your ceiling?
You are using an out of date browser. It may not display this or other websites correctly.
You should upgrade or use an alternative browser.
You should upgrade or use an alternative browser.
Other What did you fab up today? A thread for the home fabricators!
- Thread starter OCD Solutions
- Start date
OCD Solutions
Original, Clean and Dependable Solutions
- Location
- Rentz, GA
The boxes were something I did for some extra height, usually they just hang from a hook in the ceiling or a beam.
An arguement could be made that you would be better off to have more fixtures of a lesser wattage and spread it out more. These have a very intense center of light.
An arguement could be made that you would be better off to have more fixtures of a lesser wattage and spread it out more. These have a very intense center of light.
Original plan was to use 4 ft strip leds but I want something serious over the top of my lift so I can have daylight inside an engine bay. I may grab one of these for lift area and use the strips for other areas.The boxes were something I did for some extra height, usually they just hang from a hook in the ceiling or a beam.
An arguement could be made that you would be better off to have more fixtures of a lesser wattage and spread it out more. These have a very intense center of light.
This is spot on. For scenarios where the source of light is physically close to the subject/workspace/whatever, more distributed sources of light provides far better visibility than a few surface-of-the-sun sources. It’s about eliminating shadows. Having the entire ceiling illuminate would be ideal. Having lots of LED bars evenly spaced around the ceiling is a close second. I helped a friend wire his shop with led bars with about a one foot gap between the ends, and maybe 3 foot gap between light bars. When they are all switched on, it’s basically like standing in a huge softbox: omnidirectional light.An arguement could be made that you would be better off to have more fixtures of a lesser wattage and spread it out more. These have a very intense center of light.
OCD Solutions
Original, Clean and Dependable Solutions
- Location
- Rentz, GA
I doubled down with a row of pot lighting over all my bench areas and am prepared to add several rows of the LED strips if these prove to be too intense.


WFO Speedracer
A lifetime ban is like a lifetime warranty !
- Location
- Alabama
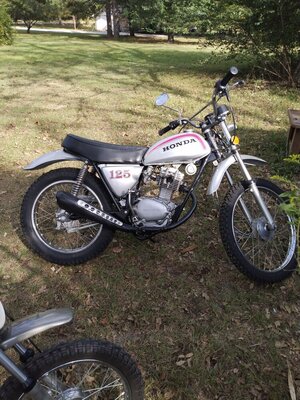
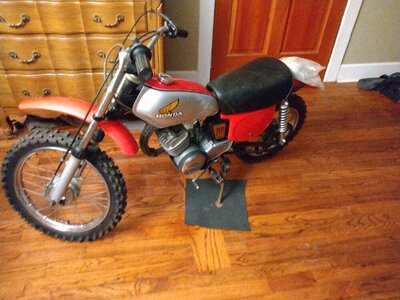
So round these here parts it's Barber Vintagefest time, so this is what I worked on today, these two were dropped off yesterday , neither ran nor did he have any idea what was wrong with them or when the last time they ran was, today they are both running, tuned to a T and ready to go to Barbers this weekend.. He is finishing up the assembly on the headlight and taillight on the SL125. I sorted out a bunch of stuff like ignition timing, carb tuning and cable routing to make them runners instead of rollers..
Attachments
WFO Speedracer
A lifetime ban is like a lifetime warranty !
- Location
- Alabama
- Location
- Wichita ks
WFO Speedracer
A lifetime ban is like a lifetime warranty !
- Location
- Alabama
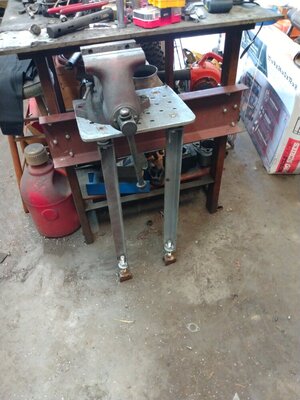
I took me a minute but I finally made it back up to my friends house and finished the installation of his vise table. I got really lucking and got three hold down bolts to line up with holes already in the plate, it's solid as a rock.
Attachments
WFO Speedracer
A lifetime ban is like a lifetime warranty !
- Location
- Alabama
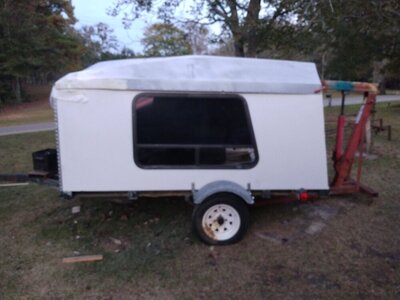
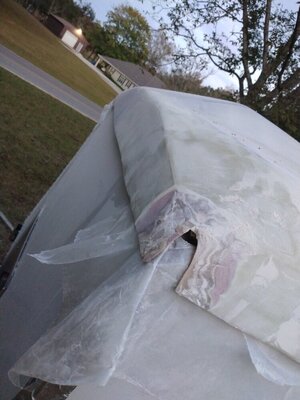
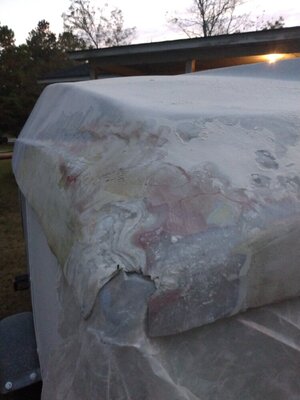
So somewhere in the back of my mind something just told me this top was not going to fit back on, I decided to rig up the cherry picker and the hitch hauler together and lift the top up and check it for fit. I was right it didn't fit.
So I was looking at my options, first I split the corner open and got it to somewhat fit, then I just decided to lop off both corners, the issue is where the plywood comes together and make a very sharp corner, so I got the grinder and a cutting disc and clipped the corners of the metal and plywood and voila, it fits like a glove, tomorrow I will glass it back up in place this time , that way I am assured it will fit back on when I get done with the top later on this week.
It's really not that big a deal to fix where I am right now, after the top was painted it would have really sucked.
Sometimes you get the bear but most of the time the bear gets you !
Attachments
- Location
- Wichita ks
WFO Speedracer
A lifetime ban is like a lifetime warranty !
- Location
- Alabama
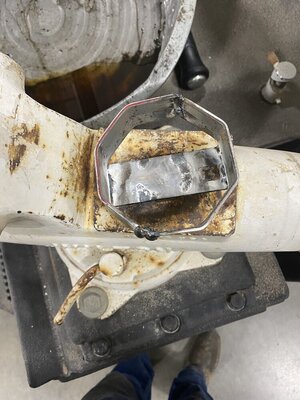
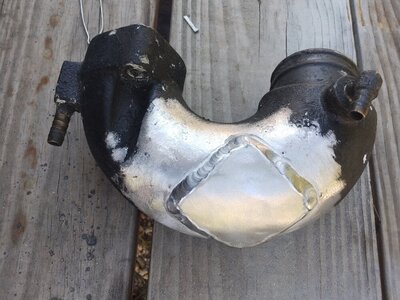
I didn't fab this up , a friend of mine welded it for me Yesterday, the back story on this head pipe is I bought it knowing it needed repairs. it had a small hole on the inside of the pipe, I decided to see if I could find it, so with a small drill bit I began drilling holes on the outside of the pipe where i thought the hole would be on the inside, I took about ten holes to find it but I finally got it to drill through the inside hole. When I was drilling I drilled through something rather soft, someone had done a prior repair on the head pipe with JB weld and repainted it.
I took it to my tig guy and he said no problem, I knew he would need a fairly large hole to get the tig torch in there so we used a hole saw without a pilot bit and a drill press to drill out all the nastiness, then he welded up the inside hole and I told him to just weld a plate up on the outside instead of trying to make a perfect size circular disc to weld into the hole, time equals money and I don't plan to sell this exhaust system anytime soon, he had it ready to pick up yesterday afternoon.
The really good part is he used to teach welding at the local high school and he offered to teach me how to tig weld, I have a tig setup at my shop but I never got a bottle of argon and a regulator to set it up, I also need to check the gas and water flow solenoids because it has a water cooled torch on it. Hopefully by early next year I can get it all set up to tig my own stuff.
Attachments
Last edited:
My day job is teaching welding. Shouldn’t have a water solenoid, water cooled should run open. Gas solenoid should trigger when you hit the foot pedal. Hit me up with questions and I’ll do my best to help.I didn't fab this up , a friend of mine welded it for me Yesterday, the back story on this head pipe is I bought it knowing it needed repairs. it had a small hole on the inside of the pipe, I decided to see if I could find it, so with a small drill bit I began drilling holes on the outside of the pipe where i thought the hole would be on the inside, I took about ten holes to find it but I finally got it to drill through the inside hole. When I was drilling I drilled through something rather soft, someone had done a prior repair on the head pipe with JB weld and repainted it.
I took it to my tig guy and he said no problem, I knew he would need a fairly large hole to get the tig torch in there so we used a hole saw without a pilot bit and a drill press to drill out all the nastiness, then he welded up the inside hole and I told him to just weld a plate up on the outside instead of trying to make a perfect size circular disc to weld into the hole, time equals money and I don't plan to sell this exhaust system anytime soon, he had it ready to pick up yesterday afternoon.
The really good part is he used to teach welding at the local high school and he offered to teach me how to tig weld, I have a tig setup at my shop but I never got a bottle of argon and a regulator to set it up, I also need to check the gas and water flow solenoids because it has a water cooled torch on it. Hopefully by early next year I can get it all set up to tig my own stuff.
WFO Speedracer
A lifetime ban is like a lifetime warranty !
- Location
- Alabama
Mine is a lincoln 300/300 tig stick welder, it does have both water and gas solenoids on this particular machine.
I do realize I could set it up with a water circulator and bypass the solenoid. or just let the water run constantly no more than I am going to be using the tig feature.
I do realize I could set it up with a water circulator and bypass the solenoid. or just let the water run constantly no more than I am going to be using the tig feature.
Ahh, my shop is full of miller dynasty’s, the new ones we got have water cooler on demand. Had to go into the hidden settings and turn it to always on. Students don’t pay enough attention to things to have them set to on demand. We go through enough torches as it is. My personal machine is set up to always on as well.Mine is a lincoln 300/300 tig stick welder, it does have both water and gas solenoids on this particular machine.
I do realize I could set it up with a water circulator and bypass the solenoid. or just let the water run constantly no more than I am going to be using the tig feature.
WFO Speedracer
A lifetime ban is like a lifetime warranty !
- Location
- Alabama
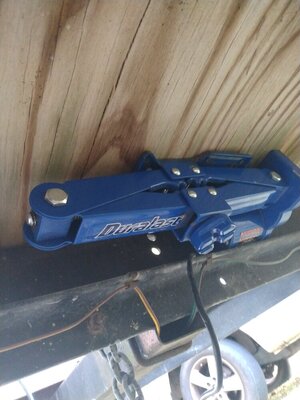
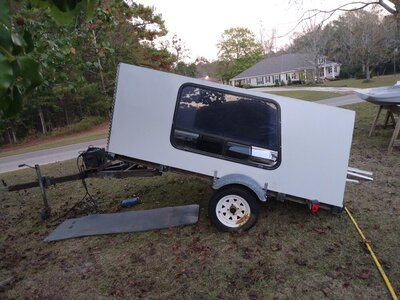
This trailer was a utility trailer and as such it had tilt function, since adding all the stuff on it iis now way too heavy to tilt by hand , I could buy a linear actuator and mount it up but I was thinking how else can I get it to tilt, so years ago I bought this electric screw jack from Autozone on clearance sale for like $20.00.
I have only used it once or twice because I usually have a hydraulic trolly jack with me in the truck, so I came up with this idea, I drilled some holes in the plate and it is just screwed to the floor right now but I am thinking of making a plate to bolt it up to and through bolting it in.
I replaced the u-bolt that held the latch with a longer one and added one so I can bolt a piece of steel to the tongue for the jack to push against, just to check it out I u-bolted a wonder bar to the trailer and the electric screw jack lifted the trailer easily, it did bend the pry bar though which means the steel will have to be really thick, no biggie on the wonderbar, the hydraulic press will fix it right up, I will pick up some steel at the house later today and try it again. It may take a few tweaks to get it to work just right and I may have to build a swinging cage for the jack pad to compensate for the arc as it lifts. A 2" pipe will fit over the pad and a bolt though the pipe would mate with the groove in the pad.
The pic is from under the trailer looking up.
Attachments
Last edited:
WFO Speedracer
A lifetime ban is like a lifetime warranty !
- Location
- Alabama
I found a piece of heavywall square tube at the shop with a piece of heavy angle already welded to it, it looked to be about the right length also, thought it might work so I loosened the u-bolts and slid it under there, the pic shows the max lift of the jack, it maxes out about the same time the rear of the trailer grounds out, the only thing I see I might need to do is cut a few links out of the limiter chain in the front.
Attachments
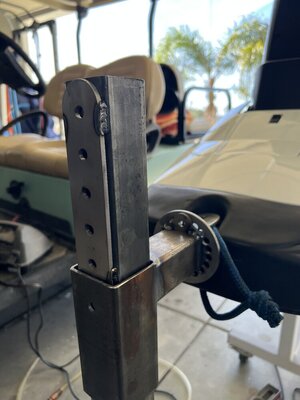
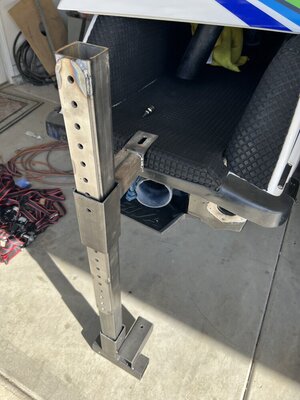
Last weekend I rode surf for the first time and got hooked. I decided to make a lumpy old square I got last week into a surf boat. Knowing that I have a ton of glass and paint in my future I couldn’t imagine doing it the same way that I did it last spring when I restored my current square. I came up with an adjustable height, adjustable length, and adjustable rotation squaretisserie. This should help me knock out glass and body work on this square.
Attachments
OCD Solutions
Original, Clean and Dependable Solutions
- Location
- Rentz, GA
Nice work! My father-in-law had a rotisserie for his 68 fastback project and it was amazing how much easier it made working on different stages.

