Other What did you fab up today? A thread for the home fabricators!

OCD Solutions

Original, Clean and Dependable Solutions
Location
Rentz, GA
Teach me to weld!
Buy a welder and learn, that's all I've done, and don't let me fool you, I have a ton more to learn yet!
I was taught to stick weld back in the day but I learned MIG from watching videos on the Miller welding site and Youtube.

FYI, Friday was the first time EVER welding steel with my MIG. I've owned it nearly 10 years and all I've ever done was aluminum.
I needed to anchor down the new platform so I welded stainless washers onto the ends of 36" steel spikes to make end caps.
 
I learned the same way. I've been MIG welding steel for years. I recently started to TIG weld aluminum, and I used the miller website. The best page was the one that compares a good weld to what welds look like when you don't have enough gas, wrong filler material, too fast, etc. I would make a weld on scrap and see what went wrong. Try again. Fix what wasn't right that time. Over and over. It didn't take long before I was making decent welds and now I can usually quickly identify if something isn't right.

It's all about practice and watching what the pros do. I'm still learning, but my welder friend keeps telling me how impressed he is with my welds considering I'm not formally trained.
 

BruceSki

Formerly Motoman25
Location
Long Island
a5d82602fb1e3e97b6fa1486a3f155ba.jpg

585cac174422fdef1f0a7dd2bfd73d10.jpg

457f82e4fad58ac39a05ea1cd53dbdba.jpg

77d957aa8c34c748202cbbc80fe98e07.jpg

c11174456756533fb8b6da6c06f0d574.jpg

5c02519d47af27ddde1446fdda2bbd4e.jpg

d8cbec5cea5dde1101f3564999be0d5a.jpg

cdf0eb97d61711999dbcb0dede067b8a.jpg


Stick and mig comes easy to me, do them both at work a lot. The TIG on aluminum has been a learning process for sure. I only do it at home and don’t do it often so it takes me a while to get in the groove every time I fire the machine up.

8f90d28aac827bef84a07d998ebb93ab.jpg


Just did the pipe wrench yesterday for a buddy at work. Hope it holds up. Did 3 passes on it at 150 amps and still didn’t feel like I had enough heat behind it with that cast.
 
Seems like thicker than 1/8 or 3/16 aluminum you can just throw as many amps as your want at it, I’m usually wide open on a dynasty 210 on 1/8 or thicker, just move slower the thicker and bigger the part gets. Once you get to like 1/2-3/4” you really just gotta get some helium and weld on dc. Dc would be tricky on cast for sure though, or anything not new and clean for that matter
 

Quinc

Buy a Superjet
Location
California
This project feels like it deserves a build thread......
 

OCD Solutions

Original, Clean and Dependable Solutions
Location
Rentz, GA
I screwed up the math on my last build so I’m doing it over again, only bigger.

f7005163cc03824b342bd4cd2605d2a0.jpg


The last platform ended up being 7.7sq/ft and the turtles filled it up pretty quick.

This new one will be 13.8sq/ft and a slight improvement in both weight and design.

Since the old platform was built to last and has quite a bit of $$ in it, it will be repurposed as a floating duck house with at least 4 roosts and placed in the back corner of the pond. We have several groups of Mallards that winter in our pond that will love it. More than anything, it’s a peace offering for our neighbor who loves the turtles but thinks we stole them from her by building the platform in front of our house. She lives the ducks too so hopefully this gives her as much pleasure as the turtles did.

a74d557d106e05f14f18ae73aca8fb95.jpg
 

BruceSki

Formerly Motoman25
Location
Long Island
Fabbed up a little 5’ aluminum ramp with a support leg and two oem stainless bow eyes for strap points. Works perfect for two man loading from a beach cart to a bed rack. Threw some scrap trex decking on it and the skis slide like butta. Completely free material cost, just burned a few hours on a day off building and designing it.

I may not have the best tools or the best skills, but slapping some aluminum together is way more fun than burning stick rods on dirty painted steel from 1957 at work all day.


2d43f87b43eee5e4c88a1e75e8998361.jpg

32b92ef28e33938c9030ccace9b9df0c.jpg

cc2c0a6fa0c47b96c8797c7fdfc4e4f3.jpg

3b59f1a40e3be119d32e5036aa3582ad.jpg
 
image.jpg

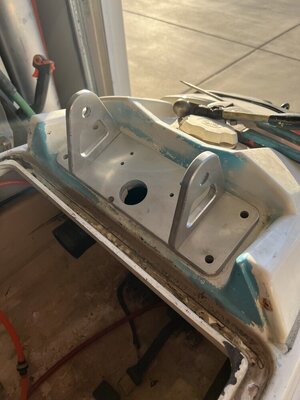
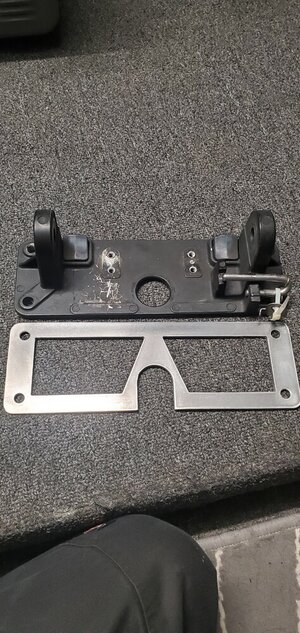
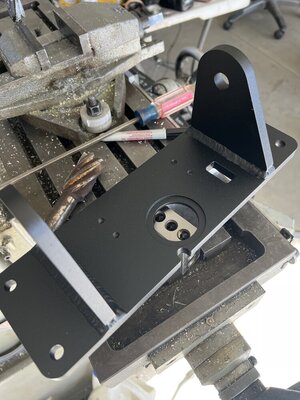
I changed some stuff up on my conversion bracket. Got it welded up today, blasted it, and powder coated it. I incorporated a slot for a kickstand like the new HSI pole. Got rid of the holes in the tabs I had on the previous version, and counterbored the hole for the rubber bellow. Also working on a cable conversion bracket. I’ll have pics of that tomorrow. My pre 08 cable showed up today and my bracket is too short.
 

WFO Speedracer

A lifetime ban is like a lifetime warranty !
Location
Alabama
I needed a trailer to haul UTV's on, my 5 x 8 just isn't big enough, it will haul them but they have to be loaded backwards and the tongue weight is all wrong, so I am looking through Facebook marketplace and find this gem Saturday morning for $300. I went and got it and drove off , I heard a noise so I pulled over the fender was hitting the tire so I pulled it off and continued my journey home.

I am not a professional welder by any means but I can weld two pieces of metal together where they will not come apart. So the second and third pics are what I turned that monstrosity into Yesterday and this morning. I still have to add the toolbox, paint the rails and treat the floor but it did have a brand new wood floor in it. the fenders are now welded to the trailer and the new top rail, solid as a rock.
 

Attachments

  • 278281278_4847714401964265_7741091591581880548_n.jpg
    278281278_4847714401964265_7741091591581880548_n.jpg
    158.9 KB · Views: 31
  • IMG_20220419_114521052_BURST000_COVER.jpg
    IMG_20220419_114521052_BURST000_COVER.jpg
    240.8 KB · Views: 29
  • IMG_20220419_114539063_BURST003.jpg
    IMG_20220419_114539063_BURST003.jpg
    250 KB · Views: 29
I got my cable conversion bracket whipped up today. Originally I wanted to make it work without opening up the slot in the pole, but that didn’t work out. I also had to hit the foam with the burr to open it up a bit. Oh well it all goes under the chin pad. Drilled and tapped the pole for it to use 2)1/4”-20 SS cap screws. The clamp is stainless and bracket is 6061-t6. A2A4556E-DF96-4E1B-A224-4FA51DC381E6.jpeg
0AF131AB-F4E6-45AC-9CA1-8483380265E4.jpeg
8E4EE157-0480-4DF6-A0D8-A308B8D3CE24.jpeg
 
Top Bottom