650/X-2 winter x2 build

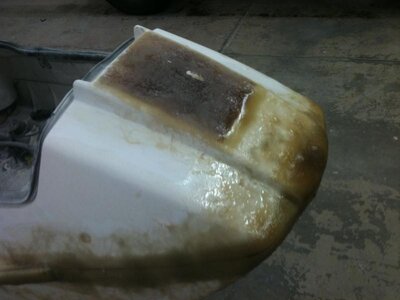
Be careful with your seat area. You cut out the lip on the side. You might not be able to fit the stock seat on if you glass the way it looks like you have the foam.

Also, did you remove the fiberglass under the seat? There's a white line that looks like you didn't remove all the glass? Not sure what you did as I can't see under the foam, but what I'm getting at is that if you are going to do that under the seat remove all the old glass because it's heavier than the foam.

Is that PVC a scupper or your exhaust? You can use PVC for exhaust, but it's much better to use aluminum or stainless. However unlikely, it is possible a backfire in the exhaust could crack or otherwise damage the PVC.

Styling looks nice.

Yes, I did cut all the fiberglass from under the seat, and also i getting rid of the seat and i am doing a peice of turf on the flat part instead. its tuff to explain what I am doing with the seat area but should look very good and clean when I am done. if i get some time i will try to photo shop a picture of what i am going todo.

That is my exhaust and that is 2 inch schedual 40 then also I machined a really nice aluminum tip going on the end. But I am doing another piesce of pvc on the the inside of the piece foamed into my ski allready so it should be pretty thick. i hope it will stand up to back fires!

Thank you very much Vumad for looking over my work! this is my first big project like this so i need to make sure i do this all right so this will last me through next season at least! Any tips along the way are very appreciated!
 
Last edited:

Vumad

Super Hero, with a cape!
Location
St. Pete, FL
I get the basic concept of what you are doing with your seat. If you are keeping the seat but turfing over it, I'd suggest using some 25mm (1 in) hydroturf padding under your turf so you can still sit down on it.

Let me know how your rear exhaust works out. I want to go to a rear exhaust but haven't decided what kind of tubing/fittings to use yet.
 
I did a draw up to show everyone the plan. I have 19mm plush under matting for tray and seat, not planning on sitting much but what to keep it as soft or softer than tray areas.


attachment.php

attachment.php

The purple is the turf with 19mm pad underneeth
 

Attachments

  • x2 seat idea 1.jpg
    x2 seat idea 1.jpg
    38.7 KB · Views: 1,157
  • x2 seat idea 2.jpg
    x2 seat idea 2.jpg
    38.2 KB · Views: 1,166

Vumad

Super Hero, with a cape!
Location
St. Pete, FL
I did a draw up to show everyone the plan. I have 19mm plush under matting for tray and seat, not planning on sitting much but what to keep it as soft or softer than tray areas.


attachment.php

attachment.php

The purple is the turf with 19mm pad underneeth

I don't understand that turf. Why do you have like 1" lip to recess the turf into? That's the area I thought I saw some remaining fiberglass edge. Don't recess anything. Wrap the seat in glass as it is now, put padding on top, cut the edges of the padding so they are not square, wrap the turf over the padding and glue it to the sides of the seat. If you run that seat like that, with fiberglass on either side of your padding, the padding will compress and you will be sitting on the hard glass. It will suck, you will never sit down.

I understand the idea is probably to hold the turf in place. However, it will most likely result in an unuseable seat that holds water and rapidly destroys the seat.
 
I dont ever sit down so its not a priority. mainly just what something light and looks very nice

DAY 4

I got some good progress today and started to fiberglass everything. I need to pick up some more resin tomorrow. So when I took off the front trim it made a gap between top on bottom hull so I put about 4 layers on one side and ran out of resin before I could do another layer on the other. So how many layers should I do of fiberglass?


IMG_0179.jpg
attachment.php

attachment.php


attachment.php

attachment.php


Just recieved my carbs The other day. They are dual sbn 46 red top cabs. I polished the intake and the side plates just trying to decide what to paint them with?

attachment.php
 

Attachments

  • IMG_0180.jpg
    IMG_0180.jpg
    39.4 KB · Views: 1,157
  • IMG_0181.jpg
    IMG_0181.jpg
    28.3 KB · Views: 1,149
  • IMG_0182.jpg
    IMG_0182.jpg
    42.4 KB · Views: 336
  • IMG_0183.jpg
    IMG_0183.jpg
    45.9 KB · Views: 337
  • IMG_0186.jpg
    IMG_0186.jpg
    35.5 KB · Views: 1,150
  • IMG_0187.jpg
    IMG_0187.jpg
    43.1 KB · Views: 1,168
Last edited:

Vumad

Super Hero, with a cape!
Location
St. Pete, FL
I still think you should wrap the seat the way it is, put the padding down on top and feather the edges, then turf over everything. Otherwise, skip the padding all together, just wrap with glass then turf. I don't think recessing for padding will work well for you, that is, it will add weight, hold water, and cost extra money w/o providing a benefit.

Did you cut out the stock fuel fill area or just fill with foam and glass over it? Removing the recess for the stock fuel fill could save some weight (tho, not a lot). May be hard to cut out now that you have glassed over it.

Also, most people just remove the stock steering cover and run their boat like yours is in the above picture. I think the steering covers are nice. Before you glass up the area for the seat, I think you should visit Tom's website. Skishoprules.com. He has a steering cover that is pretty nice. It may be more than you want to spend. At the very least, look at it for an idea. It's a nice look and you may be able to incorporate something similar you can make yourself.

Edit: One more thing... I'm jelous of those carbs! (no idea what to paint them with, but JSS offers a refirbish service, but they certainly don't work for free!)
 
Last edited:
Day 5

SO I am done with glassing I hope! I have pictures from a few nights ago but in the pictures the top of the hood is not done but it is. I also got some tubbing for the steering neck/stem. Right now the ski is at my grandpas house but I am transporting it back down to storage to start the sanding and weld the steering neck. My list of todos for this week before I go to Hawaii week from thursday...

-sand down fiberglass
-get steering neck welded and tapped
-figure out trim controll
-smooth out bottom for new paint


attachment.php

attachment.php

attachment.php

attachment.php
 

Attachments

  • IMG_0194.jpg
    IMG_0194.jpg
    46.7 KB · Views: 1,129
  • IMG_0195.jpg
    IMG_0195.jpg
    47 KB · Views: 1,120
  • IMG_0196.jpg
    IMG_0196.jpg
    45.5 KB · Views: 1,123
  • IMG_0197.jpg
    IMG_0197.jpg
    54.9 KB · Views: 1,116

98SXIPRO

One Of A K1nd
Location
The Bay Area
ive always wanted to build a X2...this thread has inspired me! looks super sick. u just need a SXR800 motor in it now...(or maybe a 701)
 

Vumad

Super Hero, with a cape!
Location
St. Pete, FL
Looks pretty good. You can't sand too deep into the glass. You can make it smoother by taking off some of the resin, but you can't get it smooth w/o sanding into the glass. This is why you need to sand lighty, then use a filler to make it smooth. Not sure what you plan to use as a filler, but I suggest using a 50/50 mix of cab-o-sil/glass microspeheres. The cab-o-sil makes the epoxy thick, while the microspheres make it easy to sand. It's better than bondo because it is epoxy based with glass filler. Only mix about 4 ounces of resin at a time, and add filler until you get a consistancy you like. The downside is that the microspheres can leave pin holes.

The steps...
...sand the glass you put down (so it's not such a smooth finish, but don't sand through the fibers, it makes them weak.)
...mix up resin + your filler mix to make a puddy, smear on ski
...sand filler mostly smooth (doesn't need to be perfect)
...repeat until you have a nice blend that feathers nicely into the origional hull
...sand smooth, like 120 grit, you will still have a few pinholes and not perfect smooth.
...last, paint on resin only, not too thick, very thin just to cover, and try to only paint flat surfaces, if the surface is too steep, then tilt the ski so it doesn't run too much, the thin layer of resin only will fill the pinholes and leave a glossy finish
...sand again (like 240, 600), this time with finer grit and work out all the imperfections
...you can add resin again if you choose, just make sure before you paint that no glass fiber is exposed, use a finer grit for the last time you sand.
 

Fletch

AKA Gordon Liddy...
ive always wanted to build a X2...this thread has inspired me! looks super sick. u just need a SXR800 motor in it now...(or maybe a 701)

I've got a '91 X-2 hull with current reg until 2013 in my name... Fuel door is filled, rear rubber areas in the tray are filled and the hood is chopped. It needs some finish work, but the hard part is done. I'm up in El Dorado Hills. $300 and it's yours. Shoot me a PM if you're interested in building and X-2!
 
Day 6

So I am doing a little sanding now. I am sanding down the large humps then the rest will be filled with filler. Started on my stearing stem today. I just need to find the top plate then I will weld it and then bead blast it then I think I will just clear it. I am hoping to have the launch lever done by the end of the week. tOMORROW i am going to start putting some filler down the sometime this week I will start working my way up grids.


attachment.php

attachment.php

attachment.php

attachment.php

attachment.php
 

Attachments

  • IMG_0199[1].jpg
    IMG_0199[1].jpg
    45 KB · Views: 1,092
  • IMG_0200[1].jpg
    IMG_0200[1].jpg
    45.9 KB · Views: 1,085
  • IMG_0201[1].jpg
    IMG_0201[1].jpg
    51.9 KB · Views: 1,087
  • IMG_0202[1].jpg
    IMG_0202[1].jpg
    50.1 KB · Views: 1,094
  • IMG_0203[1].jpg
    IMG_0203[1].jpg
    59.7 KB · Views: 1,089

Vumad

Super Hero, with a cape!
Location
St. Pete, FL
What are you using to sand? I am using a DA, but if you don't have a compressor that can power a DA, you can get a 5" electric orbital sander for about $30. Will make it a lot less labor intensive for you.
 

Vumad

Super Hero, with a cape!
Location
St. Pete, FL
Something I just noticed... How is the water going to drain away from your steering mounts? It looks like the water is going to collect at the base of the steering. You might want to glass in a small channel that will let the water drain from the steering towards the seat.
 
oh yeah i forgot about the stearing area. i will try to do some kind of drain tomorrow. thanks for catching that. i have a dh off of a big craftsmans air compresseser. i am using a 60 grit then once i get filler down im shooting for 150 grit then one i get a perfect shape then move up to a 220 to a 320.
 

Vumad

Super Hero, with a cape!
Location
St. Pete, FL
Let me know where you find your cart tank. I might try to find one that is about 4ga. My 550 tank is on it's way out.
 
Top Bottom