Yamaha Octane build

I bought a new unassembled octane hull a while back, thinking it would be nice to build a ski myself with my favorite componets.

After realizing how much work it was going to be, I lost interest. I had it for sale for a while but no one bought it. After not having a stand up to ride for the last couple of months I decided I needed a ski again, so I'm back to the original plan.

This will be a scalloped, lighter than oem octane with yamaha 66e power.
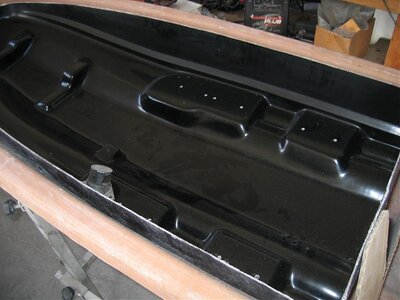
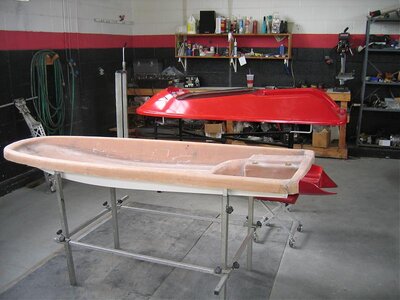

The beginning:

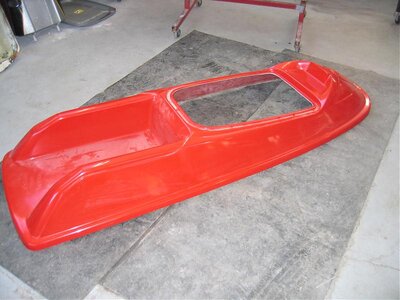
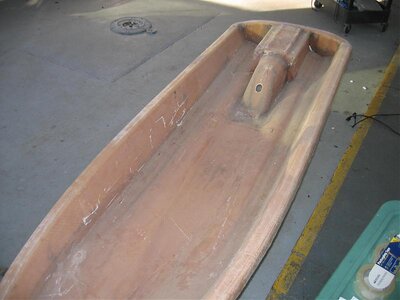
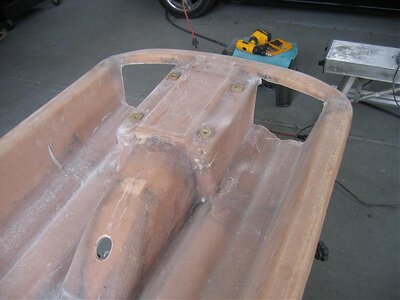
A factory oem polaris top deck , bottom deck and hood. Completely bare.
 

Attachments

  • febebaystuff 002.jpg
    febebaystuff 002.jpg
    63.8 KB · Views: 181
  • febebaystuff 007.jpg
    febebaystuff 007.jpg
    55.9 KB · Views: 227
  • febebaystuff 005.jpg
    febebaystuff 005.jpg
    58.2 KB · Views: 203
  • febebaystuff 001.jpg
    febebaystuff 001.jpg
    49 KB · Views: 252
My favorite part: cutting up the hull, making replacement panels and glassing it back in.
 

Attachments

  • octanebuild 002.jpg
    octanebuild 002.jpg
    54.5 KB · Views: 198
  • octanebuild 004.jpg
    octanebuild 004.jpg
    54.1 KB · Views: 254
  • octanebuild 003.jpg
    octanebuild 003.jpg
    51 KB · Views: 205
  • octanebuild 010.jpg
    octanebuild 010.jpg
    65.8 KB · Views: 312
  • octanebuild 012.jpg
    octanebuild 012.jpg
    82.7 KB · Views: 208
Last edited:
back panels coming together. still need to glass outer seams. Also ground down the pump mounting boss so the tilt nozzle wont hit it when the bars are turned.
 

Attachments

  • octanebuild 018.jpg
    octanebuild 018.jpg
    44.8 KB · Views: 317
  • octanebuild 019.jpg
    octanebuild 019.jpg
    35.2 KB · Views: 215
  • octanebuild 016.jpg
    octanebuild 016.jpg
    69.1 KB · Views: 205
  • octanebuild 014.jpg
    octanebuild 014.jpg
    57.6 KB · Views: 228
  • octanebuild 013.jpg
    octanebuild 013.jpg
    67.5 KB · Views: 207
Starting rounding up brass inserts. I prefer brass but brass metric is very hard to find. I found some factory yamaha inserts but some of them are small cylinders and I don't feel they'll glue to the hull as well as larger square and and hex inserts. I will be making most of them from some scrap brass from a local metal salvage. Intake grate insert will be aluminum because it's it was made before the brass was found.
 

Attachments

  • octanebuild 029.jpg
    octanebuild 029.jpg
    46.9 KB · Views: 235
  • octanebuild 009.jpg
    octanebuild 009.jpg
    53.3 KB · Views: 225
  • octanebuild 011.jpg
    octanebuild 011.jpg
    56.9 KB · Views: 201
  • octanebuild 030.jpg
    octanebuild 030.jpg
    107.3 KB · Views: 276
Mounting the 66e motor turned out to be much easier than first planned. Luckily the superjet/xjet/rev bottom hulls are so similar to the octane that Waterdawg Kustomz inner plate fits right in, this makes the build so much easier. Jeff saved me months of work and really helped me out with this Pictured is the whole piece. I'll be trimming it down considerably and fabricating a bulkhead. Using cardboard for the bulkhead template, glass will be wetted out then trimmed to match the templete.

After the inserts are glued in place Ill be trimming and fitting the bedplate in.

The bedplate will be glued in, and once the top deck is on. It will all be tied together with glass and texilium
 

Attachments

  • octanebuild 024.jpg
    octanebuild 024.jpg
    62.2 KB · Views: 288
  • octanebuild 027.jpg
    octanebuild 027.jpg
    63.7 KB · Views: 193
  • octanebuild 026.jpg
    octanebuild 026.jpg
    58.9 KB · Views: 211
  • octanebuild 023.jpg
    octanebuild 023.jpg
    56.3 KB · Views: 295
  • octanebuild 022.jpg
    octanebuild 022.jpg
    82.4 KB · Views: 295
Last edited:
major thanks to Chad Laird. His help is making this possible to be on the water before the winter. I love to cut things up and he loves to fiberglass.

top deck is going to run waterdawg pole, waterdawg rev footholds and wamiltons bracket. It will be lightly reinforced in the areas I usually damage.
 

Attachments

  • octanebuild 005.jpg
    octanebuild 005.jpg
    74.8 KB · Views: 100
  • octanebuild 006.jpg
    octanebuild 006.jpg
    69.5 KB · Views: 108
  • octanebuild 008.jpg
    octanebuild 008.jpg
    67.9 KB · Views: 235
Last edited:
Did I hear you say you are doing a trim???? I thought you hated trim? :biggrin:


every trim i've run before i hated, but it seems to be a necessary evil so I'm going to try the skat-trak one. One good thing about starting with a hull this bare, i can put the steering and trim cables where they work the best. Its nice to have the pump mount bosses ground down too.
 
Last edited:

RMBC Freeride

Vintage
Site Supporter
Location
Pueblo, CO
Looks sweet, nice work! 2 suggestions: build up a kick-tail in the tray like a superjet and trim the entire bond flange up a little higher than a factory octane (it is really deep and seems to channel too much water along the sides of the hull like a super-long sponson)
I have a little Yamaha-Octane project in the works too... :sneaky: :brap:
 
Very nice work. So with that hull insert, does that mean that the xjet is actually an octane bottom hull copy?


no the octane is basically a superjet copy, the x jet is also basically a superjet copy (on the bottom except the front is a little wider). The octane's only difference (except for that front v) is it's wider outside the strakes. The pump shoe is superjet, the pump tunnel is superjet and the strakes are superjet. The waterdawg hull insert fits inside it just isn't as wide (5/8" narrow on each side). I'd bet that the pieces that wcf and wamilton make for their hulls would fit also. I used the waterdawg piece to save time and be able to run 66e motors along with 61x/62t motors.

Thanks for the compliments
 
Looks sweet, nice work! 2 suggestions: build up a kick-tail in the tray like a superjet and trim the entire bond flange up a little higher than a factory octane (it is really deep and seems to channel too much water along the sides of the hull like a super-long sponson)
I have a little Yamaha-Octane project in the works too... :sneaky: :brap:

Didn't notice it didnt have a kicktail until you posted this. I will build one, do you think i should build the kick tail with glass or pad buildup?
 

douglee25

m3booooy
Location
South Jersey
I'm sure you have this taken care of, but I'll put it out there anyway. :smile:

When you put that insert in the hull you may want to check driveshaft alignment before you glue it down. I would mock up the whole enigne and driveline just to be sure. My thought was even though the insert may fit right in, the height of it (too high or too low) could cause issues with your driveline later on in the build (after you've assembled everything).

Good luck man. Look awesome!

Doug
 
Top Bottom