1990 Squarenose Superjet to Freestyle Machine

Location
I
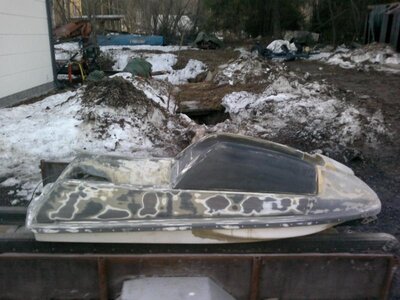
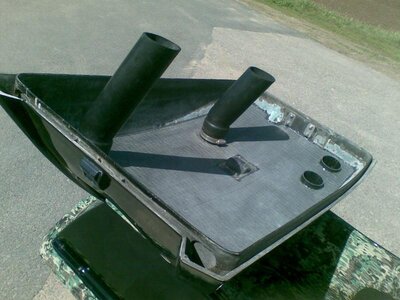
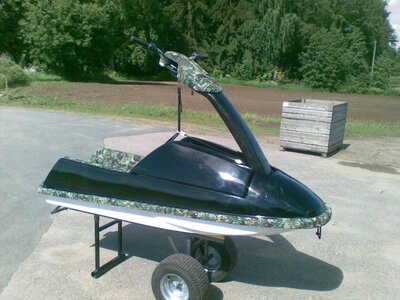
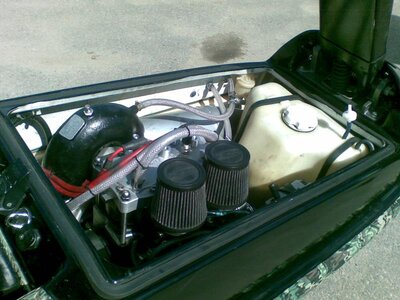
Ski is almost ready now...
 

Attachments

  • 20062010(021).jpg
    20062010(021).jpg
    66.8 KB · Views: 128
  • 20062010(007).jpg
    20062010(007).jpg
    74.6 KB · Views: 106
  • 20062010(017).jpg
    20062010(017).jpg
    65.5 KB · Views: 68
  • 20062010(006).jpg
    20062010(006).jpg
    75.5 KB · Views: 106
  • 20062010(003).jpg
    20062010(003).jpg
    68.9 KB · Views: 91
  • 20062010(008).jpg
    20062010(008).jpg
    80.9 KB · Views: 118
  • 20062010(005).jpg
    20062010(005).jpg
    81.2 KB · Views: 78
  • 20062010(001).jpg
    20062010(001).jpg
    75.8 KB · Views: 99
  • 20062010(016).jpg
    20062010(016).jpg
    76.5 KB · Views: 87
  • 20062010(009).jpg
    20062010(009).jpg
    93 KB · Views: 110
Last edited:
Location
I
I blame myself because i dont widen that tray also... Im quite big and need more room for the tray. But im not interested to rip off perfect turf so next i will be making mine sxr hull working... And keep superjet in that shape...
 
Location
I
Does anybody have any suggestions what i need to do for water ingestion... I have two hard ride days at weekend and both days i had to flush the engine because of major water ingestion. I havent done any subs or that kind of tricks, both time quite similarly ski flips off and stays few moments in right side...

i have sxr carbs so stock superjet air filter box wont match... Also does mine hood liner need redesign? Engine takes all air rear part of hood and from the pole.
 
Location
I
I have coupler cover in place. Last summer i have filter covers but for those r&d filters doesnt have ones.
 

jamme

is the stig
Location
Finland
03022011452.jpg03022011455.jpg

The build quality and "interesting" solutions that were used during the building of this ski forced me to use rather drastic measures to fix the flaws. Above is illustrated the current state of the ski. This complete rebuild also includes swapping the blown 62t-6m6 zombie motor into a brand new 760 64x.
 
Location
I
It is sad to see that nose doesnt hold. Now it is perfect excuse to move that pole forward and shorten that hull. Make that ski rip!

View attachment 144465View attachment 144466

The build quality and "interesting" solutions that were used during the building of this ski forced me to use rather drastic measures to fix the flaws. Above is illustrated the current state of the ski. This complete rebuild also includes swapping the blown 62t-6m6 zombie motor into a brand new 760 64x.
 
Bad build quality and wrong material choices, made the nosejob remind me of Michael Jakson. We were about to fix some litle cracks and realized that the whole nosejob had been done with wrong methods. So few taps with hammer and all that glassing (and terrible amount of bodyfiller), from buildup came of (polyester resin does NOT bond with SJ PUR top deck).

This matter of material choice was discussed when jamme bought the ski and from there forward we were anticipating rebuild. Rebuild will propably not include big modifications because we are doing also this other SN with shortened nose (-15 cm), and were not sure if our modifications will work in water. So wi well do on test first and jammes jet propably only be fixed.
 

jamme

is the stig
Location
Finland
05022011457.jpg08022011459.jpg08022011458.jpg

New nose starting to take rough shape slowly but surely. As for the look I decided to go for what I'd like to call "Sqround nose". SN with a hint of RN as a cherry on the top.
 

jamme

is the stig
Location
Finland
21022011462.jpg21022011463.jpg21022011465.jpg

First fiberglass work done, the outerlayer of the new nose. Fiberglass layed on top of the polyurethane mold. The outside fiberglass work was done using three layers of different mats.

Next step is taking the polyurethane mold apart, completely remove it and then lift the ski on it's nose and glass the inside of the nose. This will make the nose considerably stronger and by glassing the inside it allows the use of larger area for attachment to make sure everything will stay in place. The glassing of the inside will go all the way from the very tip of the nose to the beginning of the battery placeholder, this ensures proper and strong attachment for the new nose.
 
Last edited:

jamme

is the stig
Location
Finland
Nosepiece glassed from the outside. Next step applying fiberglass to the inside to make sure the nose is stronger than Mr T. Below some new photos.

09032011471.jpg09032011475.jpg09032011472.jpg
 

jamme

is the stig
Location
Finland
After double digit hours of sanding FINALLY the ski got the first layer of primer today. Then again sanding and more sanding + fixing the slight imperfections in the shapes and making sure the lines follow SNs original lines. Then hopefully next week the final paint. The new 64X motor should arrive from the US within few weeks after which I can start the final assembly.
14042011018.jpgView attachment 15010917042011022.jpg17042011033.jpg17042011034.jpg17042011035.jpg
 

Attachments

  • 14042011021.jpg
    14042011021.jpg
    71.5 KB · Views: 48
Last edited:
Top Bottom