Super Jet 1996 Round Nose SuperJet Project

Footholds

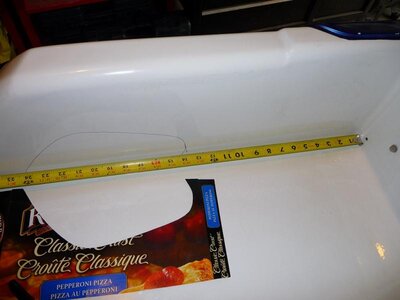
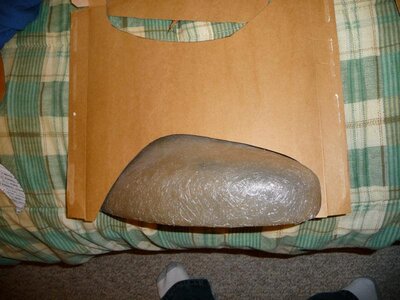
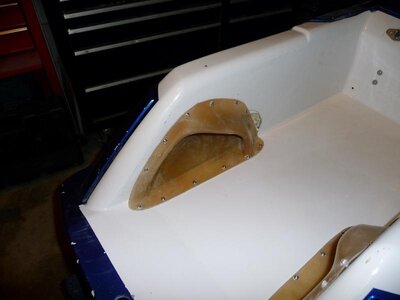
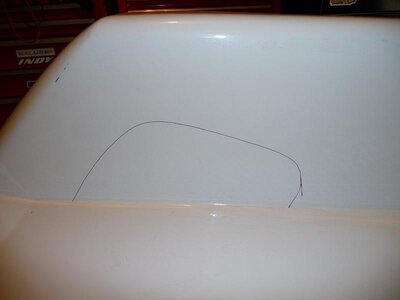
Since footholds are one of the first mods most riders are recommended to do I figured I would start there. My first order of business was to get a template figured out. Once I received my EME (Eric Malone) footholds (http://www.ericmalone.com/Merchant2/merchant.mvc?Screen=PROD&Product_Code=CFH&Category_Code=APA), I took the cardboard lid from my new work boots box and started drawing an outline of the hold but only a small one. The point was to get the hold to slide into the template toe first, and wrap it around behind the template. Eventually I found that sweet spot for a close fitting outline that fit the hold nice and snug, but also had lots of face contact with the flare on the holds.

Then I took my template out, measured from the front of the tray toward the back and drew my template outline. You will notice that I only went 14 inches back from the front of the tray...not a good call. I should have measured 16 inches back because the right hold cutout had about 3 inches of the exhaust tube protruding on an upward angle toward the front of the ski and wouldn't allow the hold to sit down flat on the tray.

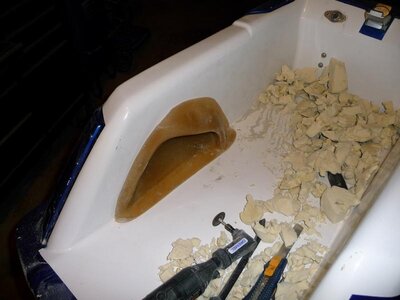
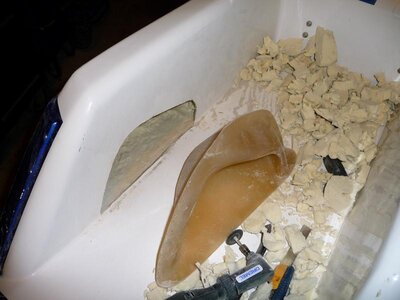
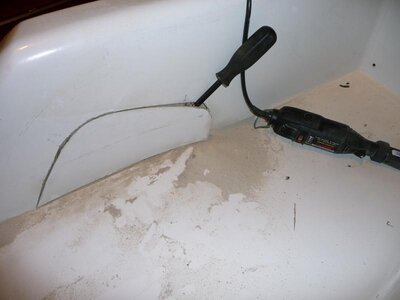
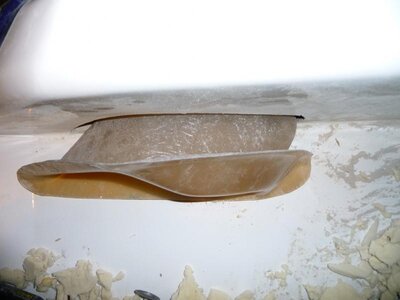
To cut out the hole for the hold I used a Dremel rotary tool with a 90 degree attachment and a fair number of cut-off discs. A lesson learned, those little red fiber washers on the disc arbor actually have a purpose. They secure the discs from spinning on the arbor shaft while using the Dremel. I burnt out the center of a few discs because they weren't there at the time. During the cutting, I found that running the cut-off disc in most of the way to the arbor will make sure the hull gets properly cut and not have any SMC fibers still holding on.

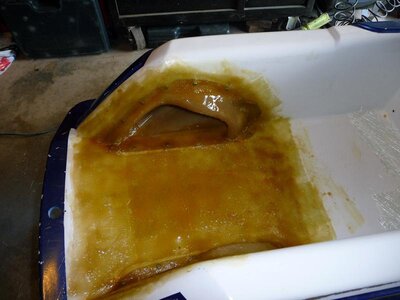
Next, using a small pry bar I removed the cutouts and yes they were a little bit tough to peel out of there due to that foam being stuck to them. The pieces stuck to the foam sounded like the hull was splitting as I was prying them out but that was all it was...foam stuck to pieces. I dug out enough foam to squeak the holds into place and what little air space there was left around the holds inside the hull, I re-packed with some of the foam I dug out for the placement of the holds. I then installed my holds, and used some stainless machine screws to keep them in place, I think I used #10's but can't really remember now.

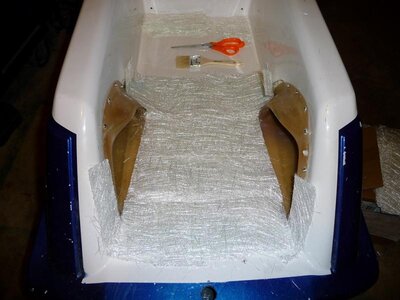
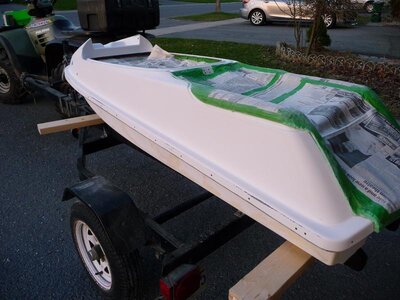
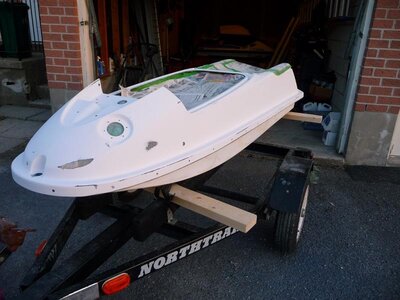
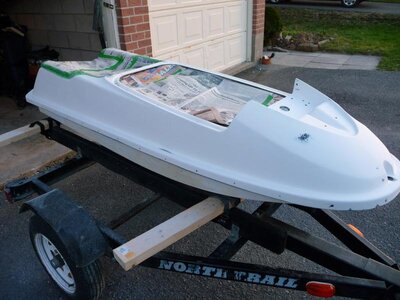
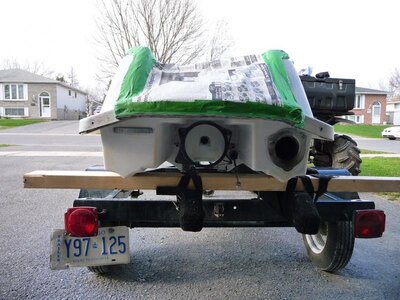
Finally came the glass work. I laid out my first sheet as it appears in the pic and tried to tuck in my upright strips so they would stay in place on their own while I painted on some resin. The strips actually stayed in place reasonably well, of course there were a few that had to be positioned after a dab or two of resin was in place first but that was to be expected. I did this process about 3 times and used the woven fiber type of glass sheet instead of the style that looks like a screen. The woven style is supposed to be much stronger over the screen style. I also did it this way because I kept in mind that once the holes for the footholds are cut out, the structural rigidity decreases too so I wanted the strength to keep my tray going for hard landings and beginner grade freeride crashes. When doing the glass work though, I also made it a point of allowing the glass to cure between each layer. 3 layers of woven fiber glass, 3 cure times.

One quick note, it is a dirty, dusty and not good for the lungs situation. If anyone does this I really recommend using at least a P100 certified breather mask because it is safe to use with paint fumes, resin fumes, glass dust, and other hazardous materials such as asbestos. I also really recommend getting some nitrile gloves and a long sleeved shirt for this because it is also very itchy and a sticky mess to work with. Forgot to mention safety glasses, when the cut-off discs explode (and some of them will) the pieces go everywhere...including to your face.
 

Attachments

  • Footholds 2.jpg
    Footholds 2.jpg
    40.8 KB · Views: 156
  • Footholds 1.jpg
    Footholds 1.jpg
    74 KB · Views: 166
  • Footholds 10.jpg
    Footholds 10.jpg
    52.3 KB · Views: 189
  • Footholds 9.jpg
    Footholds 9.jpg
    61.3 KB · Views: 179
  • Footholds 8.jpg
    Footholds 8.jpg
    32.2 KB · Views: 158
  • Footholds 7.jpg
    Footholds 7.jpg
    47.1 KB · Views: 161
  • Footholds 5.jpg
    Footholds 5.jpg
    48.7 KB · Views: 156
  • Footholds 4.jpg
    Footholds 4.jpg
    35.9 KB · Views: 151
  • Footholds 3.jpg
    Footholds 3.jpg
    21.6 KB · Views: 152
  • Footholds 6.jpg
    Footholds 6.jpg
    38.4 KB · Views: 151
Last edited:
Paint

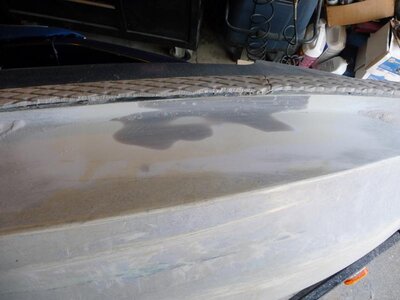
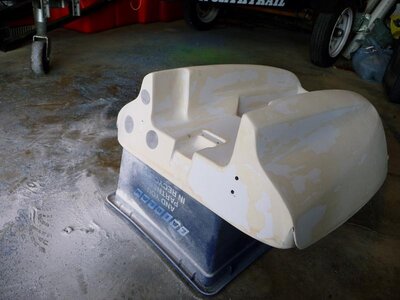
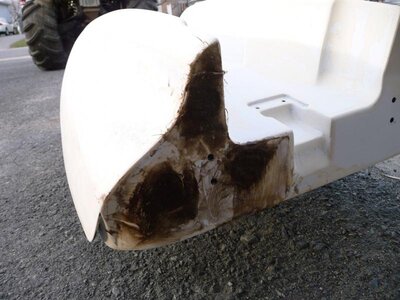
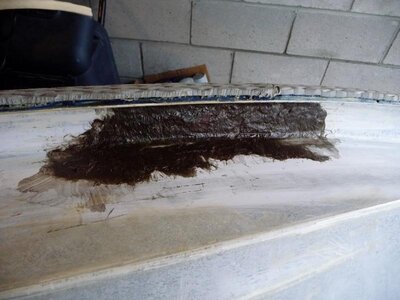
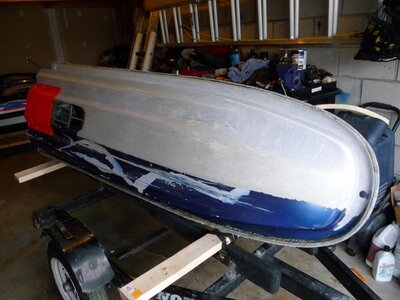
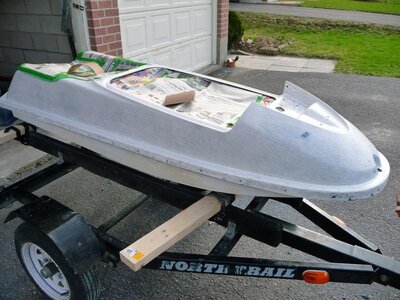
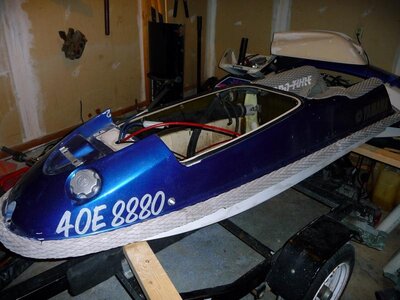
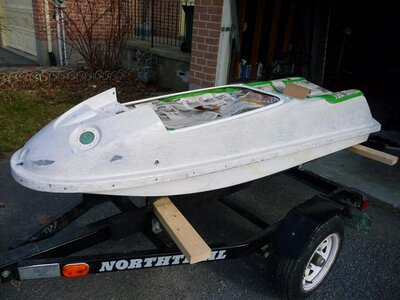
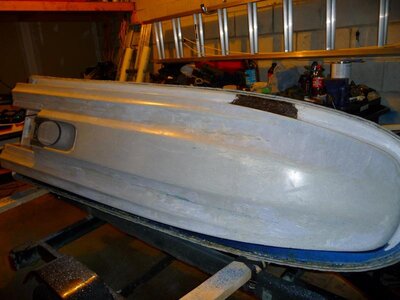
When I first started this build I painted the ski as seen in the majority of the first page. Just to update everyone on the then new color...it held up reasonably well as far as not being lifted by the water. The weakness though was its resilience. It did not hold up well to chipping or scratches and it cost a lot to rattle can it up. I went through about 8 cans of primer, 8 cans of paint, and 10 cans of clear coat. I tried using Tremclad clear coat, VHH, Color Match, and also aluminum wheel clear coating. All of it chipped and scratched with no effort at all. On top of that, my hull decided to break open on the right side just below the bond line. So now there is a glass repair needed and the blue paint has to be stripped off to do the glassing anyway, so the ski will be a new color entirely. I really like the rattle can idea because I still believe it can be done very inexpensively while maintaining a good quality finish so I will be doing it that way again. I am by no means a professional painter or body technician. Those guys had to go through a lot of training to get good at what they do. My method is just me being impatient and uninformed on how to use an airbrush or achieve any factory finish results. But I do have some ideas on the go, from what little I have painted so far it definitely has a lot more appeal and holds the potential to really look nice when finished. My hopes are that it turns out to be much better than the first attempt with the blue and have a much more resilient and durable finish. This portion of my build will be at least two to three weeks of work before it gets finished so for now I will hold off with posting any pics.
 
Last edited:
Thanks Honda, I really don't have much knowledge of the different paints on the market other than what I have used. Quite often I will go with whomever has the color or color depth that I want without really knowing fully how well the product will stand up. With the clearcoats I used though, I just stayed with the product description on the label. At the end of the day though, they didn't stand up at all. What was worse was that even the claims they made such as chemical resistant etc, it was bogus. A few drops of gas on the clear and spots started forming.
 
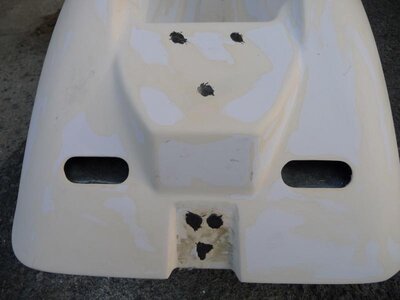
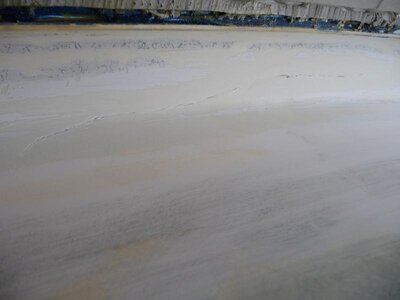
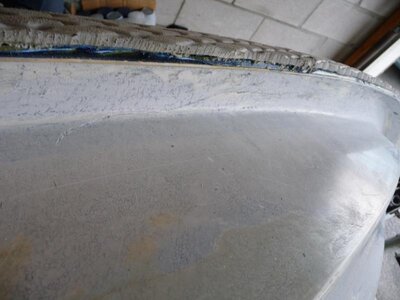
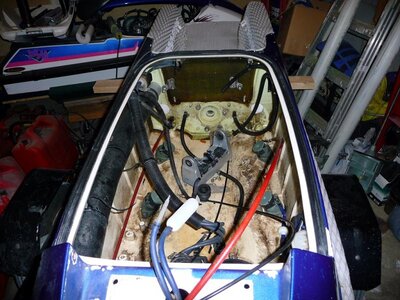
For the last few days I have been trying to stay steady putting in about three to four and a half hours a day getting the ski ready for paint. So far I have covered a reasonable amount of ground. Although I don't have any pics of it, I spent about 10 hours scraping paint from the hood. Last night I tried to get as much paint on the bottom half scraped off as well as do the glass repair to the hull, finish filling the holes in the hood where the latch used to go as I will now be using a Brap Strap, fill the holes where the old rubber handlepole bumper was, and plug and glass over the old air intake holes in the front of the hood. My compensation for the three air inlet holes will be to replace the rubber fitted plug at the handlepole bracket with a piece of rubber hose or something similar and running it up inside the handlepole as my new breather tube. That should allow enough air in to suit the engine requirements.
 

Attachments

  • Repainting 6.jpg
    Repainting 6.jpg
    46.8 KB · Views: 138
  • Repainting 10.jpg
    Repainting 10.jpg
    34.5 KB · Views: 148
  • Repainting 9.jpg
    Repainting 9.jpg
    54.1 KB · Views: 143
  • Repainting 8.jpg
    Repainting 8.jpg
    31.5 KB · Views: 141
  • Repainting 7.jpg
    Repainting 7.jpg
    63.1 KB · Views: 152
  • Repainting 5.jpg
    Repainting 5.jpg
    57.3 KB · Views: 140
  • Repainting 4.jpg
    Repainting 4.jpg
    59.3 KB · Views: 153
  • Repainting 3.jpg
    Repainting 3.jpg
    31.7 KB · Views: 139
  • Repainting 2.jpg
    Repainting 2.jpg
    47.9 KB · Views: 140
  • Repainting 1.jpg
    Repainting 1.jpg
    64.7 KB · Views: 146
Last edited:
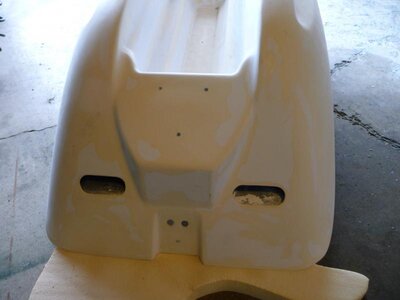
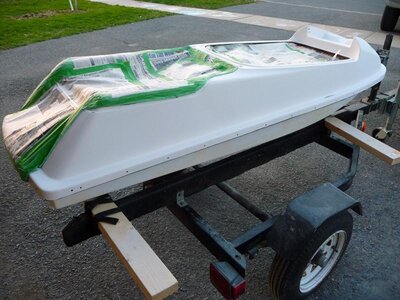
Over the last week or so, I removed the engine and handlepole assembly, and prepped the top deck for paint. This business of having a torn rotator cuff in my right shoulder has been bothering me to no end by preventing me from doing any further paint removal until now. Although this sort of thing does not heal quickly, it has made good progress and allowed me to get back to my project. Today I managed to accomplish a lot. I have scraped off all of the remaining paint and contact cement as well as sand it all down to get a nice and clean finish with enough scuff to give a good surface for the paint to cling to. I used 100 grit sand paper and the heavily oxidized SMC material cleaned up as if it were body filler. Tomorrow should see more good progress since there will very little preparation left and the plan to begin painting will take place as long as the weather stays good. All that is left now is some final touch-ups with the taping and a good cleaning before painting. I plan to go around the bondline with a clean shop towel and some "Goof-Off" adhesive remover just to make sure all the contact cement has been cleaned up. To clean the top deck of both dust and any oils left from my hands I will spay another clean towel with some brake parts cleaner to give the whole thing one final cleaning. While I am getting all of my painting preparation done I will also hang some sheets of plastic dropsheet to act as curtains in the garage and prevent any overspray from covering everything else in there. I plan to allow each deck one week of sitting time after painting and clear coating to give them hopefully enough time to establish a good cure.
 

Attachments

  • Paint Stripping 8.jpg
    Paint Stripping 8.jpg
    82.6 KB · Views: 134
  • Paint Stripping 7.jpg
    Paint Stripping 7.jpg
    72 KB · Views: 132
  • Paint Stripping 6.jpg
    Paint Stripping 6.jpg
    67.9 KB · Views: 128
  • Paint Stripping 5.jpg
    Paint Stripping 5.jpg
    67.8 KB · Views: 128
  • Paint Stripping 2.jpg
    Paint Stripping 2.jpg
    87.1 KB · Views: 132
  • Paint Stripping 1.jpg
    Paint Stripping 1.jpg
    86.7 KB · Views: 135
  • Handlepole Removal 2.jpg
    Handlepole Removal 2.jpg
    94.8 KB · Views: 145
  • Handlepole Removal 1.jpg
    Handlepole Removal 1.jpg
    69.6 KB · Views: 150
  • Paint Stripping 3.jpg
    Paint Stripping 3.jpg
    75.2 KB · Views: 141
Last edited:
swapmeet

Brotastic
Location
Arlington TX
Have you picked a color?

I used duplicolor automotive spraypaint on my RN, I didn't cover the whole thing, but I looks sharp. My best advice is to wet sand and buff the clear. It really helps the shine.


That epoxy paint mentioned above is super strong too...

Keep up the good work, sounds like you're learning a lot and that's half the fun. The other half is doing something twice ;)
 
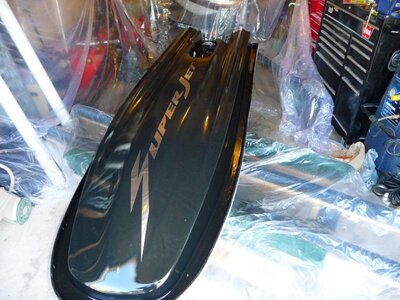
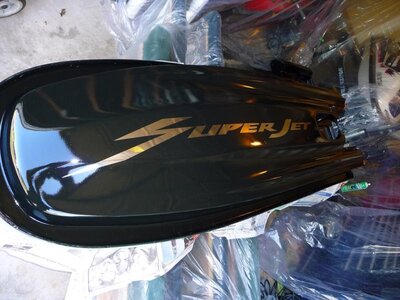
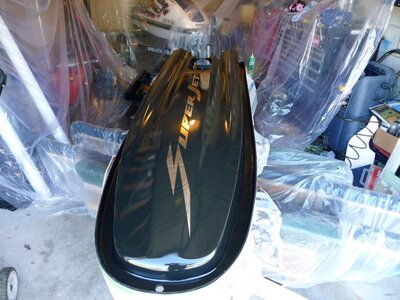
I have decided on keeping it simple and clean this time around because I don't want there to be a third time of fun with painting lol. This time around I decided to go in a completely different direction and hope that this method will hold up. I have decided to go with gloss Rustoleum black and to finish it with a clearcoat using Minwax Helmsman spar urethane. I have already done up the nose cover and it turned out to be a lot better than I had expected. The Minwax is recommended for both indoor and out, and as an added point of interest it is also the same clearcoat used for bar tops. So I figure it should be good and tough. The nose cover seems to have really taken a liking to it and unlike the last paint job, this one seems to be holding up much better. As for the wet sanding, with the Minwax it won't be necessary, it coats so well that it always looks wet and it is thin enough to use in an hvlp paint spray gun. When I did the nose cover I wanted to try it will just a brush for the heck of it to see how it would look. There are spots that could use some wet sanding from the brush strokes and a light recovering, but that is ok with me. That nose cover needs to be replaced anyway. The previous owner of the ski put a black oval HydroTurf decal on it and the adhesive on the decal reacted against the plastic. Now I have a permanent blistered up oval in the nose piece...it almost looks as if it were a part of the mould from when the plastic was poured. I will get a few more pics up later tonight.
 
Last edited:
Last week I finally have managed to get some paint down and last night, one decal. My color scheme will be black/mirror chrome/light gray. Right now all of the bottom is done and ready for clearcoat. Although it has been dry and curing for almost a week, and currently looks really nice and shiny already, the clearcoat will make it have a lot more depth and always look like it is wet. I am hoping to get some clear put on this weekend but it will all just depend on when and if the opportunity arrives. Anyway, here is the mostly finished bottom with three light coats of Rustoleum gloss black, hope you like the rattlecan artwork.
 

Attachments

  • Painted Bottom Deck And Decal.jpg
    Painted Bottom Deck And Decal.jpg
    77.5 KB · Views: 179
Last edited:
Thanks Honda, I am trying to pace myself but with the season getting so close for me it's tough not to. I did however get the last of the clearcoat done to the bottom last night. I found that the Minwax Helmsman spar urethane likes to go on thick, almost to the point of where it should look like it is ready to run down the hull. Although there are some slightly imbalanced areas due to small curtains which accumulated, I think they will still not be overly noticeable and in time when the urethane is fully cured I should be able to go over it with a nice polishing compound like the Starbrite premium polish and turn this clearcoat into a mirror. At the moment though it does have a slightly textured look to it but it certainly did make the gloss black paint look much more brilliant. I still think the job is not bad though for this being my first time ever using an HVLP (high volume low pressure) paint sprayer. Saturday will be the day to flip it over and get started on the rest of the top deck.
 

Attachments

  • Clearcoat 1.jpg
    Clearcoat 1.jpg
    69 KB · Views: 165
  • Clearcoat 2.jpg
    Clearcoat 2.jpg
    73.9 KB · Views: 165
lol...yessum. I want to put the 2013 SuperJet decal scheme on it and after seeing the way they are, I realized I should have waited to clearcoat the sides of the bottom. So now I am just going to get it all painted up by the end of the weekend and get started on the engine work. I expect to have it up and running by the end of this month.
 
Pump Blueprinting

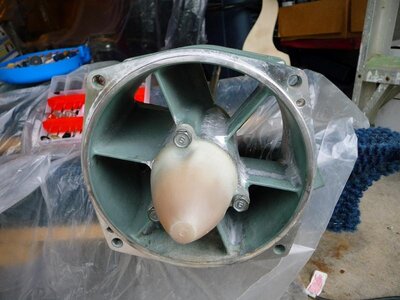
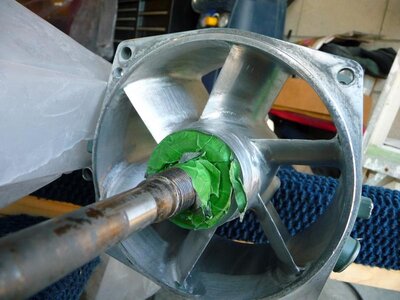
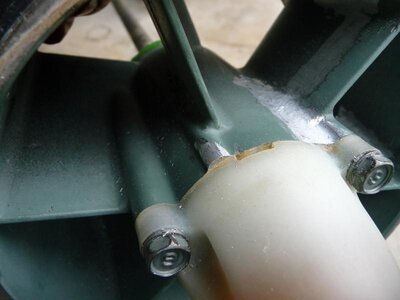
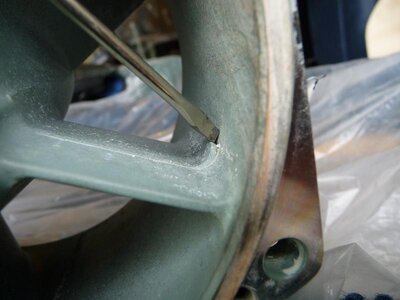
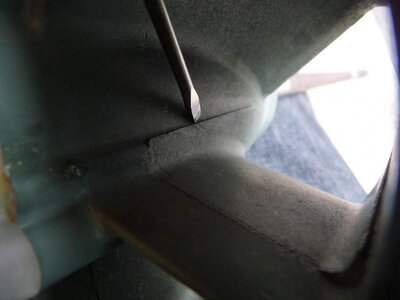
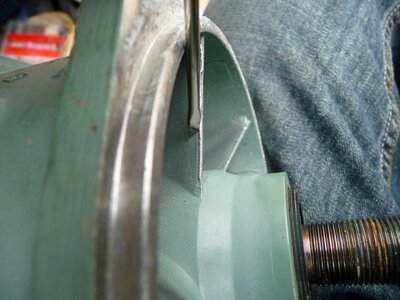
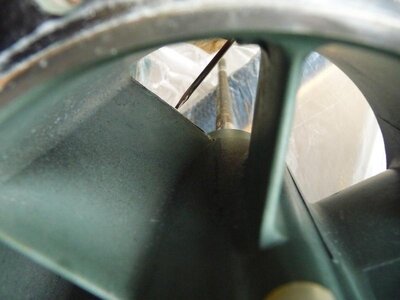
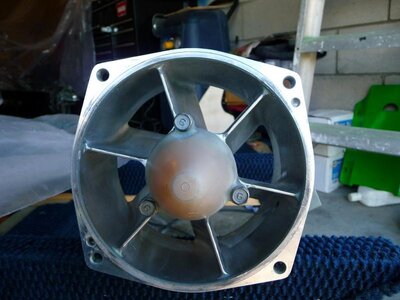
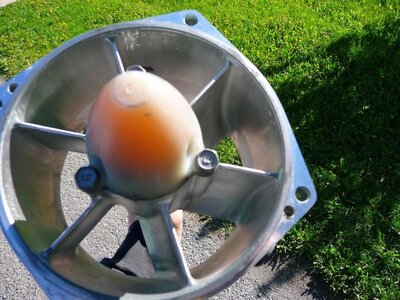
I figured that my plan for the painting work is all posted now so all that is left is updating the photos of when it is done. This weekend the weather was terrible up here so finishing the painting was not possible. But to keep the build going, I decided on Friday to get working on blueprinting the pump. It took about the same length of time as what most people have been describing, 10 hours. Unfortunately the area is small and hard to get work with which meant that the majority of the polishing had to be done by hand rather than by rotary tool. This is my first time blueprinting a pump, but after some research I found that it is the same process as polishing exhaust ports. All that is needed is to remove any of the casting imperfections and extra material left inside from the moulds, such as bad spots in the mould or an overlapping seam line from where the two halves close together if that is the design they use. In these first few photos I have pointed out the areas of material I chose to remove.
 

Attachments

  • Pump Blueprinting 6.jpg
    Pump Blueprinting 6.jpg
    63.9 KB · Views: 149
  • Pump Blueprinting 10.jpg
    Pump Blueprinting 10.jpg
    64.6 KB · Views: 144
  • Pump Blueprinting 9.jpg
    Pump Blueprinting 9.jpg
    56.2 KB · Views: 136
  • Pump Blueprinting 8.jpg
    Pump Blueprinting 8.jpg
    98 KB · Views: 143
  • Pump Blueprinting 7.jpg
    Pump Blueprinting 7.jpg
    62.4 KB · Views: 145
  • Pump Blueprinting 5.jpg
    Pump Blueprinting 5.jpg
    40.7 KB · Views: 145
  • Pump Blueprinting 4.jpg
    Pump Blueprinting 4.jpg
    43.5 KB · Views: 145
  • Pump Blueprinting 3.jpg
    Pump Blueprinting 3.jpg
    36.3 KB · Views: 141
  • Pump Blueprinting 2.jpg
    Pump Blueprinting 2.jpg
    54.6 KB · Views: 137
  • Pump Blueprinting 1.jpg
    Pump Blueprinting 1.jpg
    40.2 KB · Views: 133
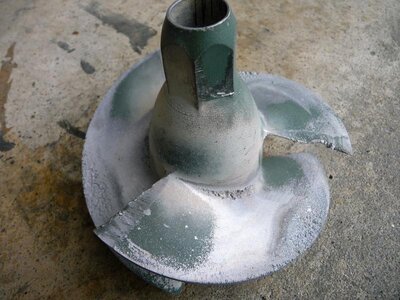
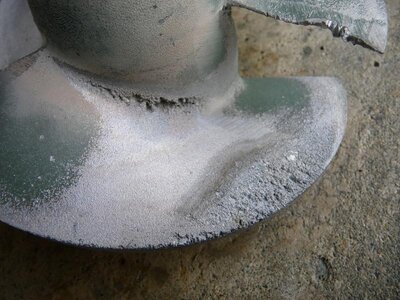
With fingers worn tender and thin, I managed to get all the sanding and blueprinting work done. Although I could have made it look much more mirror like, I figured that it was a substantial improvement over the original configuration and my fingers really couldn't handle anymore sanding. An interesting thing to note, I was surprised to see how much cavitation boil there was on the stock impeller. I have seen this sort of damage before but it was usually a result from electrolysis corrosion on outboard lower units. That was why they added in the sacrificial anode block just above their prop. I don't believe this is the same thing though because the ski is never allowed to remain constantly floating in any body of water. When the ride is done, the ski goes home. Interesting to see the damage cavitation boil does though.
 

Attachments

  • Impeller Cavitation Boil.jpg
    Impeller Cavitation Boil.jpg
    79 KB · Views: 136
  • Impeller Cavitation Boil 2.jpg
    Impeller Cavitation Boil 2.jpg
    88.9 KB · Views: 146
R&D Pump Stuffer

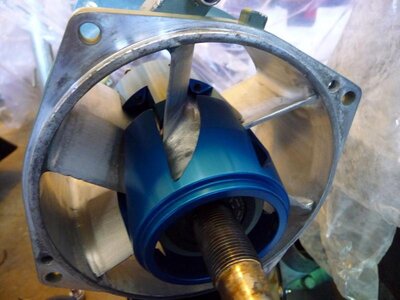
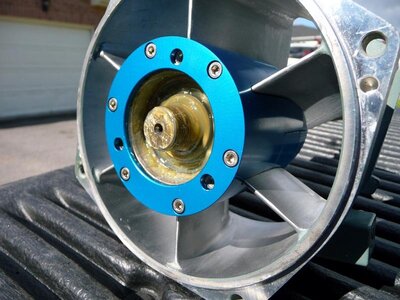
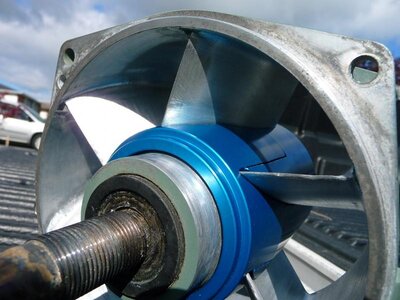
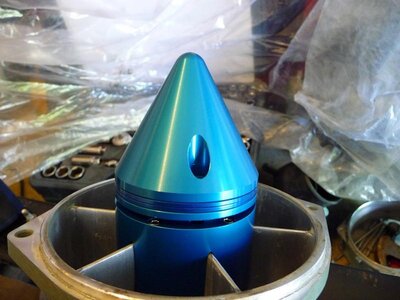
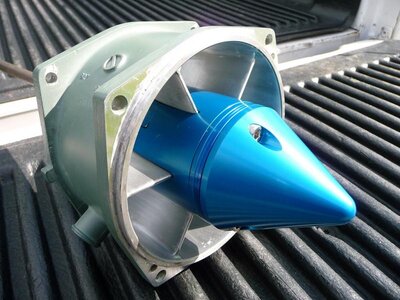
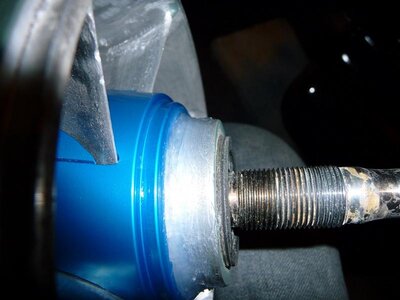
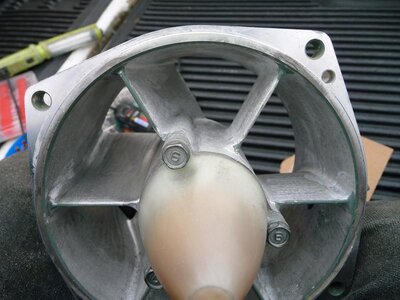
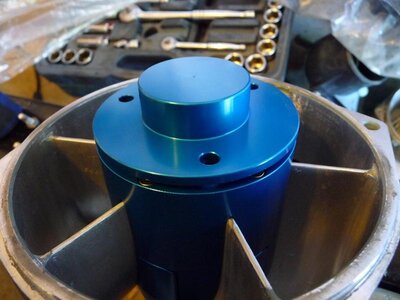
This morning I did some final touches to the finish of the pump, then I took to the R&D Afterburner pump stuffer. This thing looks awesome! The installation was easy too. With the pump and impeller removed, you just slip the back half of the stuffer on over the hub of the pump, then assemble from there. I used blue loc-tite on all the screws including the three supplied for replacing the pump cone bolts. Once the two halves were in place and the end cap and cone were ready for installation, I did a quick check on how many of the two shims should be used. The instructions were oriented toward racing but I figured that with the added material removed from the pump after blueprinting, I could use both shims. Basically, unless the ski remains totally stock, then it all comes down to determining what setting gives you the best desired effect. But after it was all installed, I added a little bead of clear silicone around the impeller side of the stuffer to help keep the water flowing toward the back rather than getting inside the stuffer. It probably wouldn't be an issue anyway as the impeller covers that area quite well, I figured it might still be a good idea anyway.
 

Attachments

  • R&D Pump Stuffer 1.jpg
    R&D Pump Stuffer 1.jpg
    56.4 KB · Views: 128
  • R&D Pump Stuffer 2.jpg
    R&D Pump Stuffer 2.jpg
    69.9 KB · Views: 130
  • R&D Pump Stuffer 3.jpg
    R&D Pump Stuffer 3.jpg
    65.5 KB · Views: 123
  • R&D Pump Stuffer 4.jpg
    R&D Pump Stuffer 4.jpg
    53.4 KB · Views: 122
  • R&D Pump Stuffer 5.jpg
    R&D Pump Stuffer 5.jpg
    56.6 KB · Views: 130
  • R&D Pump Stuffer 6.jpg
    R&D Pump Stuffer 6.jpg
    72.7 KB · Views: 130
  • R&D Pump Stuffer 7.jpg
    R&D Pump Stuffer 7.jpg
    49.8 KB · Views: 122
Top Bottom