Super Jet My 1st Superjet

Vumad

Super Hero, with a cape!
Location
St. Pete, FL
This is my 1st Superjet. It's a 2004 I bought used on 8/20/11. It was a 6 hour drive and worth every penny I paid. It was all stock and in good condition. The ski was flushed after every ride but the first owner admitted to not cleaning the engine compartment after the rides. As a result, there was a fair amount of corrosion on many parts such as the carbs, e-box and etc. Despite that fact, everything on the ski was in excellent working condition except the choke which did not function.

This build thread is more of a progression thread. I'm not really ripping the ski down to build it back up. It will progress in a manner that keeps it on the water as often as possible. While it will get many bolt on parts, I don't want to get crazy like I did with my X2 and spend more time with a wrench in my hand than the throttle.

0824011128.jpg
 

Vumad

Super Hero, with a cape!
Location
St. Pete, FL
In early september, I purchased several parts from Tom21 for my Ski. They included a Blowsion handlepole spring, a rule 500 bilge, a bilge bracket, a bilge outlet. I also purchased a fuse setup from Autozone and a switch from West marine.

DSC00402.jpg

Unfortunately I was unable to instal the bilge right away due to the corrosion on the Ebox being so bad I couldn't get the ebox out. I wanted to ride the ski so I set the project off for a later date. I also skipped the pole spring install and went riding instead.
 
Last edited:

Vumad

Super Hero, with a cape!
Location
St. Pete, FL
11/17/11 I finally installed my new handlepole spring. The previous owner always stored the ski with the pole not only down, but strapped down tight to his shop stand. The spring sucked and the replacement is a huge improvement.

Stock
DSC00315.JPG
Blowsion
DSC00319.JPG
Installed
DSC00321.JPG
 

Vumad

Super Hero, with a cape!
Location
St. Pete, FL
11/21/11 The hood was peeling when I purchased it. The owner claimed he never abused the ski and Tom21 told me that the problem was a factory defect. While minor when purchased, it took less than 2 months for the ski to look very bad. My girlfriend liked that the ski resembled an Orca when I did subs, but I wasn't too fond of the apperence. I stripped the hood paint. It needs a bit more prep and should be painted the week after Thanksgiving. I'd like to install handholds while I have it in the present condition, but I am unsure of the steps and want the ski back together ASAP.

Before
DSC00378.jpg
After
DSC00383.jpg
 
Last edited:

Vumad

Super Hero, with a cape!
Location
St. Pete, FL
11/21/11 I purchased a used but very nice set of 0 degree bars, with a stock throttle, UMI crosspad/bar and Odi rogue grips with Blowsion end caps from Jetrace19.
DSC00385.jpg

Today 11/23/11 I installed my new bars and switch. I wasn't sure how I was suppose to run the bilge wire but I put it through the hole with the green wire. However, I am still unable to remove the ebox (despite large amounts of PB blaster over the last 2 months) to finish the bilge job. I am going to have to pop the rivits and remove the dash, so I can remove the ebox, install the bilge and clean up the ebox before reinstalling.

My stock set up
DSC00386.jpg
My stock setup stripped down
DSC00388.jpg
My new bars. I had to drill a hole in the bars for my start/stop switch as there was no hole like the stock setup for some reason.
DSC00390.jpg
New bars completed with chinpad and etc.
DSC00392.jpg

I do not like the Orange Blowsion end caps on my ski. My X2 needs new grips so I plan to in the near future purchase another set of Odi Rogues from Tom21 with the normal silver end caps and put the orange set on my X2. Blue is my favorite color so I don't mind the crossbar pad too much, but my ski is all silver and black, so I think I may try to find someone with a silver UMI pad that wants to trade.
 
Last edited:

Vumad

Super Hero, with a cape!
Location
St. Pete, FL
I didn't want to get very crazy with the project, but F* it, I want hand holds. Andre said I can run his hood until mine is done, so I decided to go a bit nuts. I didn't want Blowsion drop ins. I want the clean cut look like AM hoods have. I was hoping to get the stock liner out in one piece so I could perhaps reuse it, but no luck, I had to cut it out.

Stock liner
DSC00415.jpg

Trying to get it out in one piece
DSC00419.jpg

After I cut it out
DSC00422.jpg

My girlfriend is a photoshop wiz and is going to draw and print a stencil for me so I can have nice symetric holds. I am going to make a new liner from scratch. The hood still needs sanded to finish preping for paint, and the inside needs to be sanded to clean up where the SMC was damaged by the green stuff attached to the hood.
 

chad

I pretty much love beer
Site Supporter
They look good , but if your un sure you could cut out the shape on a piece of cardboard and see how they fit your hand . I always wear gloves so you might consider that with the size of the hole.
 

Vumad

Super Hero, with a cape!
Location
St. Pete, FL
Great thread Vumad. What is next after the hood ??? Footholds ???

Not sure. I really want footholds but I'm not going to do them right away. That's a much bigger project than I want to try to get done before Daytona. The hood is a big project but Andre said I can borrow his hood so I don't have to rush the job.
 

Vumad

Super Hero, with a cape!
Location
St. Pete, FL
Copied from my Hand Hold thread. http://www.x-h2o.com/threads/103770-hand-holds

Here's the hand hold test. I like the narrower hold better. I was thinking about doing 4 holds, but I may only do one. Again, I was hoping for some opinions from those who have more experience in this sort of thing. I have seen most hoods only have 1 hold, so I was only going to put the 3rd hold from the left (second from the right). However, I have seen aftermarket hoods that have 4 holds per side, so I was thinking there might be ad advantage to that. However, I also can see the disadvantage to adding 3 extra unecessary holds.

Cardboard test. I like the narrow one.
]DSC00441.jpg

Sketch of potential placement. If I only do one hold, it will be the 3rd from the left (2nd from the right).
DSC00442.jpgDSC00443.jpg
 
Last edited:

Vumad

Super Hero, with a cape!
Location
St. Pete, FL
Copied from my Hand Hold thread. http://www.x-h2o.com/threads/103770-hand-holds

My girlfriend adjusted the templates some. She removed the wider templates, and adjusted it so 6 templates could be printed per page. She also added a centered line for alignment, and outligned them with a box to further help with alignment. The alignment lines are actually blue/red, but all I had access to atm is a laser printer that's low on toner, lol, but it's doing the job.
DSC00444.jpg

Next, I drew a grid on the SJ to provide something for alignment. I followed the natural contour of the hood and made a mark every 1" top and bottom. I then used a very flexable ruler to draw a verticle line and mark the center of every lign. I then connected the center of each line so that I had an alignment line to center off of.
DSC00445.jpg

Lastly, I used tape to apply each template (not shown) temporarily so I could adjust them. Once I had a set location for each, I peeled the backing and stuck them to the hull
DSC00451.jpgDSC00449.jpgDSC00448.jpgDSC00447.jpg

This is a FINAL layup! If you have any comments or opinions, NOW is the time. I need to repeat for the right side and then I am ready to cut the hood. PLEASE if you have any comment make them ASAP. I will likely cut the hood tomorrow, wednesday at the latest!
 

Vumad

Super Hero, with a cape!
Location
St. Pete, FL
11/28/11 continued

It was too late for me to cut the hood so I started working on other projects.

I am doing a new liner so I am changing the way the air enters the hood. To do this, I have to plug up the holes in the front and open up the holes in the back. I closed up the front with a single layer of 10oz cloth and tomorrow I will put putty on the other side and sand smooth.

I sketched out my larger air intakes. I saw this style in the hood mod thread and decided to use it as I really liked it. To make the top circle, I traced the origional hole, then elevated the apex of the circle 3cm over the old edge of the intake.
DSC00458.jpg

Next, I filled it in with marker so I had a template to cut.
DSC00459.jpg

Then I had to fill in my front holes. I used a single layer of 10oz cloth and epoxy. I didn't waste a lot of time trying to make it pretty because it is going to be under the liner and is just a plug to hold some putty. Tomorrow I need to apply putty to the front and sand smooth, then finish paint prep.
DSC00462.jpg

My helmate looks like crap, but it works good, so I am not buying a new one. I decided that if I am going to paint my hood, why not spray my helmate at the same time.
This is before...
DSC00464.jpg

And this is half preped.
DSC00465.jpg
 

Vumad

Super Hero, with a cape!
Location
St. Pete, FL
11/29/11

I started the morning by being upset that yesterday I F'ed myself. The epoxy that I used to seal the front holes did not harden. It turned rubbery so I must not have put enough activator in the mix. This sucks, because I was going to add putty tuesday and finish the prep, then spray wed, thur, fri. This one mistake blew my timeline so I cannot paint this week. I now have to scrape + sand off the bad mix and redo it. Not sure when I'll have another 3 day stretch off work to spray.

Anyway, I got over it and went to Home Depot. I bought a Dremmel 3000 and it worked good. I used a cutting tool to get the bulk of the material out of the way, then followed my template using a sanding drum.
DSC00466.jpgDSC00467.jpg
DSC00468.jpgDSC00470.jpg

After I was finished with the holds, I opened up my air intakes.
DSC00490.jpg

I am very pleased with the results.
 
Last edited:

Vumad

Super Hero, with a cape!
Location
St. Pete, FL
12/5/11

I spent some more time working towards a hood liner and hand hold cups today, but have nothing to post on that.

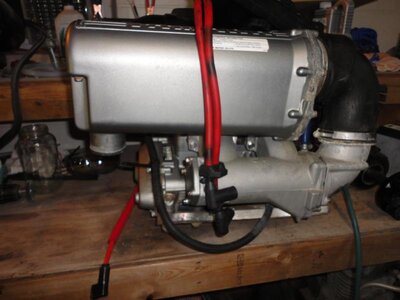
While I was waiting for some materials to dry, I pulled my motor. I was able to remove the bilge screw I had been having issues with. I tried to move the motor back but still had greater than 1cm of gap in the couplers so I guess I am going to have to have my drive shaft pressed. I need to clean up some corrosion. There's a lot of it on the Ebox and the bearing housing. I'm not sure what I am going to paint the parts with but I was thinking a rattle can. I also noticed the screws that hold my airbox on are stuck when I tried to start working on freeing my frozen choke.

Here's pictures of everything. If you see anything out of the ordinary, please let me know so I can correct.

DSC00588.jpgDSC00587.jpgDSC00586.jpgDSC00585.jpgDSC00584.jpgDSC00583.jpgDSC00582.jpgDSC00581.jpgDSC00535.jpg
 
Top Bottom