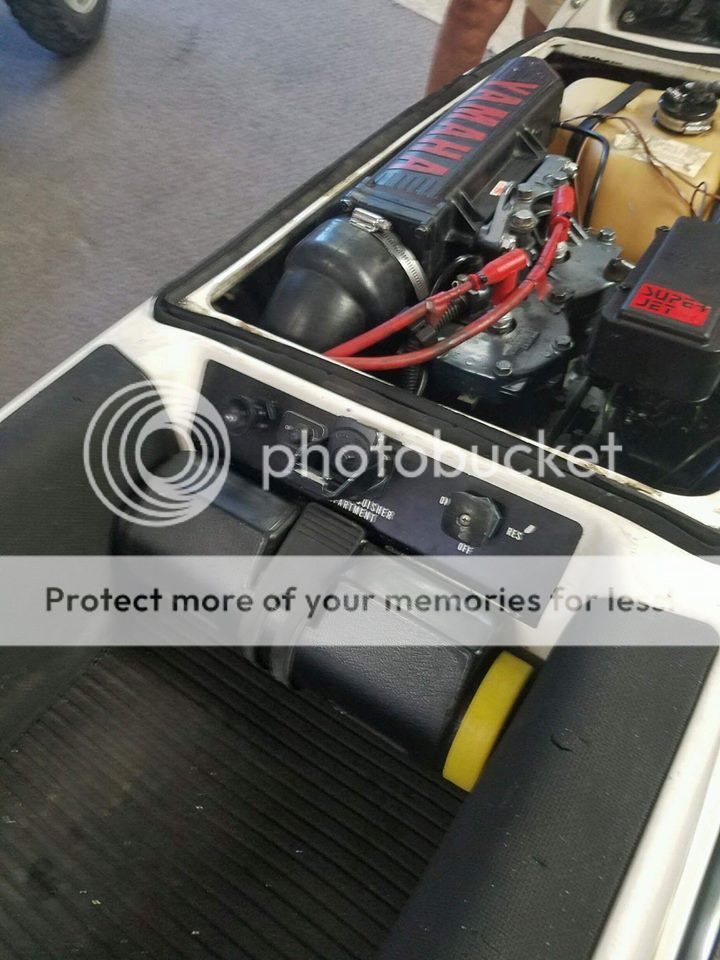
My "Better than Brand New" Square Nose Build

I Recently purchased my first Stand up jetski. I am coming from riding kawasaki 550sx's at a friends lake house and every summer for the past 4 years I've said I'll buy one of my own. Finally found one in decent shape, one owner, and unmolested for a decent price.

Say hello to my 1990 Square Nose Superjet 650.


It came with a couple aftermarket parts/accessories:
1. Extended length R&D Ride
2. West Coast Intake Grate
3. Electric Bilge Setup
4. Primer Kit Installed

Decided to replace the what seemed like original Turf and i wasnt too fond of the very dated decals... so I started tearing it apart...

Parts Ordered:
1. Worx 201 Intake Grate
2. Yellow Camo Hydro Turf Kit
3. Jet Works -4 degree bars(black)
4. Odi Grip set
5. Blowsion Finger Throttle(black)
6. Billet Bilge Fitting(black)
7. Billet Boy Eye bushings(black)
8. HT Shock Pad
9. Blowsion Freestyle Pump Cone
10. Protec Steering Nozzle(+20mm)
11. Blowsion Single Bilge Mount
12. AC Racing -2" Aluminum Handle Pole(white)
13. Decal Kit (Ebay)
14. Stiffie Registration Numbers

Had the Stock Chin Pad Recovered in Black and test fit on AC Handle Pole


Removed Old HydroTurf and Decals.
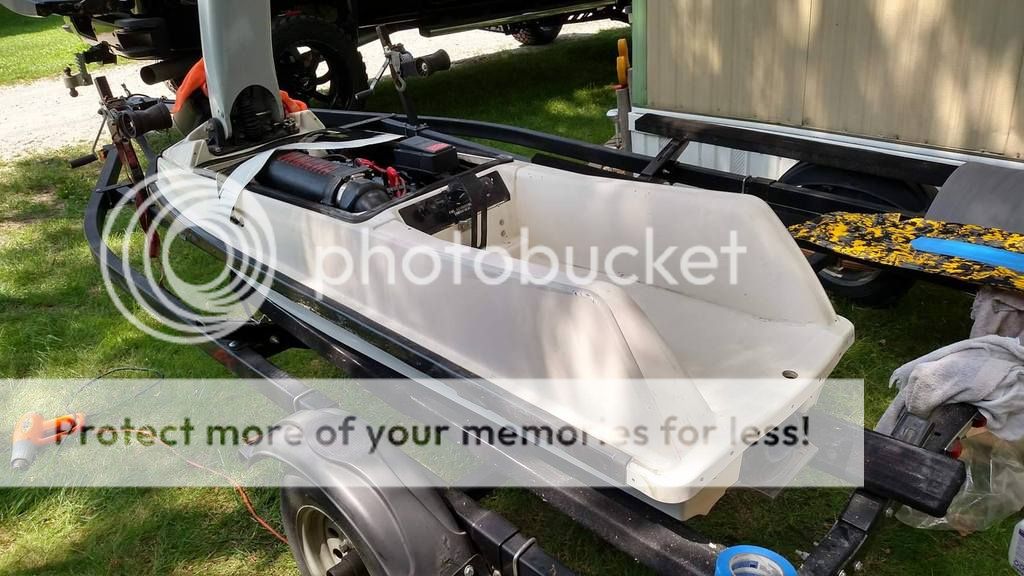

 
New HydroTurf Installed.


Majority of Decals installed... The Yellow in the decals for the bottom of hull doesnt not match the yellow in the turf or reg stickers so i wont be using them.. contemplating just making black decals for the bottom.


Ac handle pole, Handle bars and goodies installed. There are decals going on handle pole as well that matches rest of decals. Luckily I did opt for the aluminum pole because upon removal of stock handle pole I found a couple cracks and the handle pole was literally filled with water!


Installed Intake Grate, Steering Nozzle, Pump cone and all other goodies...


Had a couple issues on Maiden voyage.... One primer hose was leaking causing air in system and for engine to die out whenever it wanted. Had to Rebuild Carb and Freshened up fuel pick up. I should have known considering it hasn't been ridden in 1.5 years.

Contemplating a different ride plate maybe a D cut style. As you can tell I havent done too many mods to the engine and that's because I don't want to waste money if/when I do swap this for a 701(61x). but for now I will rock the 650 considering it is night and day improvement than a 550sx.


Also having a newer style "superjet" logo made to match the other yellow on the ski. And contemplating making replica warning labels in black/yellow for the hood.

(Superjet logo here(on both sides and on handle pole)


(sizing up for new warning labels)


Let me know what you guys think and if you have any opinion on anything else i should change for the better!
 
Clean looking ski! I'm one for stock appearances so I would probably have kept the stock gray/yellow graphics and replaced the turf with black turf.

Not sure why there is a fuel filter in the return line just before entering the tank, seems like an odd choice out of the possible locations...

I would suggest holding back on modding and spending money on it and just riding! You will have lots of fun in the stock configuration.
 
Nice ride! So are you out riding something this summer? This is the kind of work I'd save for winter.

And why the hell would you ever remake the warning decals? I stripped all those off.

Not really riding anything at the moment. I've been waiting for the great state of illinois(sarcasm) to get me my title and new registration so I have some down time to do these projects. All of the projects didn't take too long, though installing the decals was not fun.

I'm the type that likes all my mods to seem like it came from factory like that.... I went with the decal kit because it was mild and not off the wall crazy.... and I just thought possibly recreating the warning labels since i was having trouble cleaning up the gel coat where the original warning labels were(on the hood). I am having the warning labels done so they are like the newer superjets with black backing... If I dont like them its not crazy money I wasted.

I have a mint freshwater 61x engine assy on its way. So that will be my winter project. Still need to find an exhaust for the 61x and possibly a Girdled head setup (If I will need one)...
 
Clean looking ski! I'm one for stock appearances so I would probably have kept the stock gray/yellow graphics and replaced the turf with black turf.

Not sure why there is a fuel filter in the return line just before entering the tank, seems like an odd choice out of the possible locations...

I would suggest holding back on modding and spending money on it and just riding! You will have lots of fun in the stock configuration.

thanks! I'll be honest, there were a couple questionable things in the engine bay. That fuel filter location, the Rule Bilge pump came unglued and was just floating around(also not in optimal location)... But I guess it is a 27 year old ski... And I still dont know alot on these yamahas such as proper fuel/water line routing. Learning experience i suppose... but like you said I am going to just enjoy it for the rest of the season(if illinois hurries up)
 
question.... can anyone tell me what the piece on the left is for? found it just hanging out in the back of the hull by the midshaft....also would there be any reason the stock bilge/siphon was hooked behind the ebox no where close to where it is suppose to be? should i put it back? remove it?

 
question.... can anyone tell me what the piece on the left is for? found it just hanging out in the back of the hull by the midshaft....also would there be any reason the stock bilge/siphon was hooked behind the ebox no where close to where it is suppose to be? should i put it back? remove it?

Pretty sure that either wedges underneath the waterbox to stop it from moving, either that or the fuel tank
 
I think the left one goes under the engine side of the fuel tank, and the vent line passes thru the holder on the front edge.

Don't recognize the part on the right, but I don't have a SN.
 
Location
NW
I think the left one goes under the engine side of the fuel tank, and the vent line passes thru the holder on the front edge.

Don't recognize the part on the right, but I don't have a SN.
Bingo wedges under the tank and holds a vent line. Mine was bouncing around my hull also. Lift the engine side of the tank up and wedge it in.
 
So I had some time to do the 61x swap today.

We were able to:

1. Remove Old exhaust, Fuel tank and water box
2. Remove Old 6R7 engine and ebox
3. Clean Engine bay nad all components going back into hull(battery tray, waterbox, fuel Tank, etc...)
4. Replace Midshaft Assy
5. Install New 61x engine
6. Install Factory Bpipe
7. Run all new fuel lines
8. Install new primer and lines
9. Install Water lines, FCV, and pisser


Get all that done and go to start it - crank, no start. Also Upon trying to start it, the starter solenoid from the donor engine got stuck closed... So had to swap out starter solenoids from the old ebox. Tried starting again - Still crank but no start.. checked fuel- good, checked spark- good, checked compression good. AT this point I was tired and pissed off... Then i remembered I rebuilt the carb and didnt set the idle screw. It was completely shut and letting no air in. My mistake....
wallbang.gif
....opened it up and started right up, Thankfully. I was getting nervous for a second! lol...

Here are some picture of the end result. I took these prior to adding in the flush kit "T".


Didnt have time to put on my new wetjet flame arrestor setup(need to get proper mounting bolts for it) or Put it back in the water. Next time I am up at the lakehouse I will do both and hopefully then dial in the carb and b pipe. Thanks to everyone that has helped in answering questions or me purchasing parts from you for this build. Could not have done any of this without PWCtoday and xh2o members!
 
Interesting way you have that cooling running out of the head.
Yea Im still not sure if i like it as well though I thought using both ports on the ADA head would be more beneficial than capping the front one. If I put a "Y" barb fitting instead of a "T" I believe it will look cleaner and flow smoother.

I like the nice touch with oetiker clamps, but I agree the routing looks different.
Thanks I think the oem style clamp looks way cleaner. And since I already had the pliers to do them and mcmaster carr is so cheap, this was possible.

Here are the diagrams I was going off of:

Stock Head With Bpipe


ADA Head w/ Bpipe w/ front head port capped


ADA head w/ both head ports "T" together
 
Location
Wisconsin
Yea Im still not sure if i like it as well though I thought using both ports on the ADA head would be more beneficial than capping the front one. If I put a "Y" barb fitting instead of a "T" I believe it will look cleaner and flow smoother.


Thanks I think the oem style clamp looks way cleaner. And since I already had the pliers to do them and mcmaster carr is so cheap, this was possible.

Here are the diagrams I was going off of:

Stock Head With Bpipe


ADA Head w/ Bpipe w/ front head port capped


ADA head w/ both head ports "T" together

You should have just dual cooled it.
 
You should have just dual cooled it.
You are Correct I should have... Unfortunately i was not 100% sure on how to change the stock bilge line into the second cooling line from the pump.. this way works fine as well and I assume will be able to cool everything off properly.
 
Top Bottom