You are using an out of date browser. It may not display this or other websites correctly.
You should upgrade or use an alternative browser.
You should upgrade or use an alternative browser.
Neglected 96 RN Build
- Thread starter Carrera911
- Start date
- Location
- Cumming, Georgia
Thank you, very fast processing and shipping!Build is looking good. Parts were shipped yesterday.
- Location
- Dallas, GA
We did the bottom on the wife’s ski with auto paint. No issues at all.

Sent from my iPhone using Tapatalk

Sent from my iPhone using Tapatalk
- Location
- Cumming, Georgia
Thanks. I figured as much. Any catalyzed auto paint will be more durable than a rattle can imo. Very nice paint job by the way.
- Location
- Cumming, Georgia
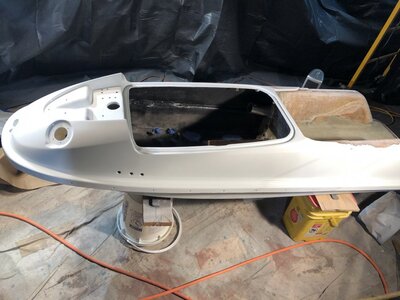
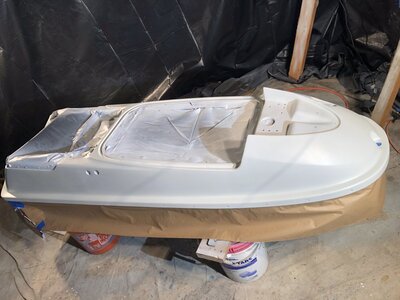
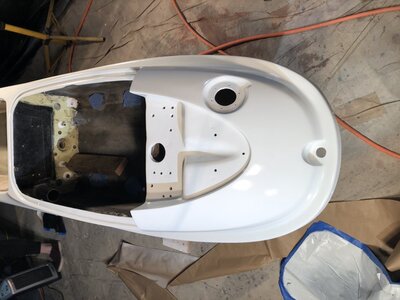
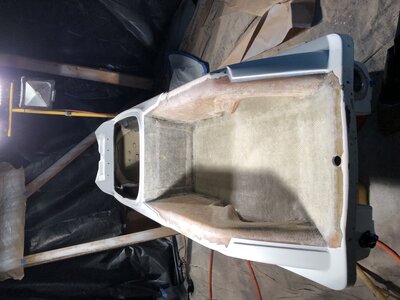
Finally got some paint on this thing. The spray booth lead fell through so it was done in the ghetto garage booth. Got the major body work done and I kept using thickened epoxy for all the body work. It got down to where it was just some pinholes which the epoxy doesn't like to get down into. That was taking way too long so I got some 3M "professional" glazing putty. I was hesitant since I had gotten to this point using just epoxy. This way it was applied and finish sanded in less than a hour. I would recommend the pro for only a dollar more, its catalyzed and dries in 10 minutes. Its probably more durable too.
Anyway, I primed and painted mostly the way I said above and I'd say it turned out pretty decent. I didn’t bother spraying the second round of epoxy after sanding though. It's got some orange peel in some areas but nothing that can't be wet sanded and buffed. I've used an HVLP a few dozen times spraying Rustoleum but this was my second time ever spraying auto paint. My other excuses are that it was done with a $10 Harbor freight gun and this is basically the cheapest epoxy primer and SS urethane on the market.
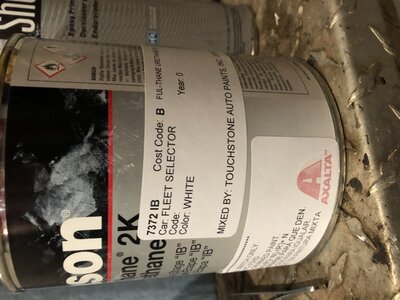
The primer is white PPG shopline epoxy and Nason single stage urethane paint. The primer was mixed as recommend but I added 10% urethane reducer.They call for acetone to keep the treehuggers happy but this is supposed to flow better and I had to buy it for the paint anyway. After mixing it make sure you let it sit for 15-20 minutes and re mix before putting it in the gun. The paint was done as recommended with 2 main coats and a 3rd in the hard to reach areas. I'll get the color code of the paint later but it was basically the whitest white in their color book. So far, the bottom only used 1/3 qt of the primer and 1/6 qt of the paint. I imagine the top will use maybe 1/2 that with less surface area.
Anyway I'm rushing to get the top half bodyworked and painted. Unless something comes up, it should be painted by the end of the week.
Bodyworked and masked
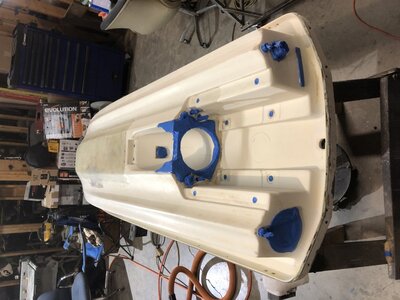
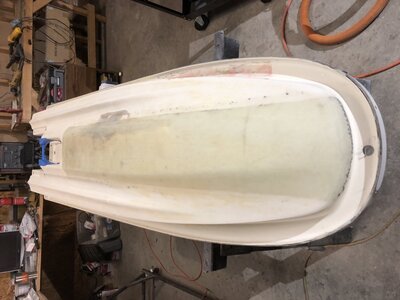
Primer
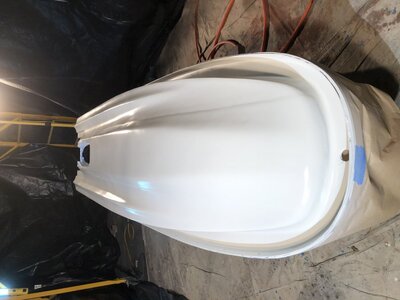
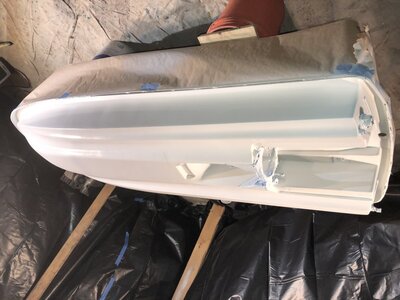
Wetsanded primer
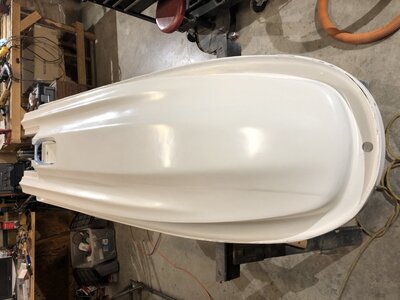
Paint
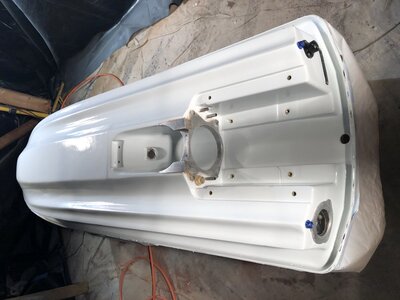
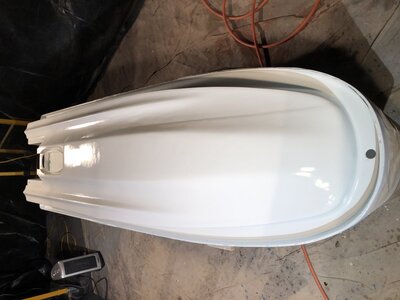
Anyway, I primed and painted mostly the way I said above and I'd say it turned out pretty decent. I didn’t bother spraying the second round of epoxy after sanding though. It's got some orange peel in some areas but nothing that can't be wet sanded and buffed. I've used an HVLP a few dozen times spraying Rustoleum but this was my second time ever spraying auto paint. My other excuses are that it was done with a $10 Harbor freight gun and this is basically the cheapest epoxy primer and SS urethane on the market.
The primer is white PPG shopline epoxy and Nason single stage urethane paint. The primer was mixed as recommend but I added 10% urethane reducer.They call for acetone to keep the treehuggers happy but this is supposed to flow better and I had to buy it for the paint anyway. After mixing it make sure you let it sit for 15-20 minutes and re mix before putting it in the gun. The paint was done as recommended with 2 main coats and a 3rd in the hard to reach areas. I'll get the color code of the paint later but it was basically the whitest white in their color book. So far, the bottom only used 1/3 qt of the primer and 1/6 qt of the paint. I imagine the top will use maybe 1/2 that with less surface area.
Anyway I'm rushing to get the top half bodyworked and painted. Unless something comes up, it should be painted by the end of the week.
Bodyworked and masked


Primer


Wetsanded primer

Paint


Last edited:
- Location
- Tidewater, VA
Love seeing you bring this ol girl back to life. The powder coat looks real nice.  Like any job where a bond matters with paint prep is at least %95. Automotive paint is fine. I like House of Kolor but PPG is great paint too.
I'll be trying an experiment this year with HOK and clear gelcoat. By all rights it should be a complete disaster. But without experimenting how would we know for sure.
I'll be trying an experiment this year with HOK and clear gelcoat. By all rights it should be a complete disaster. But without experimenting how would we know for sure.
- Location
- Cumming, Georgia
Love seeing you bring this ol girl back to life. The powder coat looks real nice.Like any job where a bond matters with paint prep is at least %95. Automotive paint is fine. I like House of Kolor but PPG is great paint too.
I'll be trying an experiment this year with HOK and clear gelcoat. By all rights it should be a complete disaster. But without experimenting how would we know for sure.
Thanks for your compliments. I looked at the House of Kolor line but there’s no distributors around me and I couldn’t find any SS white on their catalog.
How were you planning on adhering the paint and gel? Let the paint dry and then scuff it? I’d be really surprised if they’re chemically compatible enough do wet on wet. It sure would be nice if you could get it to work though.
Sent from my iPhone using Tapatalk
- Location
- California
I would guess adding the HOK to the clear Gel to get wild colors that are not available in Gelcoat.
- Location
- Los Gatos, CA
You are doing some very thorough work. Subbed to keep an eye on this.
- Location
- Cumming, Georgia
Well the paint is done with other than wetsanding and polishing. The top took about 1/2 what the bottom did and I'm left with about 1/3 qt epoxy and 1/2 qt paint. The first time spraying the bottom primer I used more thinner than my target of 10%. The top I did exactly 10% and it sprayed a bit dry with less flow out so I would do ~20% for the 1.4 tip on the HF gun.
There were a good bit of pinholes both in the epoxy bodywork and even the gel coat so it needed a lot of work with the glazing putty.
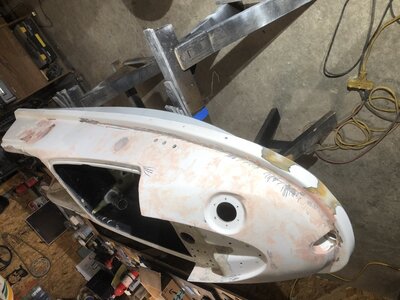
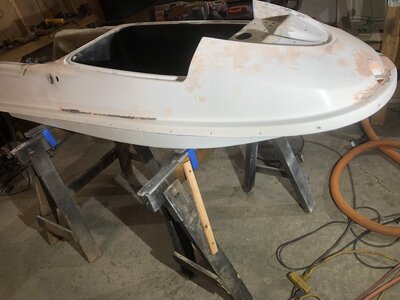
Masked and prepped
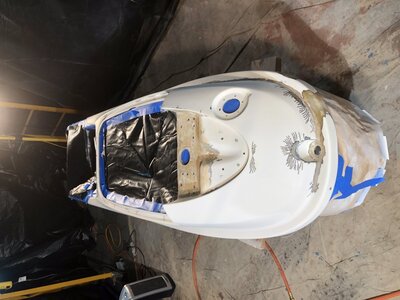
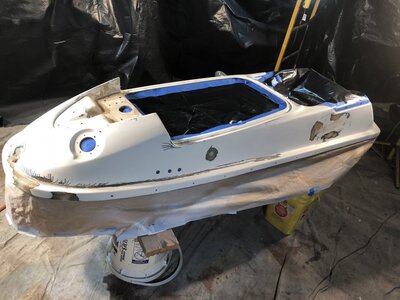
Primer
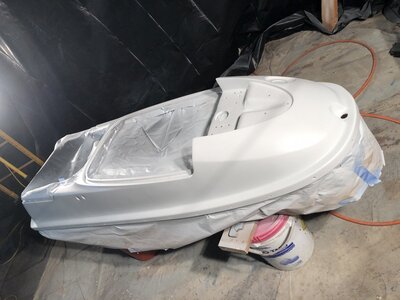

Wetsanded primer
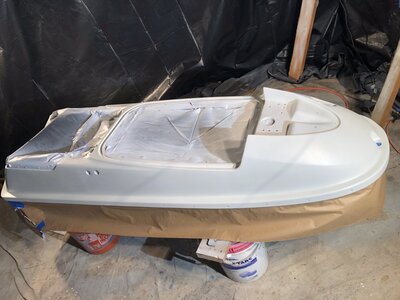
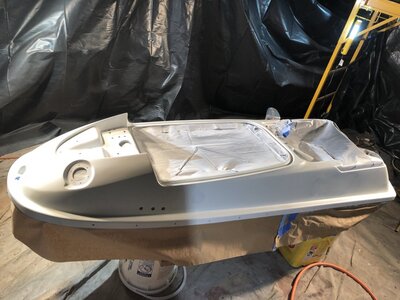
There were a good bit of pinholes both in the epoxy bodywork and even the gel coat so it needed a lot of work with the glazing putty.


Masked and prepped


Primer


Wetsanded primer


Attachments
- Location
- Cumming, Georgia
Paint
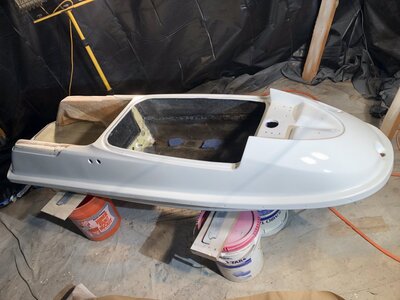
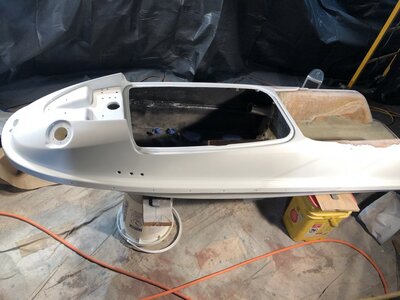
Paint code
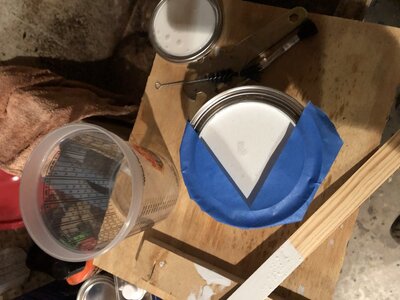
Couple little tricks. Whenever your sand paper clogs up use a stiff wire brush to clean it out. Usually can do this 4-5 times before the paper is worn out. To keep from wasting paint and making a mess with the quart cans, use some masking tape while the can lip is clean. Stick it on well and paint stays out of the top lip and off the side of the can.
Anyway, the only major PITA left after buffing is turf. Then just decals and reassembly. The goal is to have it not done, but rideable, by the end of the month if at all possible.


Paint code

Couple little tricks. Whenever your sand paper clogs up use a stiff wire brush to clean it out. Usually can do this 4-5 times before the paper is worn out. To keep from wasting paint and making a mess with the quart cans, use some masking tape while the can lip is clean. Stick it on well and paint stays out of the top lip and off the side of the can.

Anyway, the only major PITA left after buffing is turf. Then just decals and reassembly. The goal is to have it not done, but rideable, by the end of the month if at all possible.
- Location
- Cumming, Georgia
It's been a while but I'm getting close. Wetsanded the paint with 1k, 2k, 3k then buffed it with Meguiar's Ultra cut then mirror glaze. The full size dewalt buffer was too bulky so I picked up a $10 drill buffing kit off amazon that worked surprisingly well. It's no show quality paint job, but I'd say its way better than rattle can for not much more cost. The best part is I can't remove it with my fingernail like spray paint, which was the main goal.
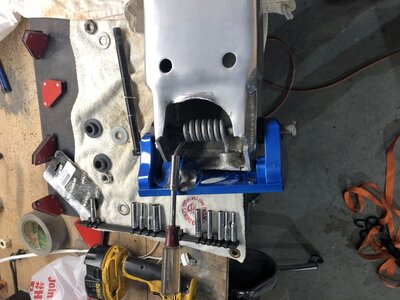
Anyway, the pole is mostly back together. The spring was a pain in the ass and it took some head scratching to get in. I ended up using a spare pivot bolt backwards as a guide and hammered the bolt I'm using in as I lined things up. Not sure how everyone else does it but putting a deep socket on a socket driver worked nice for pulling the spring up and out of the way.
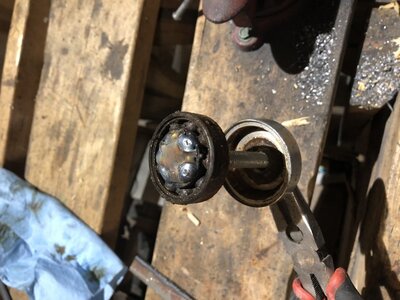
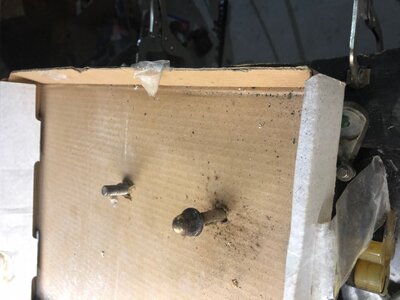
Also rebuilt the UMI style steering, I'd say it was a bit overdue lol. The bearing was really seized in it's cup so I welded on a bolt to knock it out.
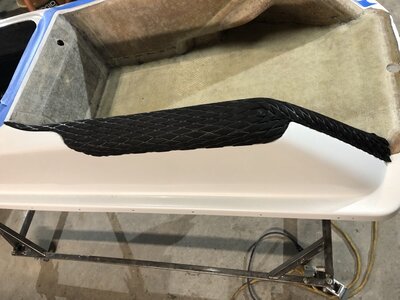
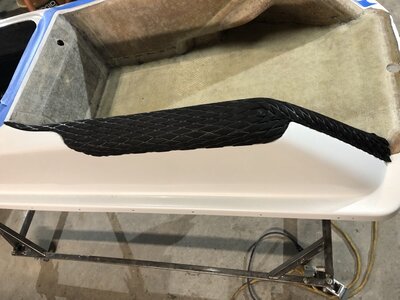
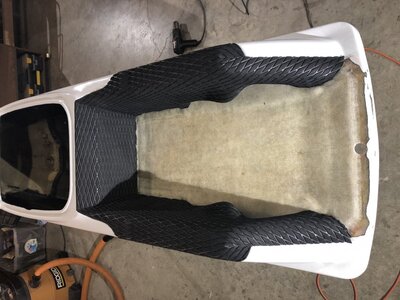
I've also been working on turf, hoping to finish it up and do the rails today. Once again, not perfect but I'm happy with it for my first time. Thanks for the pointers @Sanoman.
Question: How much strength do the bondline rivets add? I'm thinking I need them and I'm debating whether to put them through the turf or under it. I'm thinking through it might help hold the turf on a bit better but I'll have to test how well the rivets will compress the turf before engaging and snapping off. Also, I'm not sure how the dimples of the rivets under the turf will look if they're under it. Thoughts?
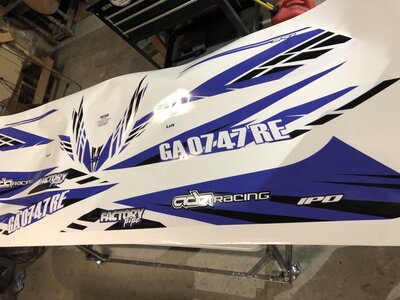
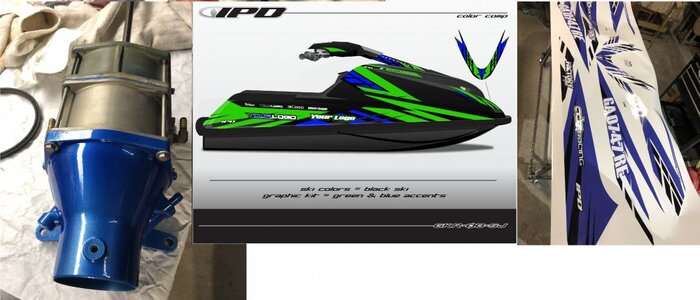
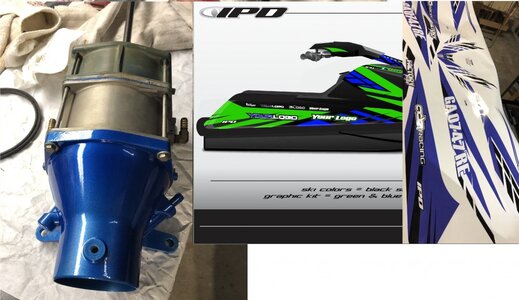
The graphics showed up but I wish I could say I'm happy with them. Before I ordered, I had them email me color samples and I went with their "blue" because it was the color I was after (a bright Yamaha style blue). I even chose the powder coat based off that blue. But in person it's a much darker purplish blue. It's almost closer to 90s FX1 or Seadoo purple than what their proof was. I'm not a color match nazi by any means, but this is so far off I'd have a hard time putting them on the ski. I called IPD Thursday, they said to email them but no response yet. Over the phone she said something about their printings don't exactly match their proofs. I can understand that, but this is hardly close IMO. The way I see it, it's no different than a color sample in a paint book, the color you see should be the color you get. Especially when these were $300+ after a 30% discount. I guess I'll call again Monday and see if I can get a response.
Anyway, spring is here and I need this thing to be done lol.
Anyway, the pole is mostly back together. The spring was a pain in the ass and it took some head scratching to get in. I ended up using a spare pivot bolt backwards as a guide and hammered the bolt I'm using in as I lined things up. Not sure how everyone else does it but putting a deep socket on a socket driver worked nice for pulling the spring up and out of the way.

Also rebuilt the UMI style steering, I'd say it was a bit overdue lol. The bearing was really seized in it's cup so I welded on a bolt to knock it out.

I've also been working on turf, hoping to finish it up and do the rails today. Once again, not perfect but I'm happy with it for my first time. Thanks for the pointers @Sanoman.
Question: How much strength do the bondline rivets add? I'm thinking I need them and I'm debating whether to put them through the turf or under it. I'm thinking through it might help hold the turf on a bit better but I'll have to test how well the rivets will compress the turf before engaging and snapping off. Also, I'm not sure how the dimples of the rivets under the turf will look if they're under it. Thoughts?


The graphics showed up but I wish I could say I'm happy with them. Before I ordered, I had them email me color samples and I went with their "blue" because it was the color I was after (a bright Yamaha style blue). I even chose the powder coat based off that blue. But in person it's a much darker purplish blue. It's almost closer to 90s FX1 or Seadoo purple than what their proof was. I'm not a color match nazi by any means, but this is so far off I'd have a hard time putting them on the ski. I called IPD Thursday, they said to email them but no response yet. Over the phone she said something about their printings don't exactly match their proofs. I can understand that, but this is hardly close IMO. The way I see it, it's no different than a color sample in a paint book, the color you see should be the color you get. Especially when these were $300+ after a 30% discount. I guess I'll call again Monday and see if I can get a response.

Anyway, spring is here and I need this thing to be done lol.
Attachments
Last edited:
- Location
- Los Gatos, CA
Looking good! You'll have it done just in time for summer.
The graphics do look pretty purple and are nothing like the proof. They look like 90's Yamaha. It looks like a pretty close match to my 1999 SJ. I like it because it's a Yamaha color but it definitely does not match what you were expecting.
It is NOTHING like the proof, that's for sure.
The graphics do look pretty purple and are nothing like the proof. They look like 90's Yamaha. It looks like a pretty close match to my 1999 SJ. I like it because it's a Yamaha color but it definitely does not match what you were expecting.
It is NOTHING like the proof, that's for sure.
- Location
- Cumming, Georgia
Thanks and I'm glad someone else agrees with me. While what they sent isn't my favorite color in the world, I wouldn't have a problem if it was the only blue on the ski. Unfortunately that's not the case and I'm pretty sure their standard policy is no returns / exchanges. Ideally I'd like another set that matches but I guess that's up to them.Looking good! You'll have it done just in time for summer.
The graphics do look pretty purple and are nothing like the proof. They look like 90's Yamaha. It looks like a pretty close match to my 1999 SJ. I like it because it's a Yamaha color but it definitely does not match what you were expecting.
It is NOTHING like the proof, that's for sure.
Last edited:
- Location
- Cumming, Georgia
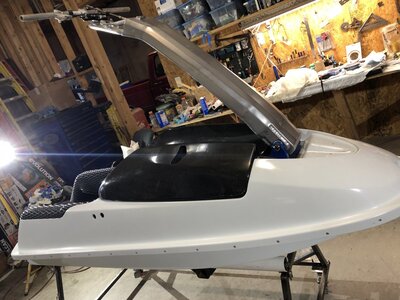
I've had a busy week trying to get as much done as possible. I was ready to start turfing the rails when I decided I had to grind the bondline halves even with one another. Some areas were off more than a quarter inch. So one more time getting itchy with the grinder and then I poured epoxy in the gaps.

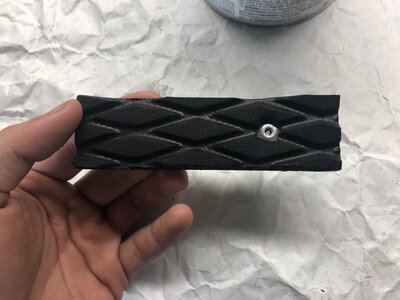
I did a test piece of steel to see whether I like the rivets through or under the turf and I decided on under. The turf hides them much better than I was expecting. I like the look of the rivets too but they would also need to be re-done every turf job.

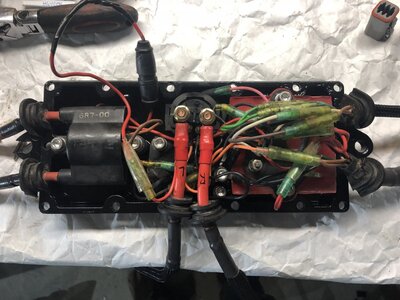
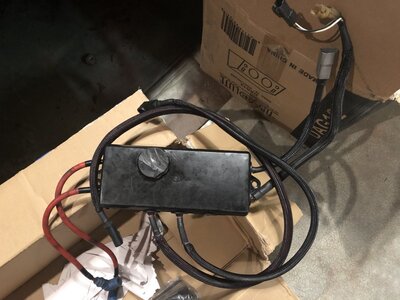
Got the ebox bead blasted, painted and back together. I added a deutsch connector on the stator wires. Not sure why Yamaha didn't, but to hell with taking apart the ebox to pull the motor. Yes, I'll be replacing the fuse cover, no clue how the p/o did that.
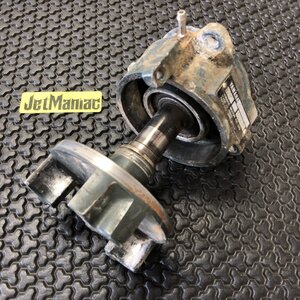
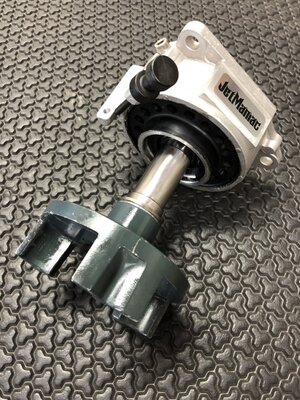
The turf is done minus the rails and the pump / midshaft are in. I couldn't get the pump far enough forward to align the bolts with the new pump seal but I barely made it with the big clamps.
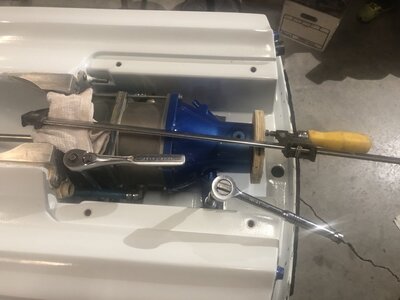
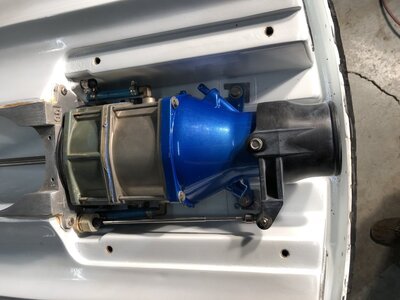
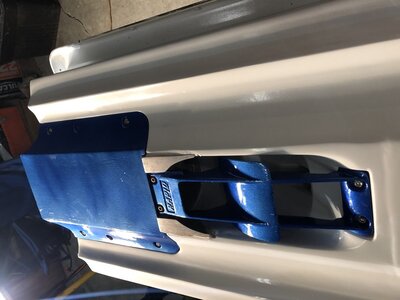
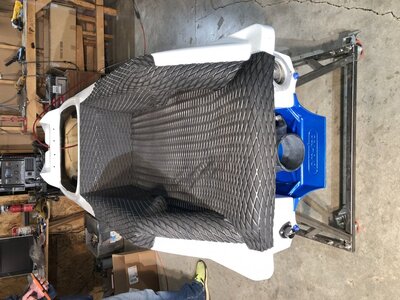

I did a test piece of steel to see whether I like the rivets through or under the turf and I decided on under. The turf hides them much better than I was expecting. I like the look of the rivets too but they would also need to be re-done every turf job.


Got the ebox bead blasted, painted and back together. I added a deutsch connector on the stator wires. Not sure why Yamaha didn't, but to hell with taking apart the ebox to pull the motor. Yes, I'll be replacing the fuse cover, no clue how the p/o did that.


The turf is done minus the rails and the pump / midshaft are in. I couldn't get the pump far enough forward to align the bolts with the new pump seal but I barely made it with the big clamps.


- Location
- Cumming, Georgia
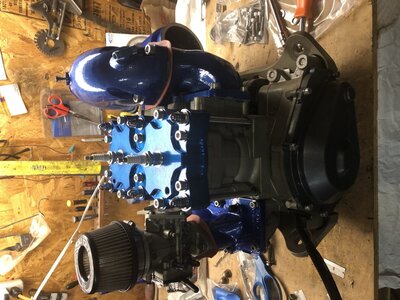
Did some engine work as well. The old girdle studs were seized in the cases so I had to weld the nuts on two and impact them out. Of course the new ones didn't want to go in either so I had to make a thread chaser. Just grind a slit in each side, coat it in antisieze and run it in / out with the drill clutch turned down. I did that 3-4 times in each hole and the new studs bottomed out easily by hand.
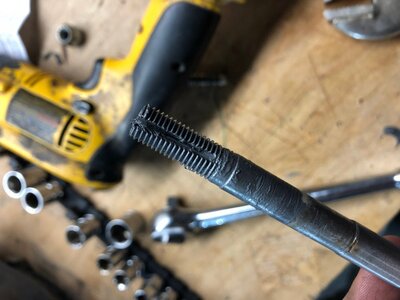
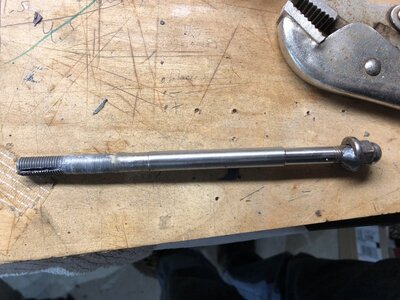
Anyway, I got the engine back together and made a pressure tester with mostly parts laying around. I was half expecting the crank seals to leak, but to my surprise it dropped 1 psi from 5 over 30 minutes. New ADA head with 35cc domes and the carb is also rebuilt with a bit richer jetting. For some reason the large outer o-ring on the head was about 3/4" too long. Tried shrinking it overnight in the freezer but that didn't do anything. I ended up cutting out the excess and sticking it back together with superglue. As hack as that sounds, a lot of guys make o-rings from scratch that way with good results.
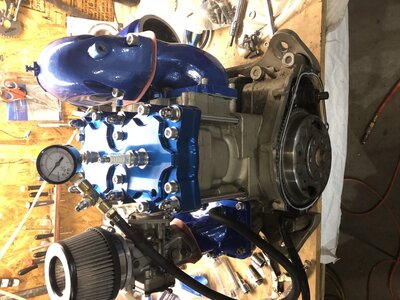
While it was sealed, I hit it with some gunk and hosed it off. Now the block needs a paint job but that'll have to wait for next winter.
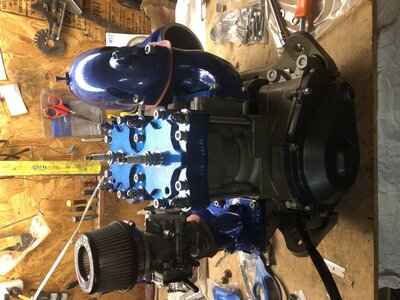
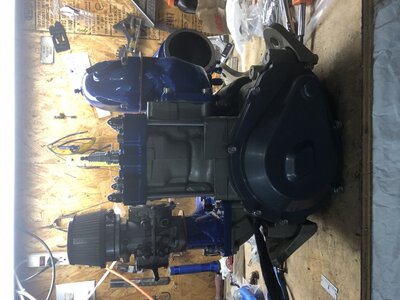
Maybe ride-able this weekend? I guess that depends on whether I hit any snags and if I can stay motivated and off my ass.


Anyway, I got the engine back together and made a pressure tester with mostly parts laying around. I was half expecting the crank seals to leak, but to my surprise it dropped 1 psi from 5 over 30 minutes. New ADA head with 35cc domes and the carb is also rebuilt with a bit richer jetting. For some reason the large outer o-ring on the head was about 3/4" too long. Tried shrinking it overnight in the freezer but that didn't do anything. I ended up cutting out the excess and sticking it back together with superglue. As hack as that sounds, a lot of guys make o-rings from scratch that way with good results.

While it was sealed, I hit it with some gunk and hosed it off. Now the block needs a paint job but that'll have to wait for next winter.


Maybe ride-able this weekend? I guess that depends on whether I hit any snags and if I can stay motivated and off my ass.
Attachments
Last edited:
- Location
- Los Gatos, CA
Not an expert here but I would recommend a bit higher pressure, such as 8psi. And also a vacuum check at 14 in Hg. Pressure finds gross leaks, but vacuum will find leaky crank seals. I had an engine that passed pressure but a crank seal leaked under vacuum. It may still be good enough though.
- Location
- Cumming, Georgia
Not an expert here but I would recommend a bit higher pressure, such as 8psi. And also a vacuum check at 14 in Hg. Pressure finds gross leaks, but vacuum will find leaky crank seals. I had an engine that passed pressure but a crank seal leaked under vacuum. It may still be good enough though.
Thanks for your input. I just checked at 8 psi and got about 1 psi drop over 30 minutes. Unfortunately, I don’t have a vacuum pump. The reality is, I don’t think anything in my hooptie fleet of dirt bikes and skis has any bottom end seals less than 10 years old lol. I’d almost bet the motor has never been out of the 88 650sx.
Sent from my iPhone using Tapatalk
- Location
- California
8 psi for 10 minutes without dropping is pretty standard. Any fresh engine should pass that no problem.

