You are using an out of date browser. It may not display this or other websites correctly.
You should upgrade or use an alternative browser.
You should upgrade or use an alternative browser.
Super Jet Project Dance-floor
- Thread starter Req
- Start date
- Location
- Northern michigan
Awesome, you have a great eye. And not afraid of anything.
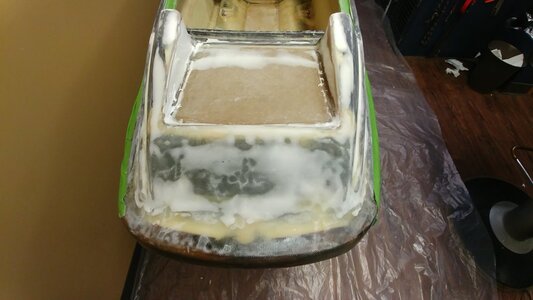
I started gluing in the pole bracket area last night with it vertical. I scratched the hell out of the surfaces and prepped thoroughly to ensure a bond. I used a load of chopped up biax to thicken and strengthen the glue. I then took the wet hair ball like substance and crammed it into the front void and besides where it touches the hull. Additionally I took what was remaining and put it underneath to stitch the back. I let that cure up overnight and I flipped the jet ski this morning. I mixed up another heavy batch of glass strands and resin and filled the low spot on either side of the bracket. While it was still wet I laid four strips of 17 Oz by axe over the seams and one large piece of 17 ounce by axe over the entirety.
I still have to grind & Stitch the outside but it is not structural. All of the structure will come from underneath the bracket.


I still have to grind & Stitch the outside but it is not structural. All of the structure will come from underneath the bracket.


Last edited:
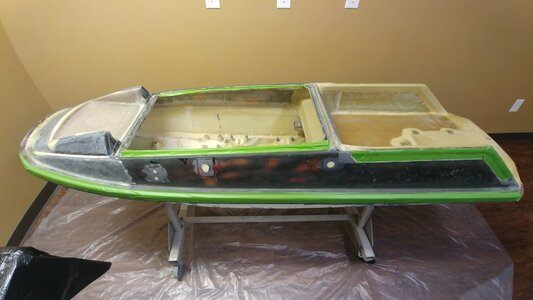
I flipped it back over and got it mostly fared in, unfortunately I'm running out of daylight so I won't stitch the outside in tonight since I can't get the grinding done in time. I ended up knocking out the front part of the channel of the front part of the hood seal which allowed It to transition perfectly to the hood seal level. My hood hooks fit amazingly well, Hood prongs will be low on the hood, I'll no longer need to mutilate the pole, I'm digging this change.


- Location
- norfolk country
That looks great. I know what Im doing next time I cut into my SN. You are almost ready for paint!!!
- Location
- Northern michigan
Remember if you can feel a imperfection with your hand you will definitely see it. I am a big fan of the long board for sanding during the fairing process. Take your time if your after great results if not and you just want a 10' paint job then don't spend the hours prepping. Paint can always be done again later.I fared the jet ski above the bond line. Cake it on like crazy up in the pole bracket area even though 95% of its coming off. We are talking about 2oz once its sanded off, I only mixed 5.
View attachment 376424View attachment 376425View attachment 376418View attachment 376419View attachment 376417View attachment 376420View attachment 376421View attachment 376422View attachment 376423
I was already at the point where there were only a few spots that really needed the faring compound that couldn't be sanded out before application, I could run my hand over it and only feel a spot or two. The amount I applied is way excessive for the faring I need to do. The two areas that needed a little bit of love were the gunwales and the pole bracket area where I stitched it.
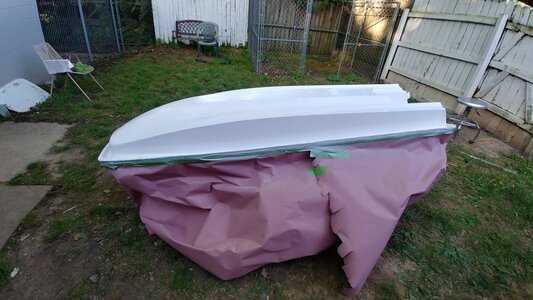
Sanded the compound down and it's turning out really smooth. There are three spots that I'm going to put a dab of compound at this evening but other than that it is ready for paint. I've already flipped it over and I'm finishing stripping the bottom currently. I plan on painting the bottom with Appliance epoxy this evening and painting the upper half tomorrow with plum paint and clearcoat.


What are you planning with the pump tunnel cut ?
I have a second larger pump tunnel already formed inside the tray all I have to do is pie out the old tunnel. I formed it on page 9 and it's large enough for a 155.
Back to the build. I flipped it over since that paint cures in 3 hours and hit a few spots that weren't perfect with glass bubbles. A quick sand tomorrow and I'll be painting this plum before the day is out.


Last edited:
Is there any reason to paint areas that will be covered in turf? I cant think of any benefit but I may be wrong.
Thanks.
No paint, glue directly to the glass like your thinking.
I have a second larger pump tunnel already formed inside the tray all I have to do is pie out the old tunnel. I formed it on page 9 and it's large enough for a 155.
oh that's right, I remember you glassing the tunnel intake from the backside but didn't realize it was still covered.


