FX-1 Purple Madness

hornedogg79

dodgin' bass boats
93# bare with pump shoe. SJ around 116. Add all the weight you want, it'll just ride better. The best rider I've ever ridden with in surf rode a 400# superjet. Landing flat on a lightweight hull is the worst. I'm losing count of people selling their carbon Superfreak to buy a glass Edge.
 

Sanoman

AbouttoKrash
Location
NE Tenn
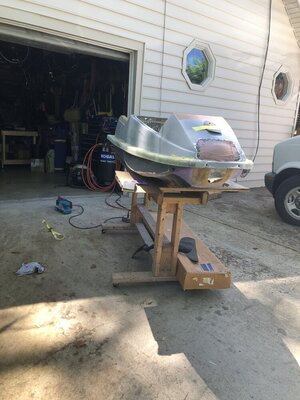
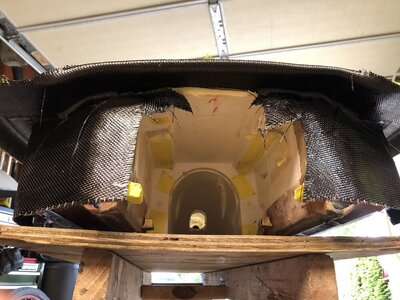
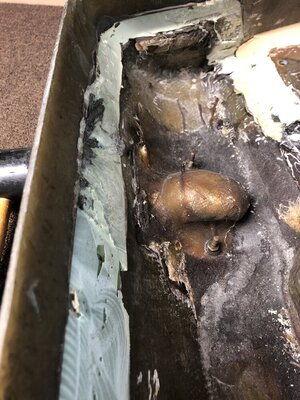
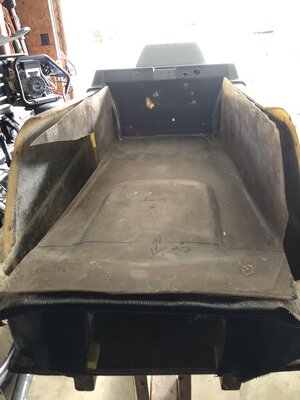
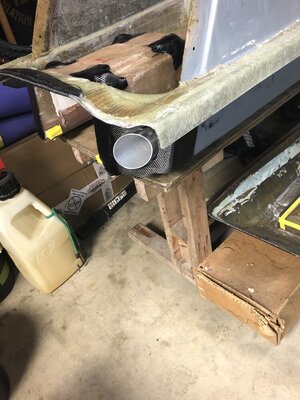
Well finally made some small progress on the ski.Rails are cut and shaped but still need some sanding.Real happy with the rear bond rail.The topside is done and the rear rail but still need to fill the two holes where the larger pump tunnel meets the hull and also lay some carbon on the underside to tie the end caps into the bond rail.
Going to try to make a big push this weekend to work on it.Just hope for the best!
 

Attachments

  • 2F96227A-885A-4351-9CA1-5C84C8626E61.jpeg
    2F96227A-885A-4351-9CA1-5C84C8626E61.jpeg
    90.5 KB · Views: 162
  • CE5772AF-A84A-432A-AE18-9892DE6EE4AD.jpeg
    CE5772AF-A84A-432A-AE18-9892DE6EE4AD.jpeg
    182.4 KB · Views: 128
  • 1C8D7650-6AAF-4D07-8DFD-61DDB9BE8828.jpeg
    1C8D7650-6AAF-4D07-8DFD-61DDB9BE8828.jpeg
    154.9 KB · Views: 112
  • 5E77A450-8749-4350-A718-D99F306D8BD5.jpeg
    5E77A450-8749-4350-A718-D99F306D8BD5.jpeg
    144.4 KB · Views: 102
  • D4C93B43-4158-4BEB-AA84-5D10AD635F28.jpeg
    D4C93B43-4158-4BEB-AA84-5D10AD635F28.jpeg
    202.4 KB · Views: 113
Last edited:

Sanoman

AbouttoKrash
Location
NE Tenn
for the love of God and all things Holy (AKA Beer), would you finish already!
Trying Bk! Been repairing and repairing a gust room at our house.Getting ready for a new wood floor.l stripped the baseboards off over the weekend and also patching holes in the walls.Splitting my time up between working the ski.

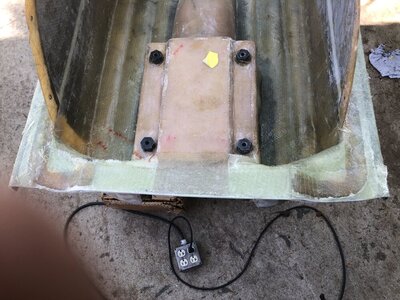
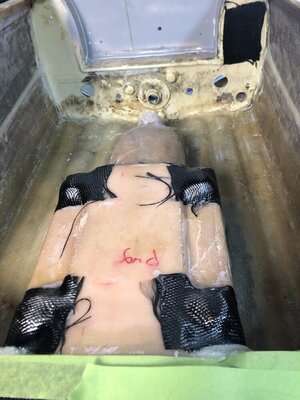
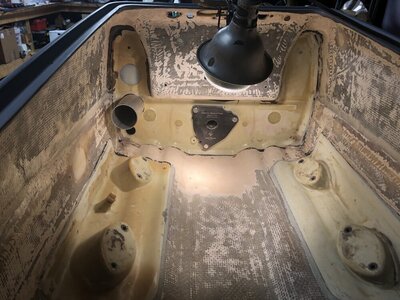
But made great progress on the ski.Filled in the tow eye delete on the bottom of the nose.Four layers of 12 oz carbon on the inside with a small piece of carbon scrap sandwiched with three layers on the outside.Also tied the last layer into the bottom of the bond (outside) rail.Encapsulated the pump bolt holes with thickened epoxy with a layer of carbon over the top.They look sloppy but are solid.Also covered the outside of the hull end caps with the same 12oz carbon,using only one layer.Some trimming out and it will look great.The is enough reinforcement on the inside already.To finish,l covered the bottom of the rear bond rail tied into the end caps..Done with that portion of glassing on the hull.
So this week going to start drilling the holes for exhaust,water lines and steering tube.Maybe get them glued in with 5200.
 

Attachments

  • 7C994193-6174-4324-BC2F-C0FF3F71B449.jpeg
    7C994193-6174-4324-BC2F-C0FF3F71B449.jpeg
    189 KB · Views: 86
  • 4D37E426-D7C8-43C3-BF43-6454F87489DB.jpeg
    4D37E426-D7C8-43C3-BF43-6454F87489DB.jpeg
    155.6 KB · Views: 81
  • 3C251165-6846-4A1D-98F8-A1C33B4BA4E9.jpeg
    3C251165-6846-4A1D-98F8-A1C33B4BA4E9.jpeg
    130.8 KB · Views: 76
  • C4E63F7F-464E-4913-BF31-CD792E04E80E.jpeg
    C4E63F7F-464E-4913-BF31-CD792E04E80E.jpeg
    168.3 KB · Views: 89

Sanoman

AbouttoKrash
Location
NE Tenn
Another area is the hood that needs some help.The previous owner must have bought the hood separately form the hull because of the color.But whoever did the mods on the hood should not be working with fiberglass! The two vent holes on the front of the hood had been filled in,but just with some sort of filler (?).All it took was one whack of a rubber mallet to pop them out.The thin glass cloth was dry too.And the unusual hand holds in the top of the hood broke off easily with a screwdriver and the mallet.Sorry @brapperdoodle,l did not like them.l’ll make some new ones.
Also (maybe) going to cut the fire extinguisher area out.Still thinking about that one.If l do cut it out,plan on customizing the hood by cutting down the the rear of the hood you see taped off and lowering it.May look to see if anyone has an old fx fire extinguisher holder.On the fence at this point.

Spent sometime last night making plans on the tray and what it will take to work it in to the build
 

Attachments

  • 9EBE3A69-6799-41E0-9835-2713CABD4CAB.jpeg
    9EBE3A69-6799-41E0-9835-2713CABD4CAB.jpeg
    176.7 KB · Views: 84
  • 617363BB-498F-4089-A0FF-65A3B0F92748.jpeg
    617363BB-498F-4089-A0FF-65A3B0F92748.jpeg
    187.4 KB · Views: 87
  • 2864833F-3CA5-4D2E-B22F-4BD8B7750C92.jpeg
    2864833F-3CA5-4D2E-B22F-4BD8B7750C92.jpeg
    184.6 KB · Views: 85
  • FAB59CB0-089A-4C58-84E5-3DBB3A41803B.jpeg
    FAB59CB0-089A-4C58-84E5-3DBB3A41803B.jpeg
    151.7 KB · Views: 87
  • FCF6C783-206C-46CE-AA7B-F6A9ED2EB65D.jpeg
    FCF6C783-206C-46CE-AA7B-F6A9ED2EB65D.jpeg
    99.1 KB · Views: 102

wydopen

onthepipe
Another area is the hood that needs some help.The previous owner must have bought the hood separately form the hull because of the color.But whoever did the mods on the hood should not be working with fiberglass! The two vent holes on the front of the hood had been filled in,but just with some sort of filler (?).All it took was one whack of a rubber mallet to pop them out.The thin glass cloth was dry too.And the unusual hand holds in the top of the hood broke off easily with a screwdriver and the mallet.Sorry @brapperdoodle,l did not like them.l’ll make some new ones.
Also (maybe) going to cut the fire extinguisher area out.Still thinking about that one.If l do cut it out,plan on customizing the hood by cutting down the the rear of the hood you see taped off and lowering it.May look to see if anyone has an old fx fire extinguisher holder.On the fence at this point.

Spent sometime last night making plans on the tray and what it will take to work it in to the build
I’ve got the fire extinguisher holder (I think unless I threw it away) if you need one
 
I have a Yamaha brochure from 1994, these numbers might help get a close Idea... The good news is, I have a virtually stock FX-1 that will be built up very similar to Purple Madness. I will absolutely weigh the hull and keep track of the numbers as we go along. This question will be answered eventually haha :)


View attachment 409834
View attachment 409833
View attachment 409835
View attachment 409836
When I gutted and reinforced my FX-1 about 6 or so years ago, it weighed 78lbs and the foam was stil intact and obviously dry still in the tray. That weight is with absolutley no hardware, no pump shoe, no inserts - just the glass hull without the hood, no turf, no nose foam. After having Tom21 reinforce it and before putting in any hardware it weighed 89lbs. Tom used a vacuum in the process of layup including reinforcing the hood undercuts, and a bit extra under the pole mount. Used a bathroom scale in the garage for weighing.
 

Sanoman

AbouttoKrash
Location
NE Tenn
l didn’t weigh mine before l started (wish l did now).But it was already cut up and the 144 pump graft installed.Then l ground off most of the glass and thickened epoxy out.But will definitely weigh it before it gets paint.
 

Sanoman

AbouttoKrash
Location
NE Tenn
Small stuff this weekend.But a lot of little things add up in the end on a build.
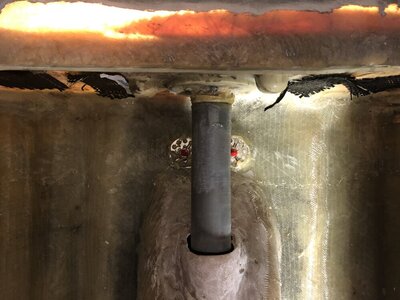
1.Driveshaft tube glued with g-flex.Will carbon wrap later.
2.Scoop grate inserts for front screws added today.Another carbon wrap later.
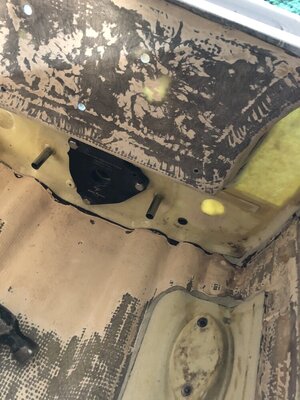
3.All the holes thru the bulkhead filled with thickened epoxy with glass strands and a piece of carbon on the backside.
4.New exhaust hole drilled lower in bulkhead to the end cap.Seems like that took forever because l had to angle the hole.
Had to order some new water line tubes because they were a bit short.
 

Attachments

  • 103A5AEB-89D0-4923-89AE-8D707E925F6D.jpeg
    103A5AEB-89D0-4923-89AE-8D707E925F6D.jpeg
    123.5 KB · Views: 76
  • 1BD3E1B4-9F1E-4ED7-B964-EC2BFB145A66.jpeg
    1BD3E1B4-9F1E-4ED7-B964-EC2BFB145A66.jpeg
    147.8 KB · Views: 74
  • 380BDE8C-3265-4336-B22E-168F1A9A14DA.jpeg
    380BDE8C-3265-4336-B22E-168F1A9A14DA.jpeg
    158.7 KB · Views: 75
  • D7AE6930-7979-438E-BFE2-41221A2EED71.jpeg
    D7AE6930-7979-438E-BFE2-41221A2EED71.jpeg
    124.8 KB · Views: 91

Sanoman

AbouttoKrash
Location
NE Tenn
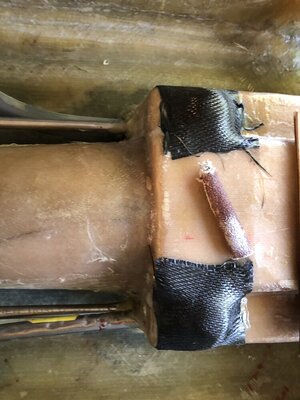
The Madness continues as l am slowly getting things tied up.Closed off the driveshaft tube this weekend on the pump tunnel side by adding some thickened epoxy with glass strands to fill in around the tube and hull.Then wrapped some 12 oz carbon around the shaft tube connecting it to the inside pump tunnel.Also covered the front intake grate inserts with the same cloth.
On the outside of the 144 pump box in the front of the brass piece where you bolt the ride plate to,there is some “cutouts” that allow some extra room for the steering cable thru-hull nut.Well this space when you bolt an fx ride plate to it leaves about a space of .25” wide and 1.25” long gap.Sorry that was such a long explanation.:rolleyes: Filled that area in instead of just adding silicone later on.l had about half of the thickness filled in from a previous surplus of epoxy so wasn’t that much to finish.We’ll all that leads up to is now l can install the plastic steering thru hull without having to deal with sanding and trying to finish it later.
l also skim coated the end caps with faring to smooth out the 12 oz carbon previously done.This will allow the exhaust tube to also be installed,as well as the .50” water lines and trim tube possibly today.Pics later

*As a side note.Had a discussion with another rider this past weekend about using thickened epoxy with glass or carbon strands mixed in to use as a filler.l have had great success with the mixture over several builds,but l don’t think you should overly use the mixture.As in years past where a bodyman would use a 2 lbs of bondo to fill a dent.lt should be used as a “skim coat” or just in small amounts,then reinforced over with carbon or glass.Think of it as carbon rebar when using.Be interesting to see other opinions on this.Maybe should start a thread..
 

Sanoman

AbouttoKrash
Location
NE Tenn
Couple pics
 

Attachments

  • 18EC8495-C887-4C3A-8881-D0905A8B4C36.jpeg
    18EC8495-C887-4C3A-8881-D0905A8B4C36.jpeg
    146.4 KB · Views: 63
  • 2F366CA5-F985-49E2-9E31-272696BEA58C.jpeg
    2F366CA5-F985-49E2-9E31-272696BEA58C.jpeg
    113.7 KB · Views: 66
  • A788510B-2A3A-4762-B79F-72E1B02B8066.jpeg
    A788510B-2A3A-4762-B79F-72E1B02B8066.jpeg
    131.1 KB · Views: 89

Sanoman

AbouttoKrash
Location
NE Tenn
Exhaust going in this weekend,just need to finish sanding the skim coat of fairing before.Then l can start cutting and placing the polypropylene in the tray.

Wanted to thank @SALTDOG for sending me a fire ext holder that is in excellent condition! Thinking how long this plastic part has been in existence is unreal the condition of it.
 

Attachments

  • DDFE180B-DF79-4EEA-8975-9255D3A97540.jpeg
    DDFE180B-DF79-4EEA-8975-9255D3A97540.jpeg
    131.8 KB · Views: 70

Sanoman

AbouttoKrash
Location
NE Tenn
Decided to keep the original design of the hood with some tweaks.lt’s on the back burner right now.l need to get started on the tray
 
Top Bottom