FX-1 Purple Madness

Sanoman

AbouttoKrash
Location
NE Tenn
Looks good. Unfortunately you will be in the same boat as me hand sanding between the new rail and tubbie. Not fun..Although your mini belt sander will come in handy I’m sure
Yea,still gonna be some sanding by hand lm afraid.And like Scotts,great video
 

Sanoman

AbouttoKrash
Location
NE Tenn
As the days grow longer and it gets warmer,l know l have to crank it up a notch to get to ride this ski.Work has been crazy busy,so l don’t feel like doing crap when the day ends.Yesterday was a 730am to 8pm day.But some of that was my own doing.Went for the first bike ride of the season on a local rail trail.Rode 10 miles.But today is another long one,as well as tomorrow.I really don’t need to bitch...(but l still do)
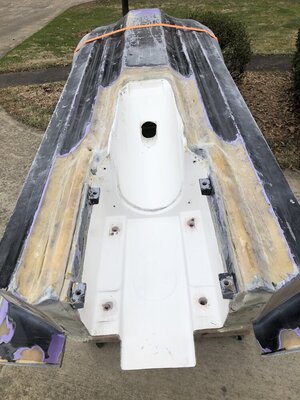
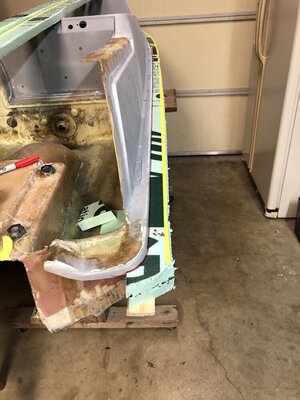
This weekend l plan to grind what’s left of the rails to prep for wider ones and dremel the rest of the area around the pump graft.l should be able to start building up that area around the new pump conversion with layering glass.Then some carbon over that to finish.Also,make a run to lowe’s for some polystyrene foam for the rails.Sand on saturday and glass on sunday.
Well,that’s the plan anyway:rolleyes:
 

Sanoman

AbouttoKrash
Location
NE Tenn
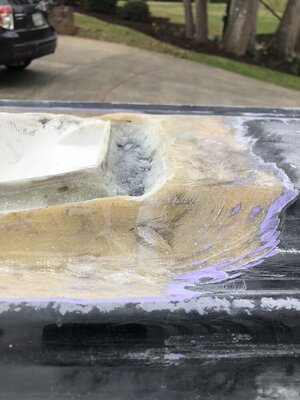
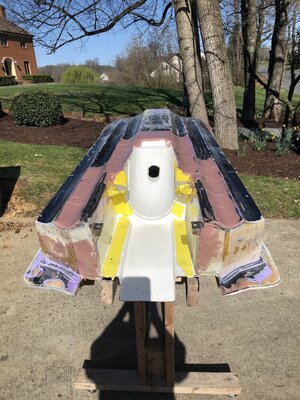
As always,life and my sweet wife have other plans for my weekend.But managed to get the finish sanding done around the conversion area.So it’s prepped and ready to go.l talked to several friends who l respect their opinions about what was the best way to fill the areas that l grounded out.l got all the way down to where l filled in the inside of the tray with fiberglass in order to get a good surface on the outside.My decision is to go with making some thickened epoxy with glass strands in order to fill the void and then cover with some carbon over all of it all at the same time.More than likely there will be some high and low spots which l can fill in later after sanding all of it down.l will use faring as a body filler just to even it out smooth.
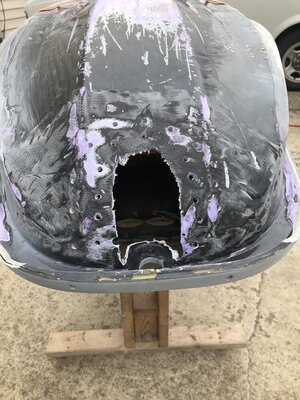
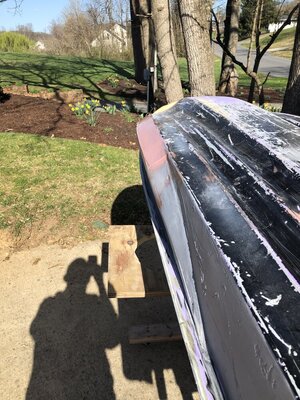
l got the rails sanded out and even now.So a trip to lowe’s to pick up some polystyrene today to start on them before flipping it back over.Also worked on the nose grinding it down and drilling several holes to form a bond between inside and out.I’m not sure what the black paint was (think it’s lmron) but that chit is tough.Also discovered that the gas cap delete does not have any glass cloth on the inside over it.I also have to do away with the 2 holes for the handle pole bracket because of the one hole-r that will be used.

This is a different experience for me,as l normally build new a/m hulls from the ground up,not doing a conversion on an oem one.Shout out to @ScottS @TOBY @tom21 for all their advise and help! Appreciate you guys
 

Attachments

  • E47554F4-3F75-4658-8B4E-59387CA8FE7F.jpeg
    E47554F4-3F75-4658-8B4E-59387CA8FE7F.jpeg
    166.1 KB · Views: 140
  • 073638DA-C052-44AB-8583-8FF1366E3ECC.jpeg
    073638DA-C052-44AB-8583-8FF1366E3ECC.jpeg
    126.6 KB · Views: 119
  • CF1C7F0C-F8DA-4EB5-982A-C1B3014CB516.jpeg
    CF1C7F0C-F8DA-4EB5-982A-C1B3014CB516.jpeg
    189.8 KB · Views: 116

Sanoman

AbouttoKrash
Location
NE Tenn
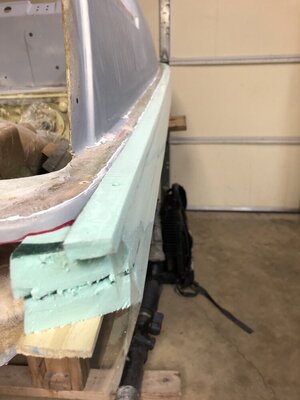
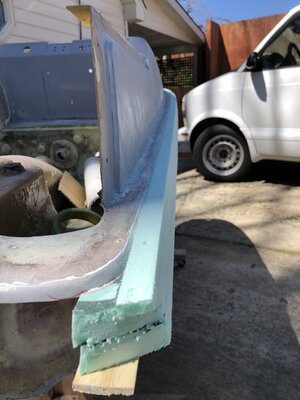
Picked up some foam insulation and a couple furring strips today.Already cut the foam off for both sides in a curved shape.The wood is to hold the foam securely to the ski with some wood screws.Not my idea,but it will work great.

Trying to decide on a shape and width at this point.Been told the rails should be wider midway,which sounds like a good idea.But open to some input from other FX1 riders (not you BK!:p) that would like to share their experiences.This ski will be mostly rode on the lake,but will see some surf from time to time.
 
Last edited:

Sanoman

AbouttoKrash
Location
NE Tenn
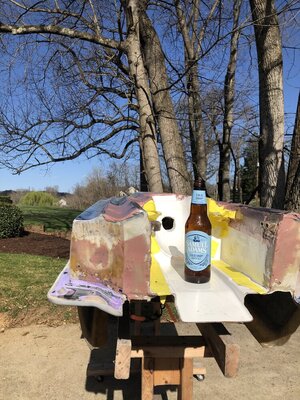
Didn’t get to the rails this weekend,but have some time this week to set them up.Got a skim coat on the conversion area.Had to do some serious sanding to level it all out.Now just a matter of smoothing out the fairing.One of the pics shows where l filled in the chines on the tubbies. l remember wydopen saying it allowed the ski to be a bit loose.There is also a pic of the end cap.I have sanded both down in order to wrap some carbon around them.
Will also be working on the tow eye delete this week.Plus grinding down some of the thickened epoxy from the previous gas cap delete and also changing back the two holes to one for the handle pole bracket.
 

Attachments

  • C2068182-5515-43B3-802B-9F7E80F8CF5C.jpeg
    C2068182-5515-43B3-802B-9F7E80F8CF5C.jpeg
    153 KB · Views: 76
  • 9765B205-E8C2-480E-AA00-677902B5BAAA.jpeg
    9765B205-E8C2-480E-AA00-677902B5BAAA.jpeg
    153 KB · Views: 75
  • 146F7B9A-1B75-4019-A04F-A92C386937F4.jpeg
    146F7B9A-1B75-4019-A04F-A92C386937F4.jpeg
    216.9 KB · Views: 70
  • 25F55BBA-C0B7-4529-8138-C757CEB6B0DF.jpeg
    25F55BBA-C0B7-4529-8138-C757CEB6B0DF.jpeg
    236.2 KB · Views: 73
  • DCF552E4-F601-42B5-B5BC-B0889C8045C7.jpeg
    DCF552E4-F601-42B5-B5BC-B0889C8045C7.jpeg
    242.4 KB · Views: 95

Sanoman

AbouttoKrash
Location
NE Tenn
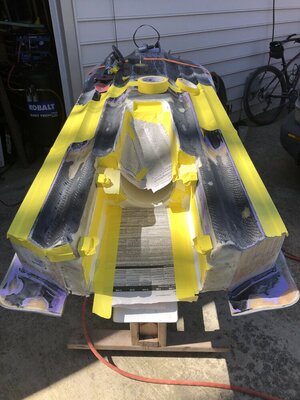
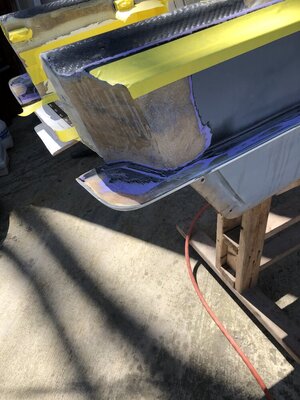
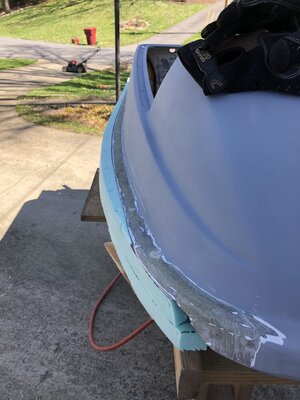
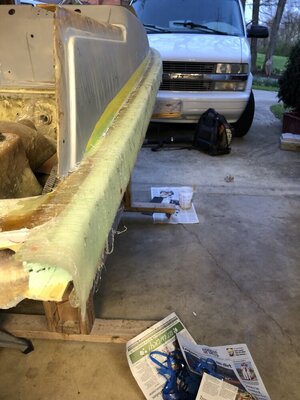
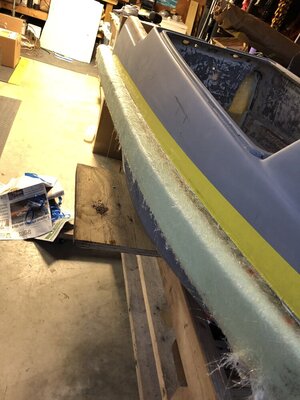
Some progress this weekend.More pics coming.Got part of the day off today to get some carbon and glass on the top of the rails.Ended up about 2” plus wide with a little flair out on the vertical part.The pic of the rail does not show the final cut which is actually to the left of the yellow masking tape.
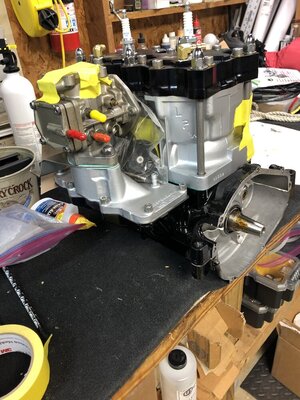
@brapperdoodle and his sweetie came up fo a parts exchange and visit! Great to see y’all too! We traded engines (long story) and some other items.He got his LPW 735 and l got the engine @Jr. built for me (thank you),another LPW 735 to go in this project.
 

Attachments

  • 1D2BE15B-A8DA-4BA3-83FD-66B7BA295BB3.jpeg
    1D2BE15B-A8DA-4BA3-83FD-66B7BA295BB3.jpeg
    131.7 KB · Views: 82
  • A44FDB2B-3C3C-4CE5-BAA4-4643F946FEBE.jpeg
    A44FDB2B-3C3C-4CE5-BAA4-4643F946FEBE.jpeg
    178.7 KB · Views: 90

Sanoman

AbouttoKrash
Location
NE Tenn
So l got to this point on the rails.Put shipping tape on one side last night and still have to finish sanding the other rail.But l want to do just one side at a time.First time rail builder,ya knowo_O
 

Attachments

  • E413F7CB-4186-4AFD-9B9C-DBB4540180EA.jpeg
    E413F7CB-4186-4AFD-9B9C-DBB4540180EA.jpeg
    82.3 KB · Views: 73
  • 955A0B01-ECB8-46B2-BD9F-6060A7007C19.jpeg
    955A0B01-ECB8-46B2-BD9F-6060A7007C19.jpeg
    116.7 KB · Views: 66
  • F4806B07-D434-409E-B06E-E53C35160122.jpeg
    F4806B07-D434-409E-B06E-E53C35160122.jpeg
    108.9 KB · Views: 74

Sanoman

AbouttoKrash
Location
NE Tenn
So today l cut the biax into strips 4” wide,mixed up some resin and laid it on the rails.Did the top side with 2 layers of 1208. I soaked the glass with resin and then squeegeed all the excess off.Had to babysit it for a while,but it’s done.Just glad l didn’t attempt both sides
 

Attachments

  • EBEB8E48-6FFF-4090-9EC1-C2DD6C4A02D5.jpeg
    EBEB8E48-6FFF-4090-9EC1-C2DD6C4A02D5.jpeg
    133 KB · Views: 58
  • 954B2540-A796-4A2D-A282-A4E8FB526E57.jpeg
    954B2540-A796-4A2D-A282-A4E8FB526E57.jpeg
    135.1 KB · Views: 66
Last edited:
Top Bottom