You are using an out of date browser. It may not display this or other websites correctly.
You should upgrade or use an alternative browser.
You should upgrade or use an alternative browser.
Superjet - Project RS *Build Complete (for now)*
- Thread starter Mud-Nut
- Start date
- Location
- LaSalle, ON
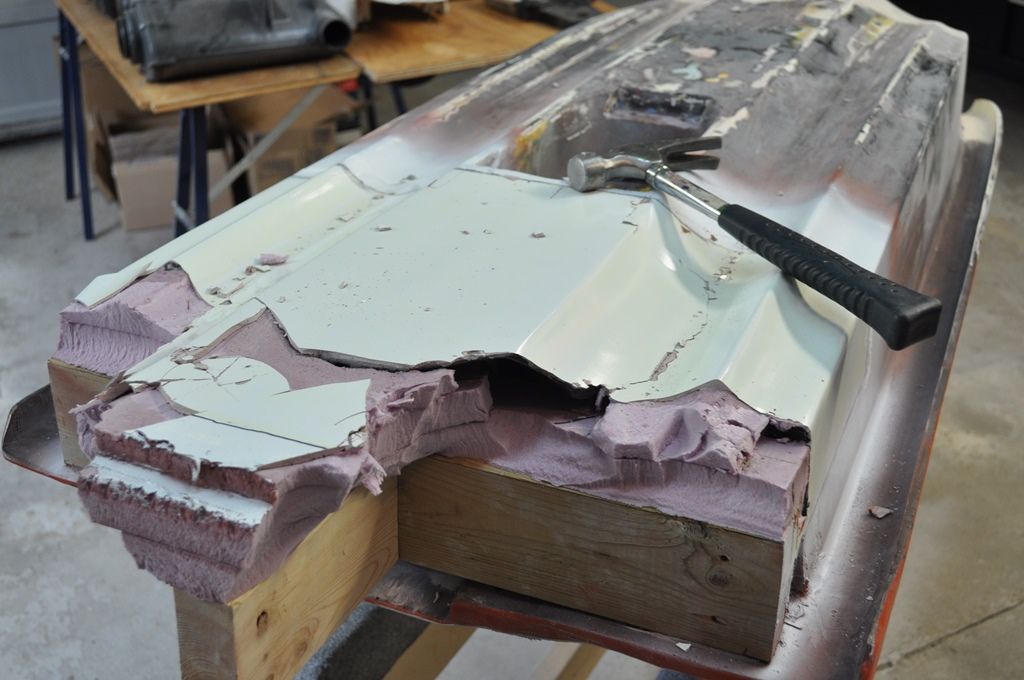
Smashing the plug was really fun!
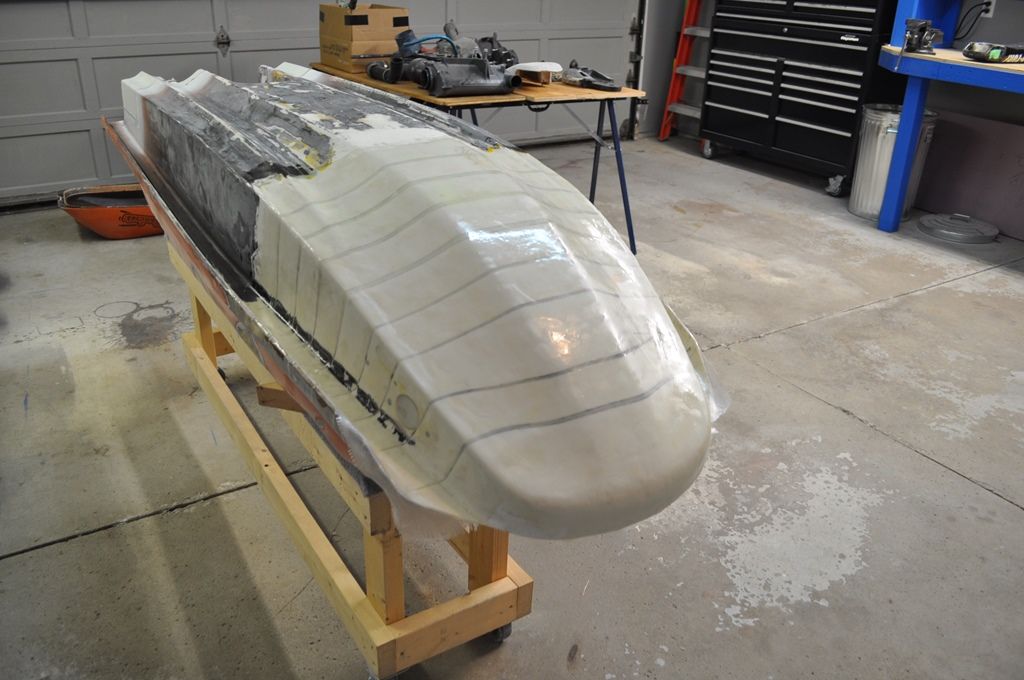
Then I laid down a layer of s-glass on the outside of the rocker.
Sorry, it's a short update, but I've been putting some time into the handpole as well (pictures/details to come soon). I'm also waiting for some supplies for the ride plate, so in the meantime I've also been touching up the mold.

Then I laid down a layer of s-glass on the outside of the rocker.

Sorry, it's a short update, but I've been putting some time into the handpole as well (pictures/details to come soon). I'm also waiting for some supplies for the ride plate, so in the meantime I've also been touching up the mold.
- Location
- LaSalle, ON
I want to do something different with my hood, but before I can do any of it, I need to get my air through the handpole. An aftermarket handpole is not in the budget, so I decided to make my stock pole breathe. I haven't seen anyone do this yet (didn't search too hard though).
Based on the info I could find, it seems like my handpole has been shortened approximately 8.5 inches. The number doesn't really matter, I liked it how it was setup.
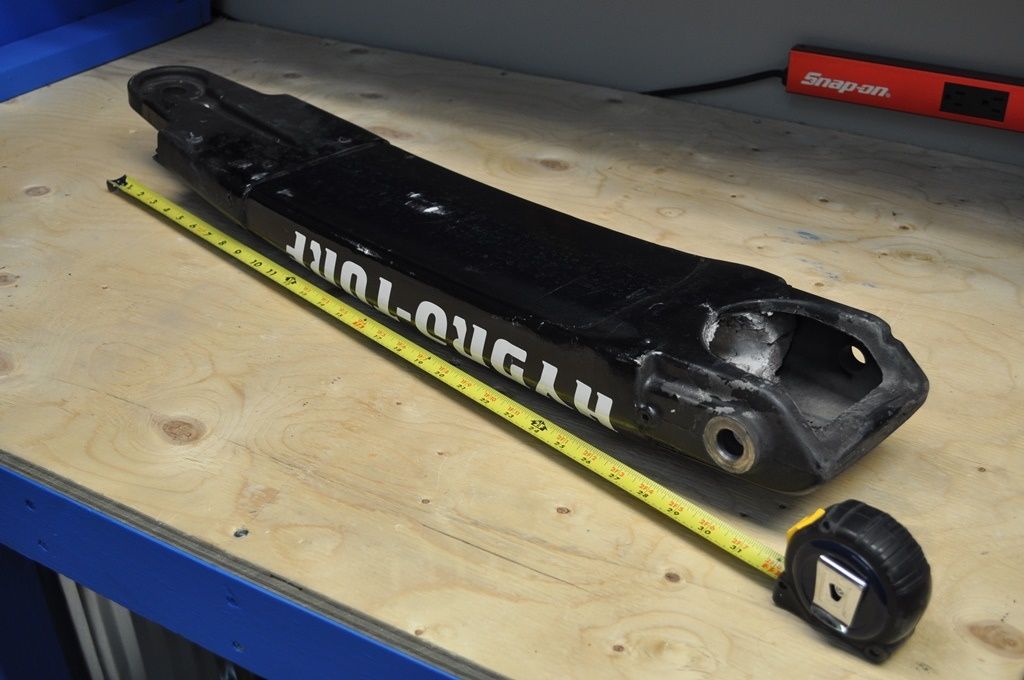
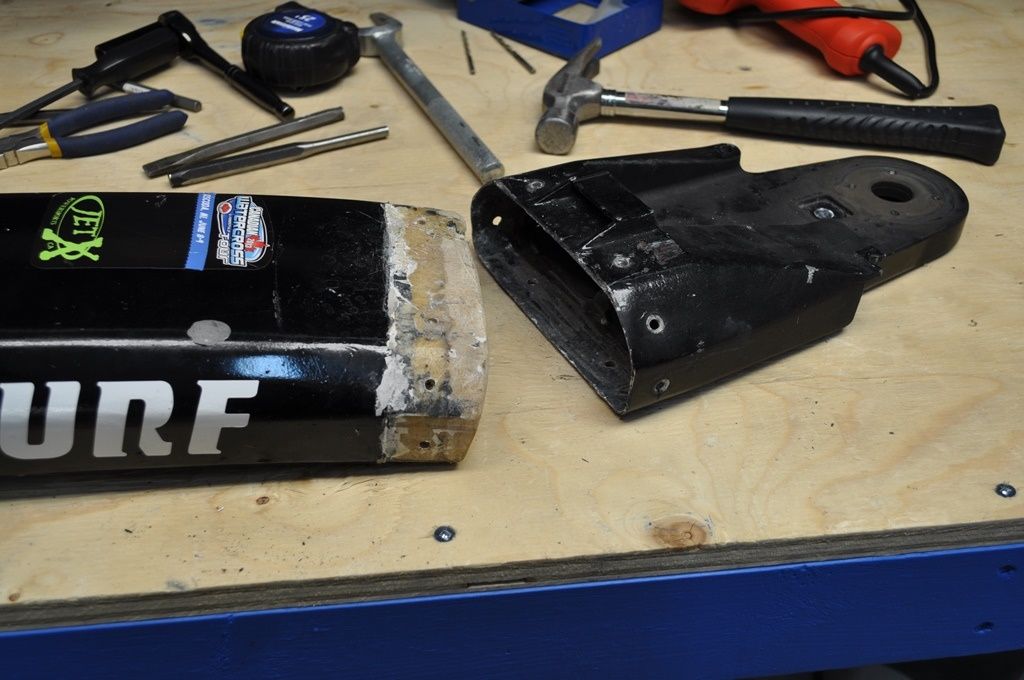
It appears the handpole was shortened by chopping some length off the top and bottom. The bottom was glassed over, so I decided to remove the top section. Started by drilling out the rivets, and then did a lot of hammering and messing around to get it to split.
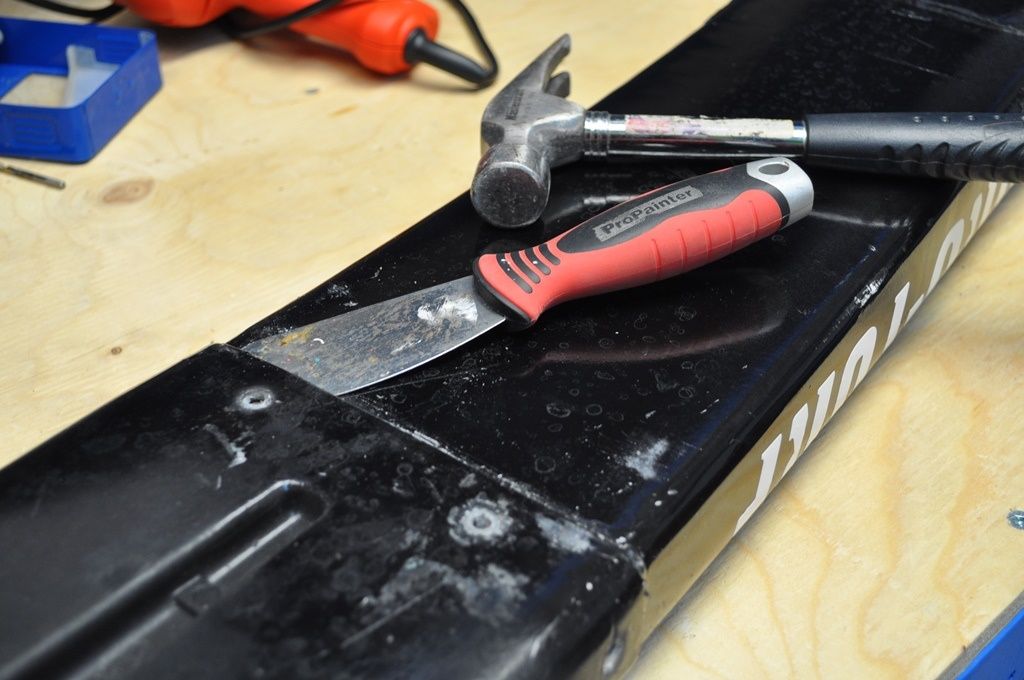
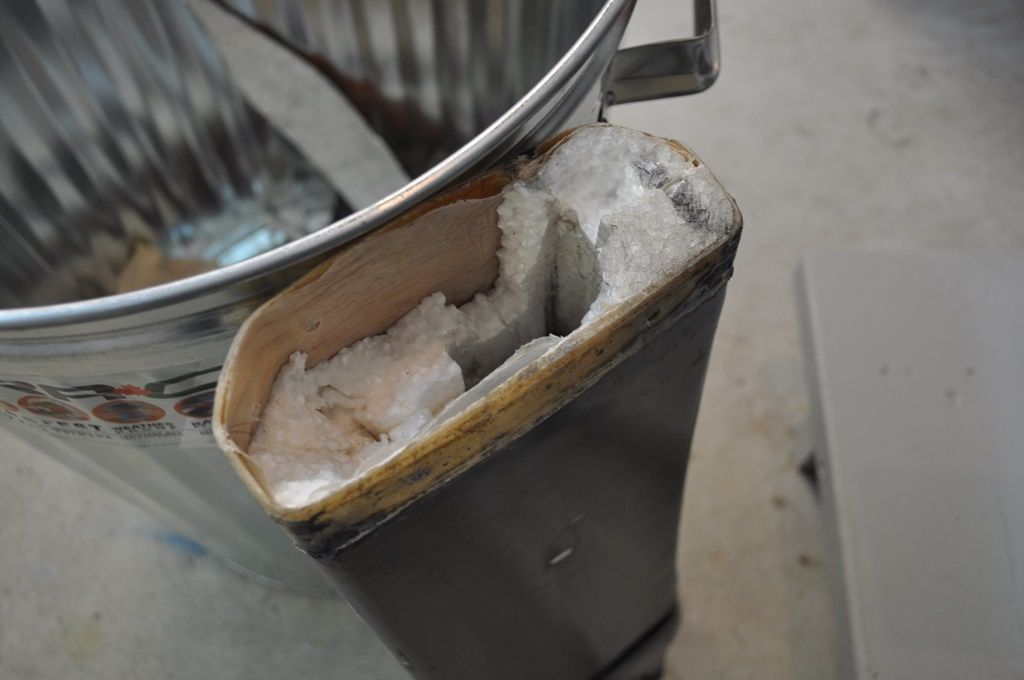
Defoamed. This was a PITA the deeper I got!
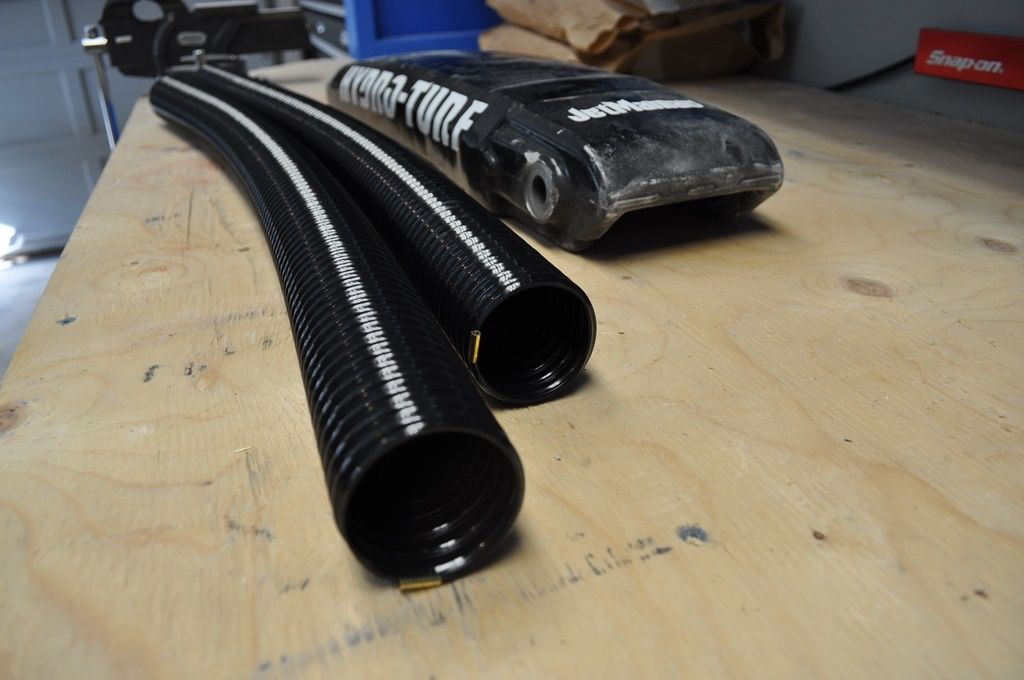
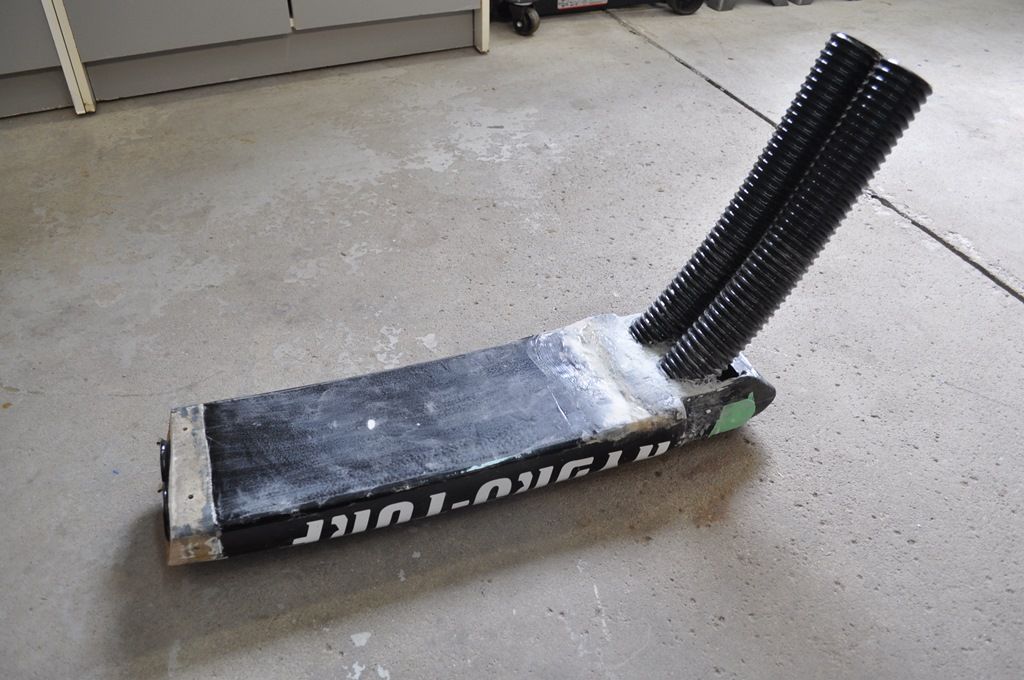
Found these at Home Depot, they should work!
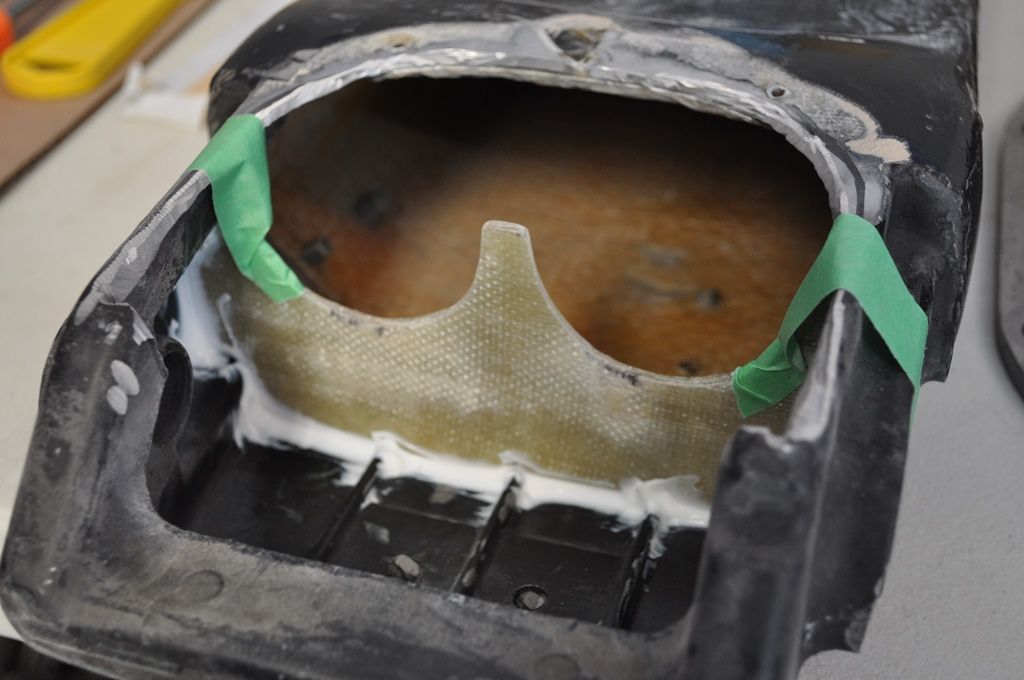
The next step was to glass in the tubes at the bottom of the handpole. I used a combination of cured fiberglass pieces cut to shape, silicone, 1.5oz matting, and cabosil/resin mixture. Worked out pretty good! Also, I had to make the opening at the bottom a little bigger as well.
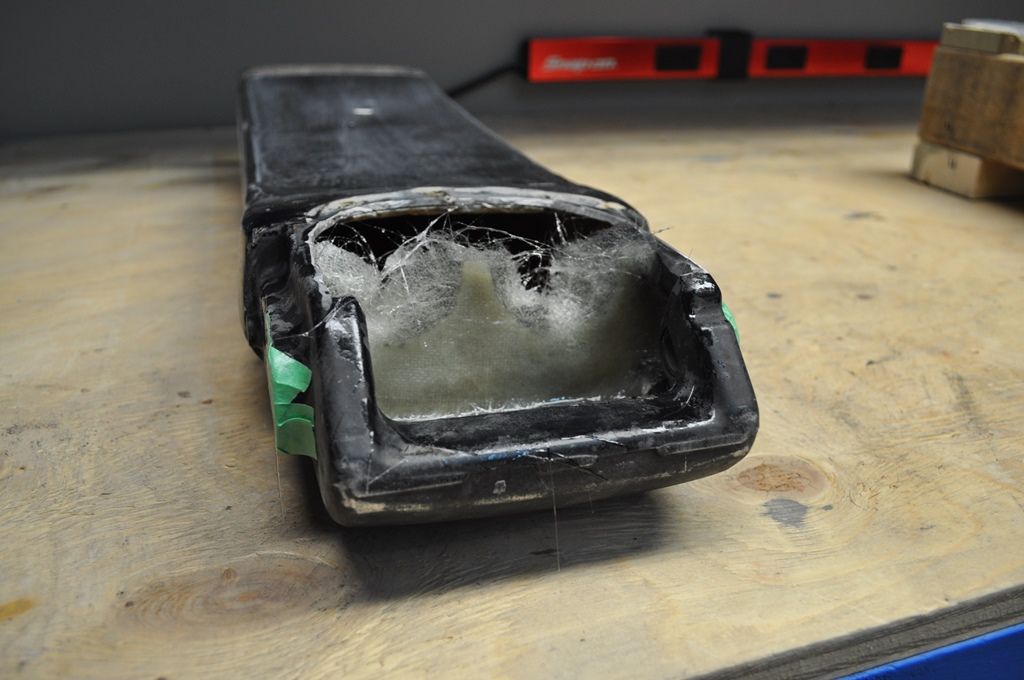
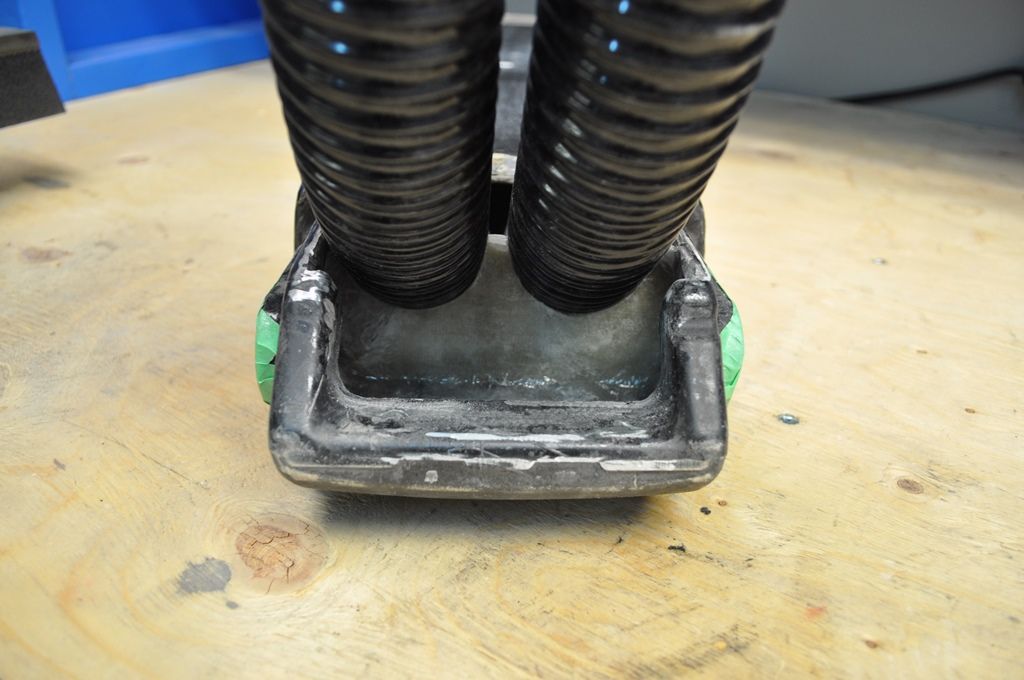
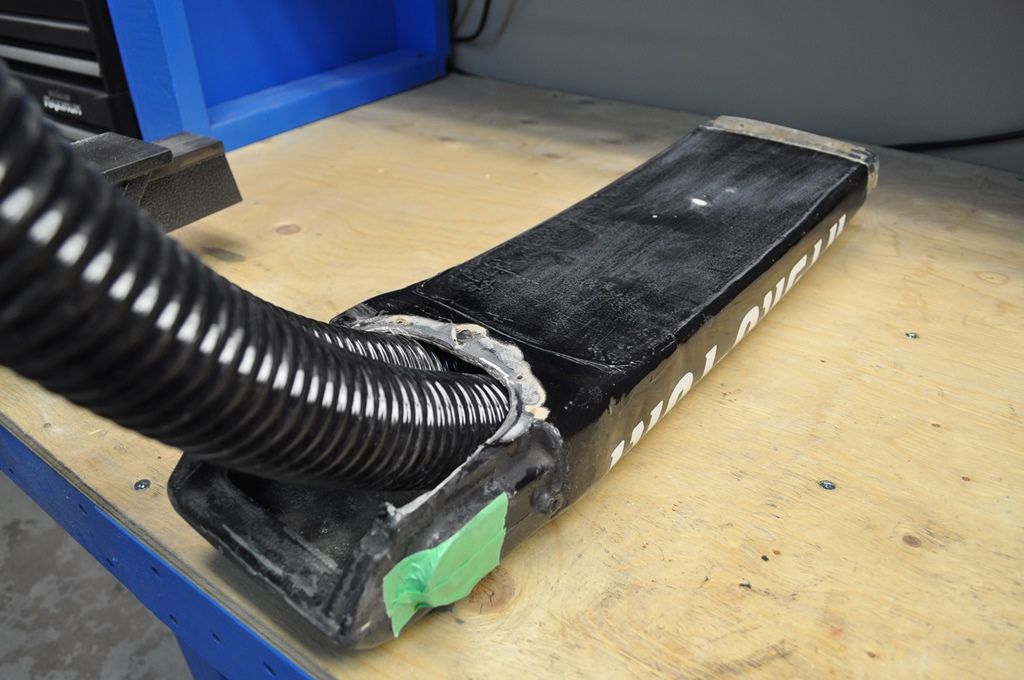
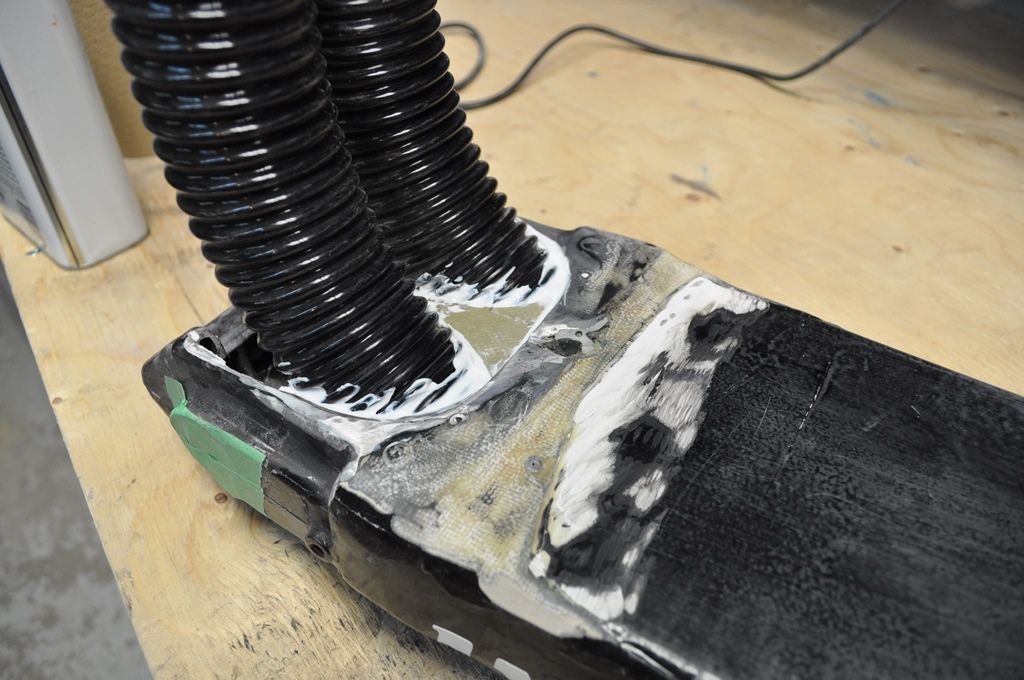
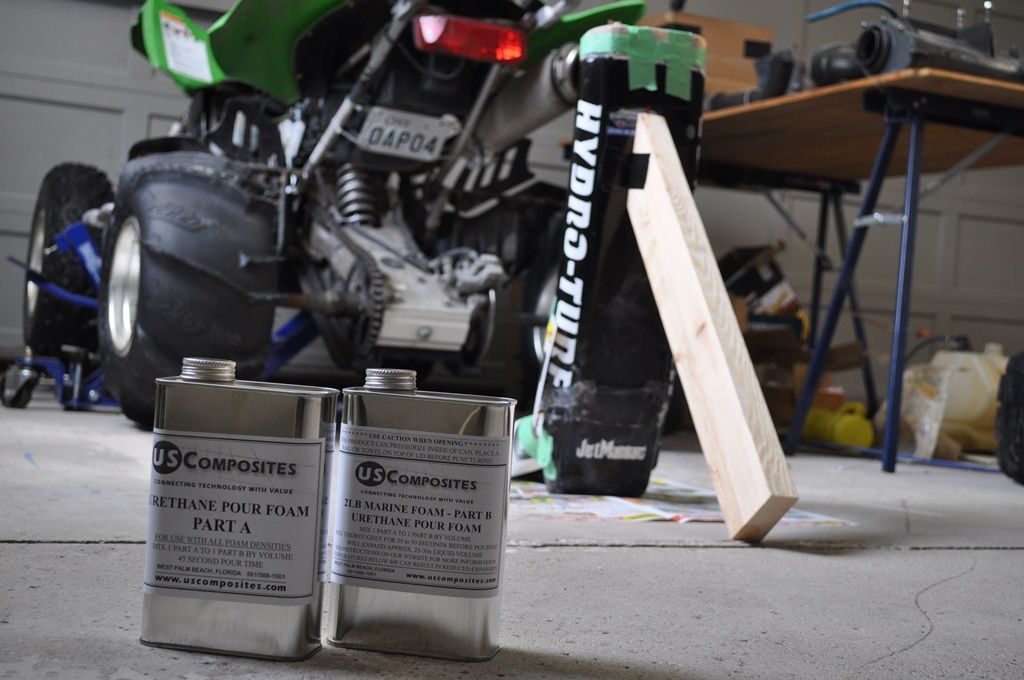
Then I filled the pole with expanding foam (yes, I know I take a lot of pictures).
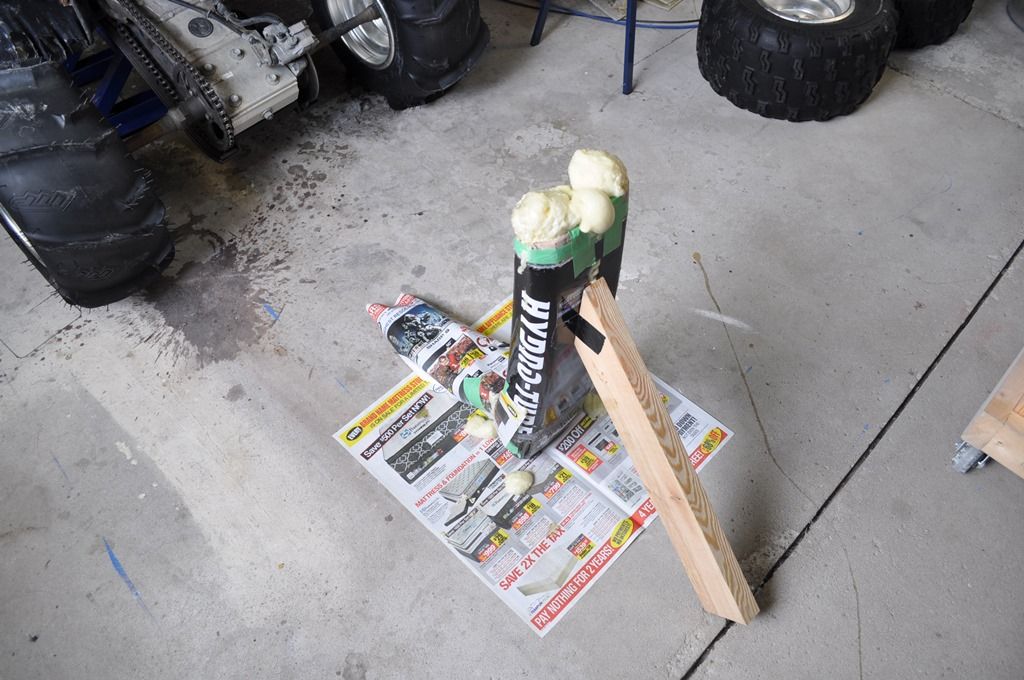
Sealed the end with some epoxy resin.
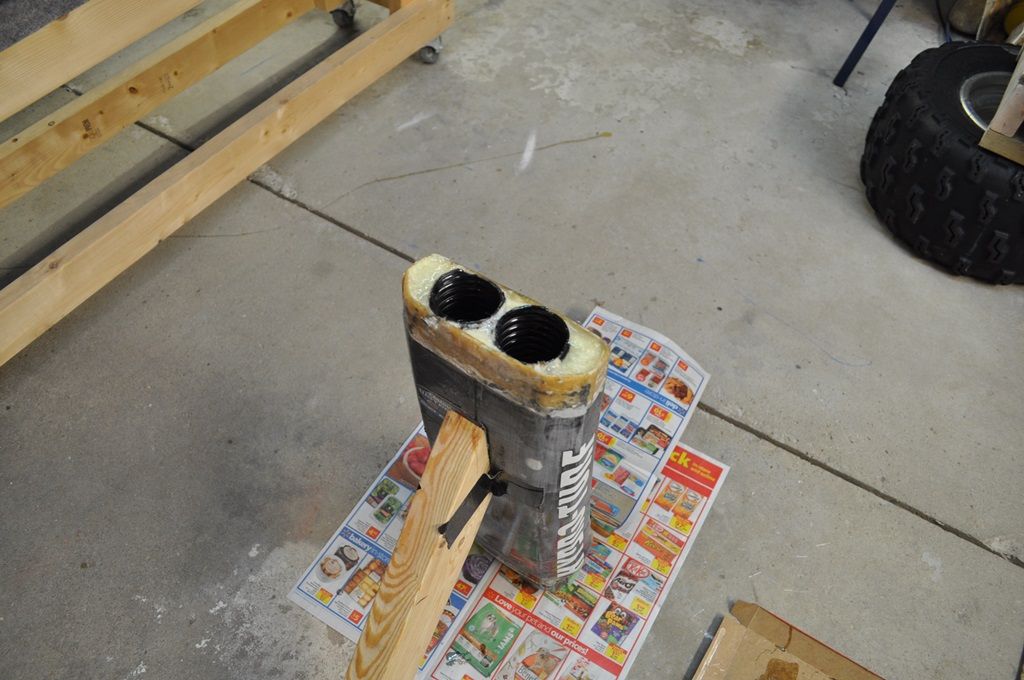
And then I sealed that with silicone, just to make sure the foam doesn't get wet.
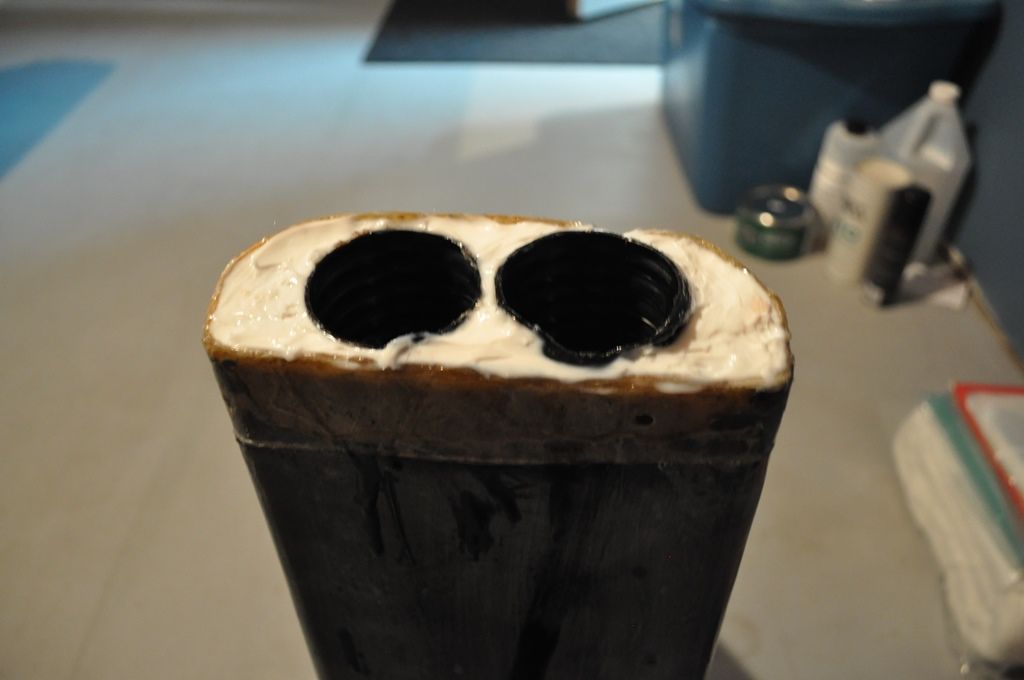
Air will be sucked from the top of the pole, and the top aluminum piece doesn't have many holes in it to allow air flow. So I added some cutouts to let air flow into the pole.
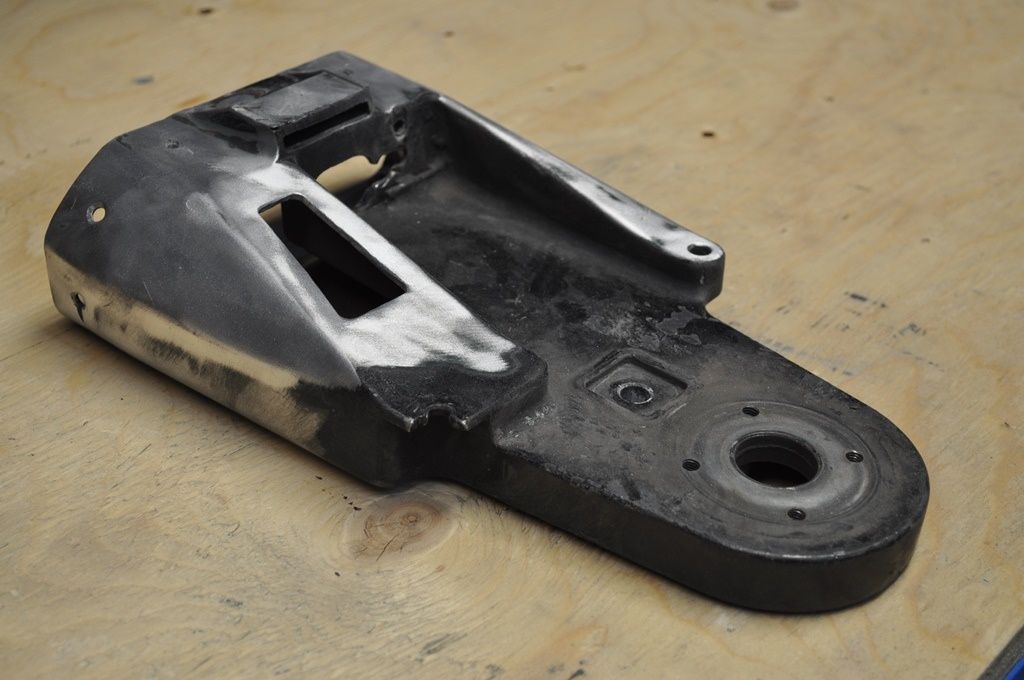
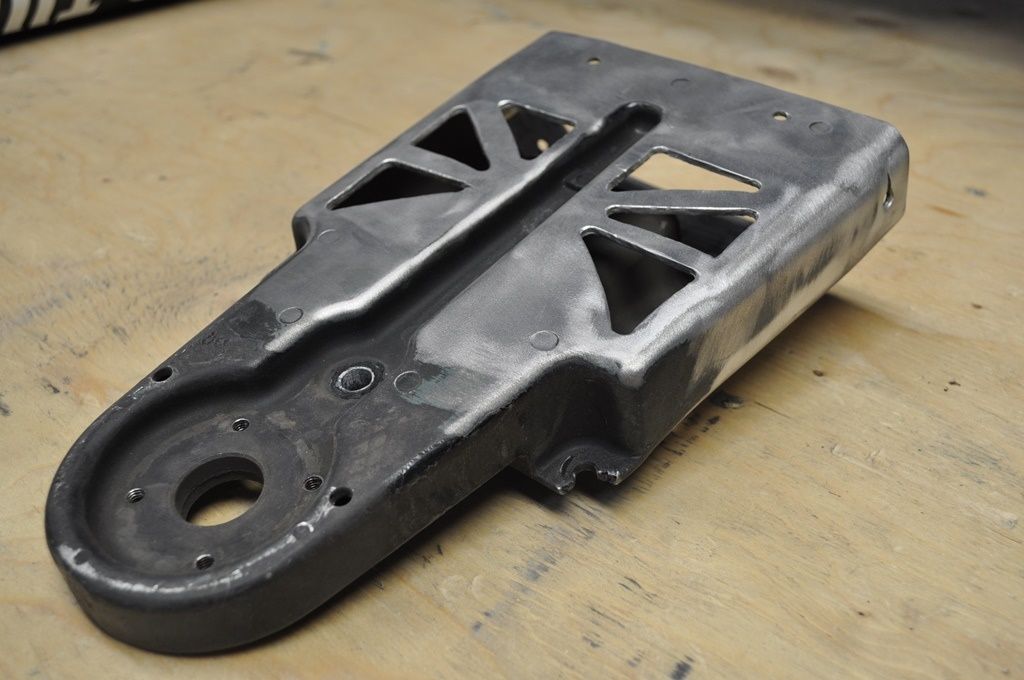
More to come soon, heading out to the garage right now.
Based on the info I could find, it seems like my handpole has been shortened approximately 8.5 inches. The number doesn't really matter, I liked it how it was setup.

It appears the handpole was shortened by chopping some length off the top and bottom. The bottom was glassed over, so I decided to remove the top section. Started by drilling out the rivets, and then did a lot of hammering and messing around to get it to split.


Defoamed. This was a PITA the deeper I got!

Found these at Home Depot, they should work!

The next step was to glass in the tubes at the bottom of the handpole. I used a combination of cured fiberglass pieces cut to shape, silicone, 1.5oz matting, and cabosil/resin mixture. Worked out pretty good! Also, I had to make the opening at the bottom a little bigger as well.


Then I filled the pole with expanding foam (yes, I know I take a lot of pictures).


Sealed the end with some epoxy resin.

And then I sealed that with silicone, just to make sure the foam doesn't get wet.

Air will be sucked from the top of the pole, and the top aluminum piece doesn't have many holes in it to allow air flow. So I added some cutouts to let air flow into the pole.


More to come soon, heading out to the garage right now.
BruceSki
Formerly Motoman25
- Location
- Long Island
Yeah man, sorry to be a Debbie downer. But if you ride hard, you will snap that pole in no time. There is a reason everyone runs aftermarket metal poles.
But it does look cool. And the attention to detail is there for suree
But it does look cool. And the attention to detail is there for suree
- Location
- clark lake, MI
Use glass or carbon and over lap both ends of the end aluminum pieces. I did that on a buddy s, and he is yet to break it again.
- Location
- Spokane,wa

.....nice ideal...this will help from snapping your pole and damaging your hull if u don't have one yet...i been running a/m poles for a while now but i still have a limiting rope just in case of over extending the pole
Last edited:
- Location
- LaSalle, ON
Use glass or carbon and over lap both ends of the end aluminum pieces. I did that on a buddy s, and he is yet to break it again.
.....nice ideal...this will help from snapping your pole and your hull if u don't have one yet...i been running a/m poles for a while now but i still have a limiting rope just in case of over extending the pole....
My plans include both of those; some reinforcement and a limiting rope. If I manage to break it, then I'll move on and buy something stronger. But if I wasn't able to break it last year, and I'm building it stronger now, I think I'll be fine for a little while at the very least.
Last edited:
- Location
- Spokane,wa
My plans include both of those; some reinforcement and a limiting rope. If I manage to break it, then I'll move and buy a something stronger. But if I wasn't able to break it last year, and I'm building it stronger now, I think I'll be fine for a little while at the very least.
.....by the way u can reinforce underneath the hull were handlepole mount goes with a aluminum plate for extra reinforcement i made my own and been running the plate for years...

Last edited:
- Location
- Windsor, Ontario
I think that is an awesome idea man. Little reinforcing at the high stress points and you're golden plus DOT breathing through the pole will be awesome. Keep up the good work!
- Location
- Washington DC
Any idea on pole length when you started? did you change it when you modified the pole?
Awesome build so far.
Awesome build so far.
- Location
- LaSalle, ON
@tnt01 - Thanks, I was going to make my own as well.
@Parsonsjb88 - Thanks man!
@xzibit a - When I started, I figured the pole was shortened approximately 8.5 inches. I rode the ski for a season and really liked it, so I'm leaving the length as it is.
@Parsonsjb88 - Thanks man!
@xzibit a - When I started, I figured the pole was shortened approximately 8.5 inches. I rode the ski for a season and really liked it, so I'm leaving the length as it is.
Quinc
Buy a Superjet
- Location
- California
Great build thread!
- Location
- United Kingdom
Nice thread. Good read.
JT_Freeride
John Tetenes @Jtetenes
- Location
- Long Island
Bruce is right. The detail really is nice but if you are going hard it will break. I broke 2 poles in a 2 day period not to mention the pole bracket are is cracking everywhere. This best thing to do is wrap the base in glass or carbon that's where they snap.Yeah man, sorry to be a Debbie downer. But if you ride hard, you will snap that pole in no time. There is a reason everyone runs aftermarket metal poles.
But it does look cool. And the attention to detail is there for suree
blank
Ready To Rip
- Location
- Grand Rapids, MI
sub'd nice detailed work!
- Location
- Wasaga Beach
Great work. Looking forward to seeing it complete.
- Location
- LaSalle, ON
Thanks for the comments and feedback. I have an update for you guys....
Mold touch-ups are done, all clean, and ready to go.
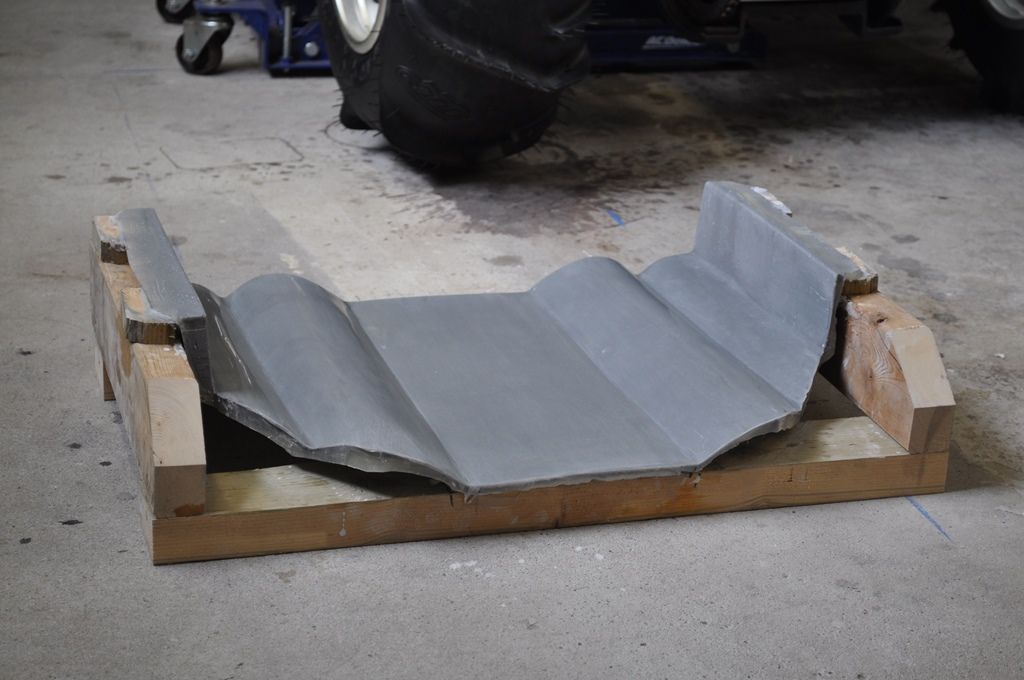
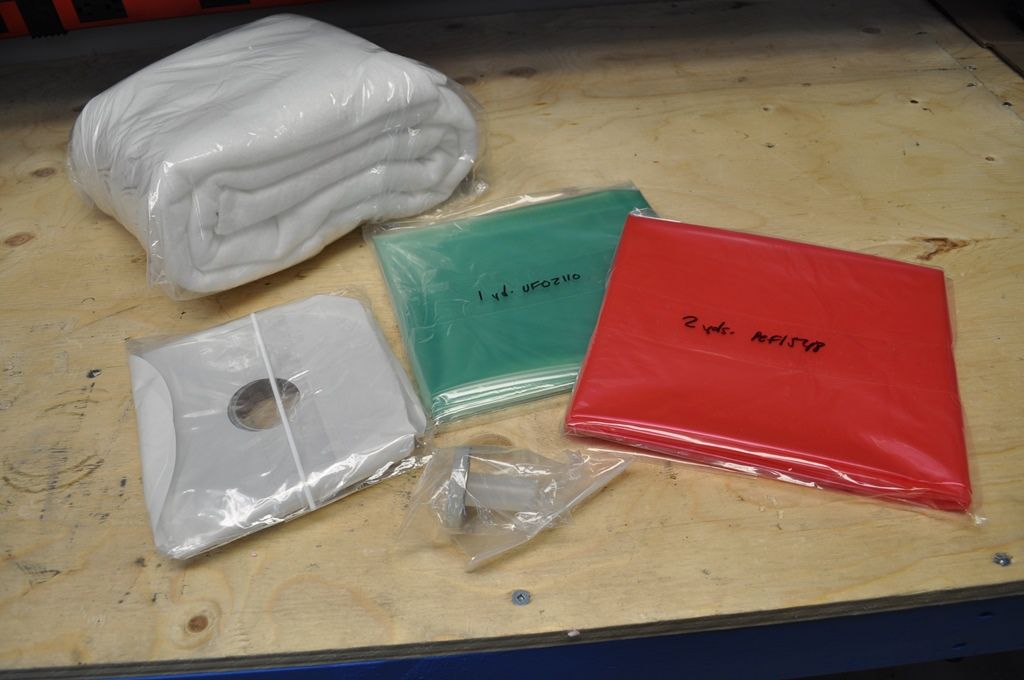
Vacuum bagging supplies from US Composites.
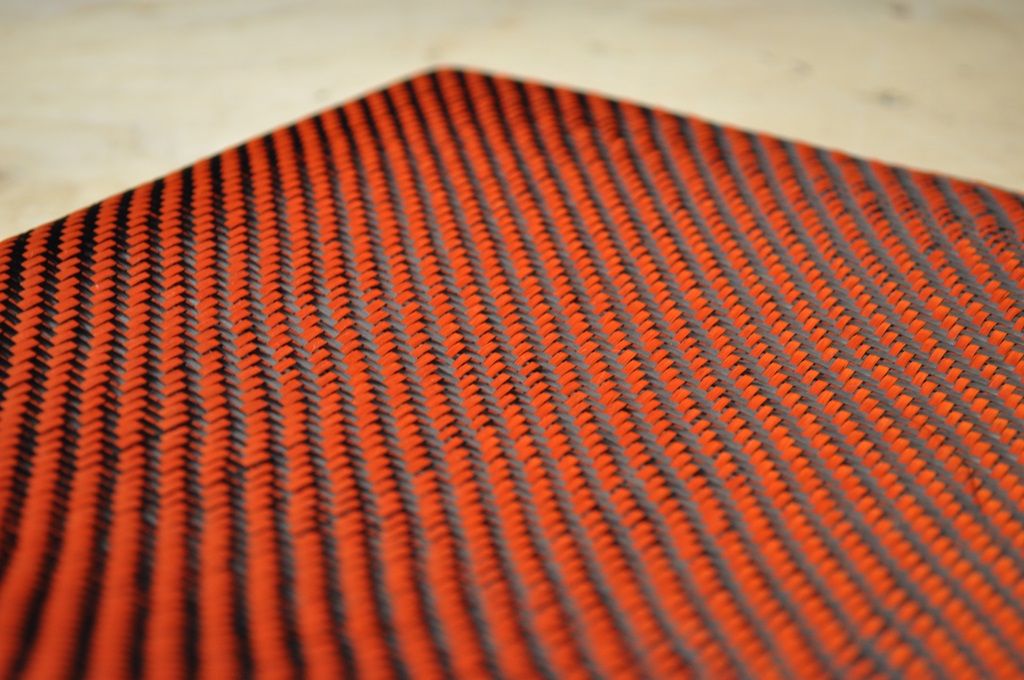
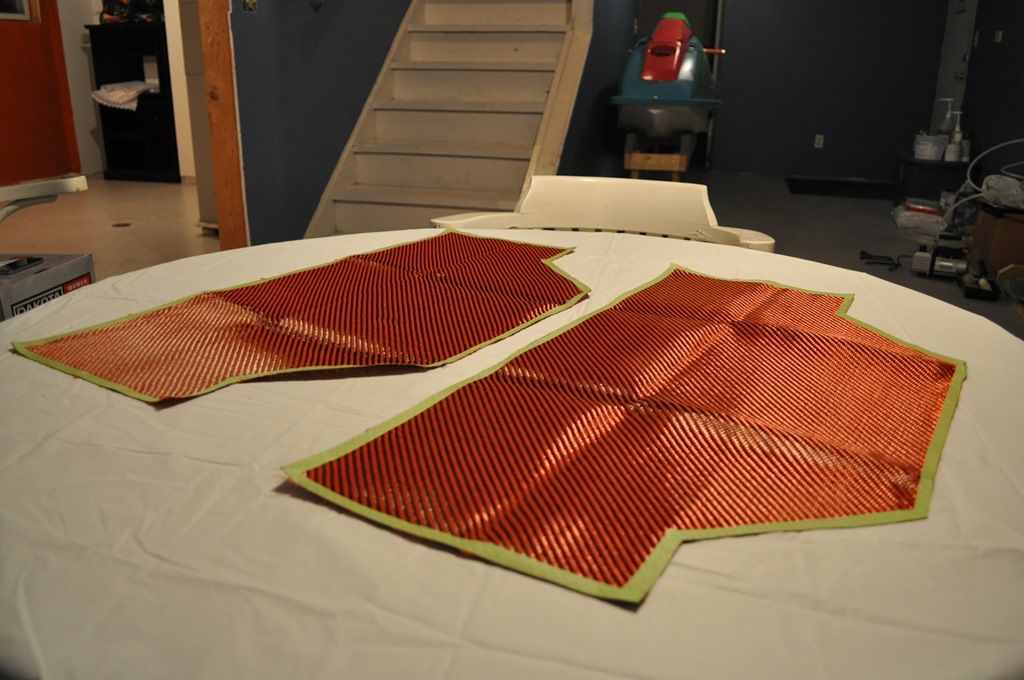
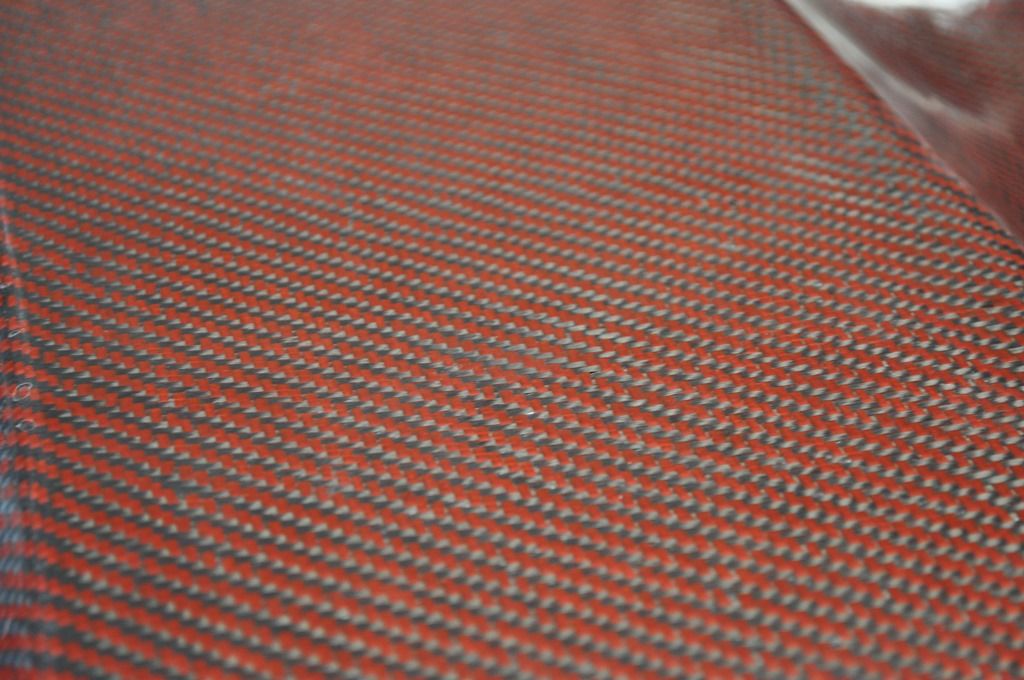
Decided I wanted to try an orange visual carbon/kevlar for the ride plate.
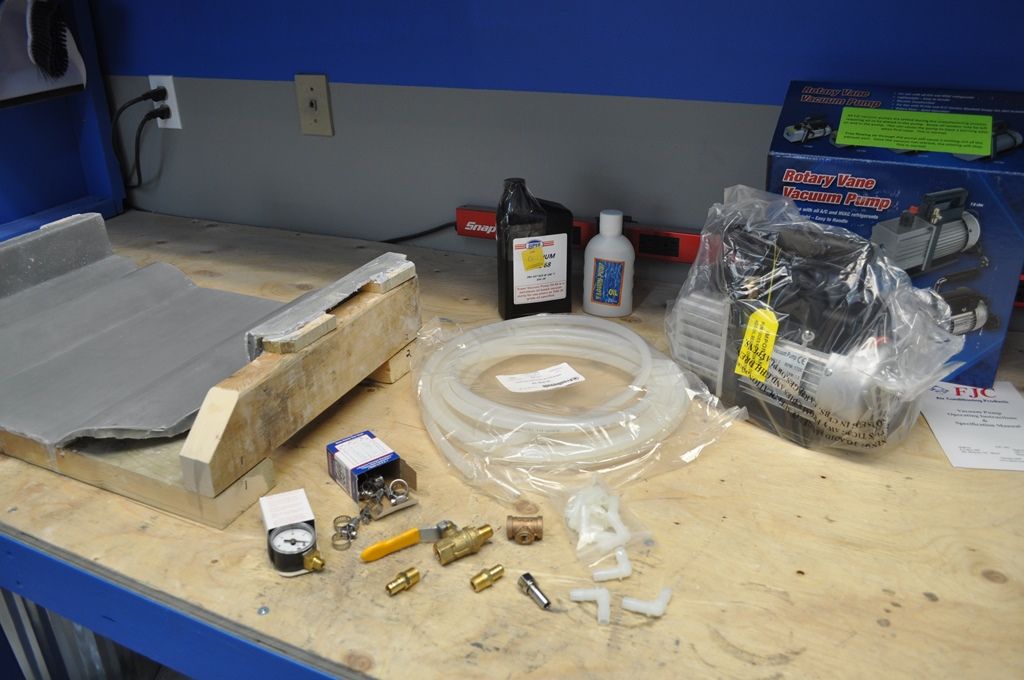
More stuff to make this vacuum bagging work.
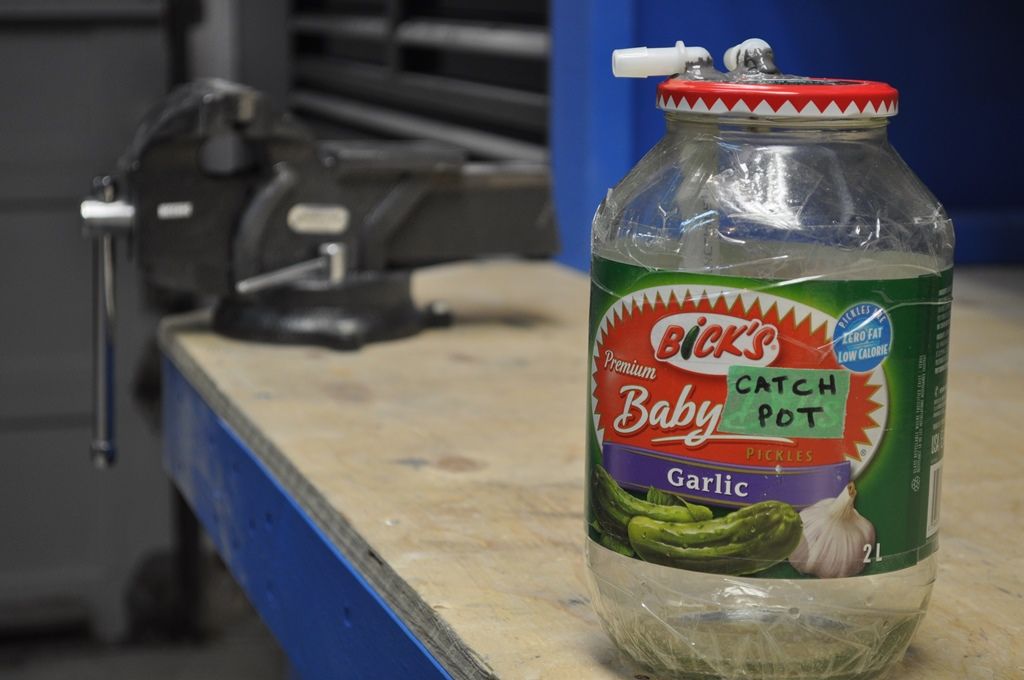
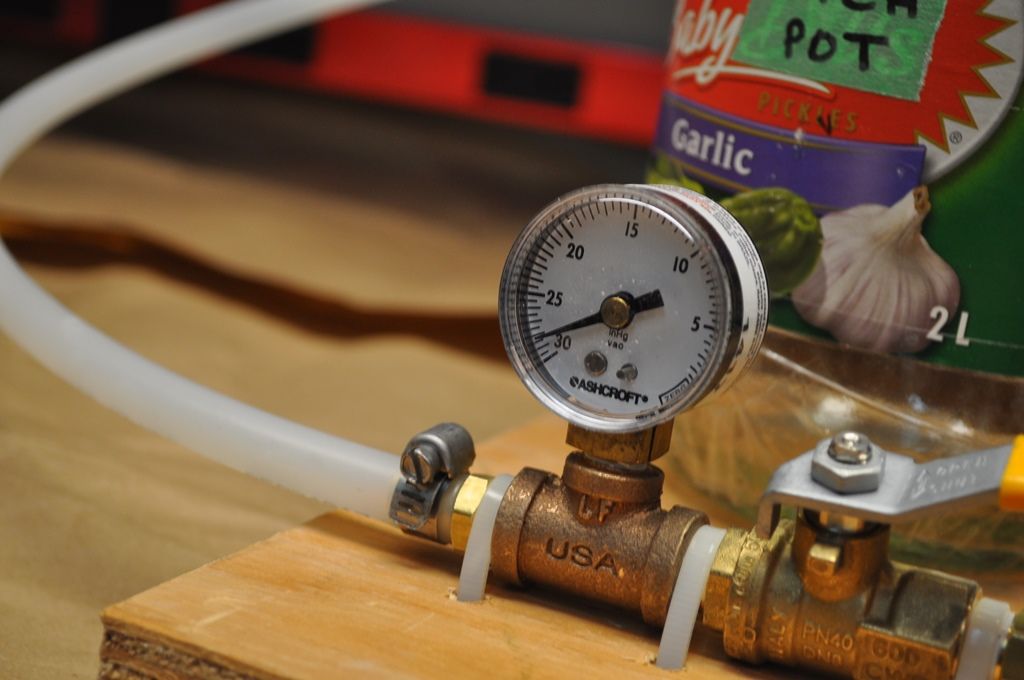
I took the more affordable route and made my own catch pot....
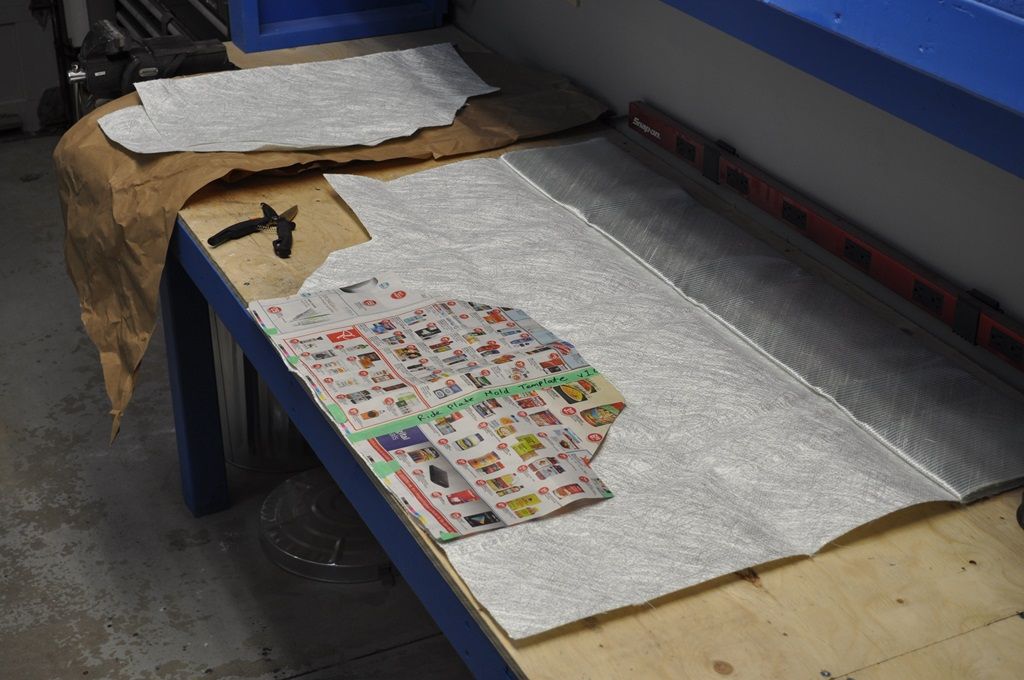
Getting the layup ready.... 5 layers of 1708, and then 2 layers of visual carbon/kevlar.
Unfortunately, I didn't take any pictures while we were laying up everything and sealing up the vacuum bag (my wife and a friend helped out). But here it is after we were done and waiting for it to cure.
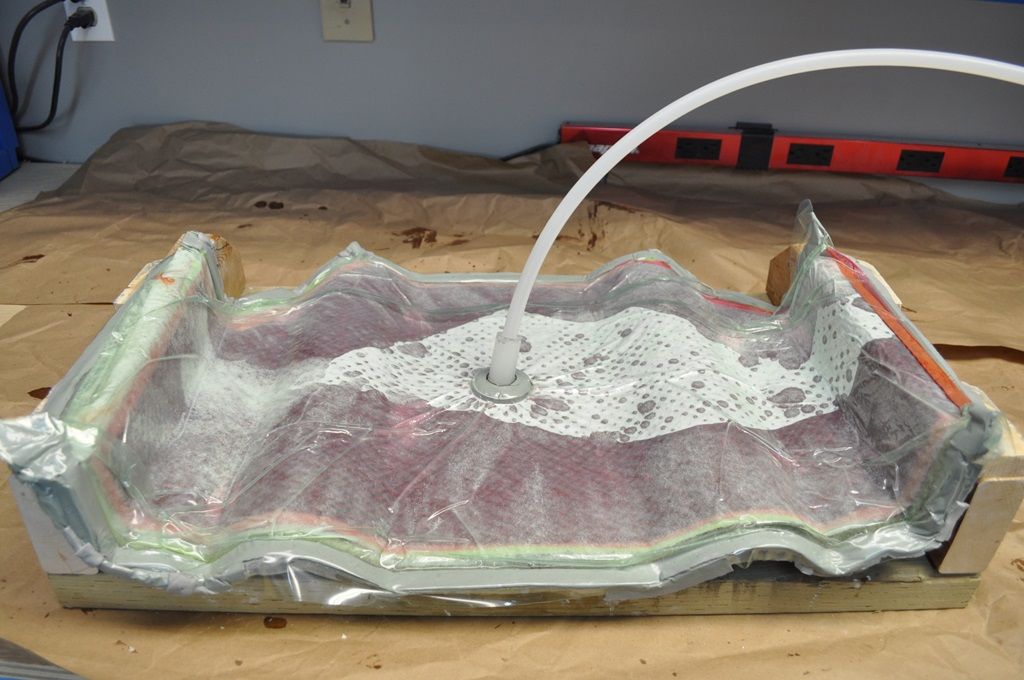
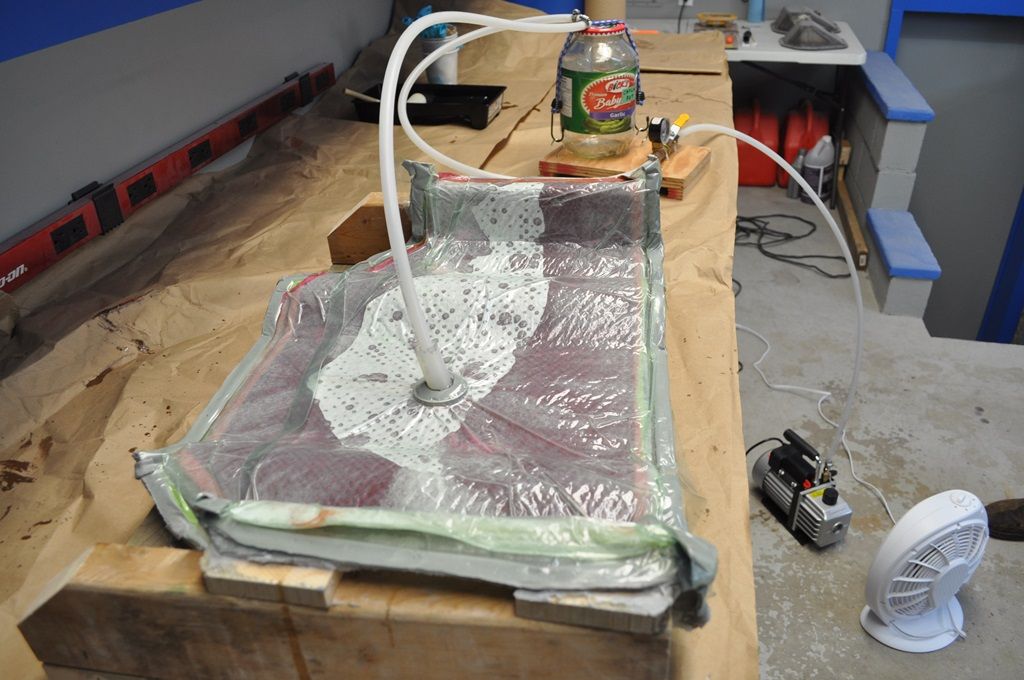
We made a few mistakes, and learned a bunch. It was fun, and I believe we can do better with more practice. We weren't able to get a 100% vacuum seal, but we pulled over 28 inHg.
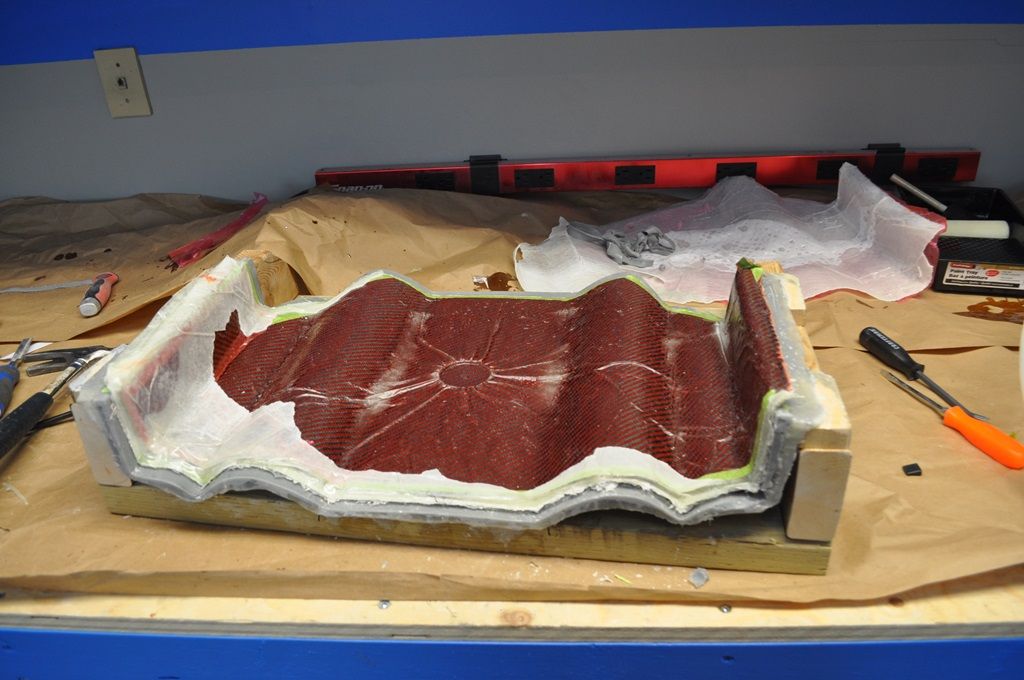
The resin cured a little too fast, so we didn't get a perfect part (as you can see). With a little love, I think the ride plate will be fine. Here we are releasing it from the mold.
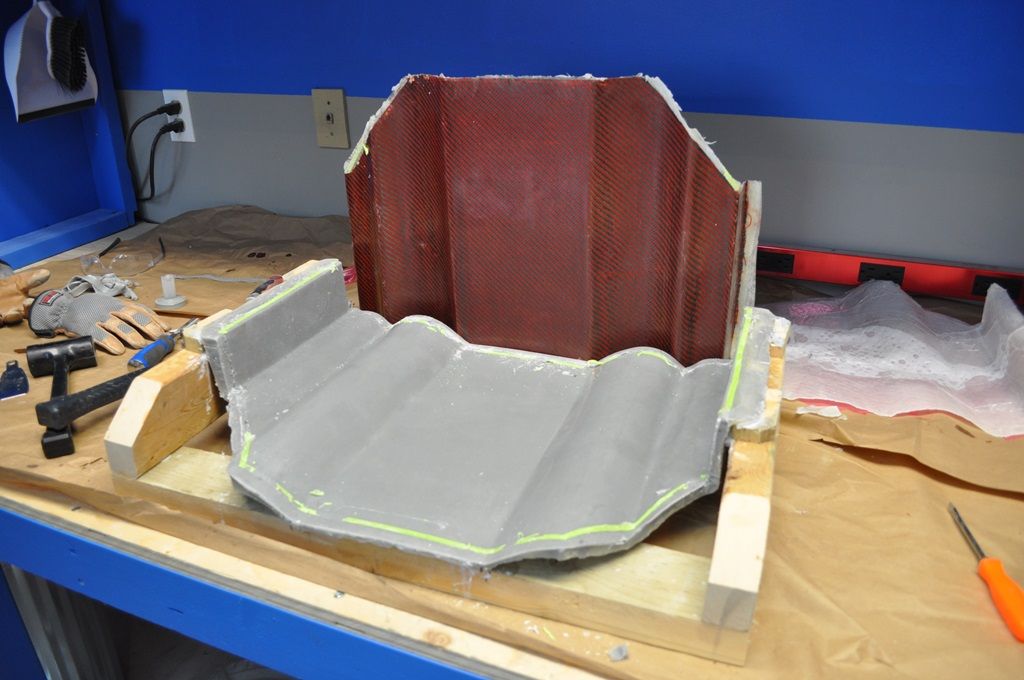
Popped right out!
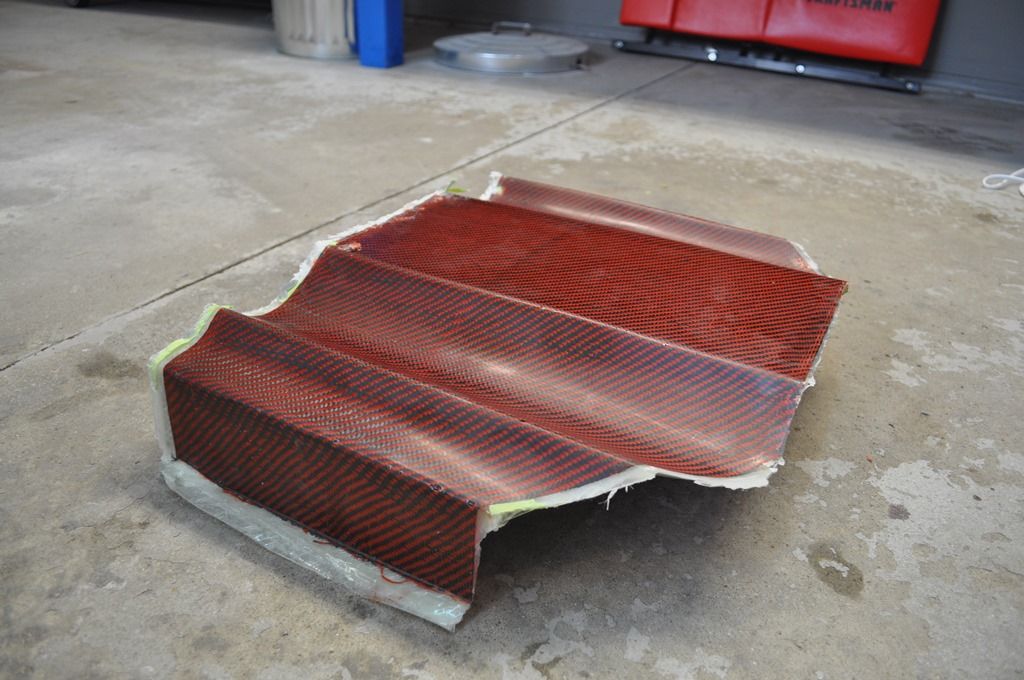
Again, I'm very happy with how my first part turned out!
Mold touch-ups are done, all clean, and ready to go.

Vacuum bagging supplies from US Composites.

Decided I wanted to try an orange visual carbon/kevlar for the ride plate.

More stuff to make this vacuum bagging work.

I took the more affordable route and made my own catch pot....

Getting the layup ready.... 5 layers of 1708, and then 2 layers of visual carbon/kevlar.


Unfortunately, I didn't take any pictures while we were laying up everything and sealing up the vacuum bag (my wife and a friend helped out). But here it is after we were done and waiting for it to cure.


We made a few mistakes, and learned a bunch. It was fun, and I believe we can do better with more practice. We weren't able to get a 100% vacuum seal, but we pulled over 28 inHg.

The resin cured a little too fast, so we didn't get a perfect part (as you can see). With a little love, I think the ride plate will be fine. Here we are releasing it from the mold.

Popped right out!

Again, I'm very happy with how my first part turned out!


- Location
- Midland, Ontario, Canada
impressive...looks great
