Thunderstruck ! Counter to the Blunderjet thread

WFO Speedracer

A lifetime ban is like a lifetime warranty !
Location
Alabama
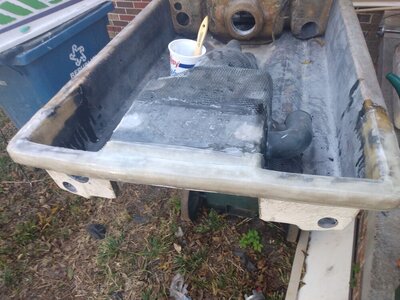
More test fitting , I haven't hit the gym this week, haven't needed to I am getting plenty of exercise lifitn this engine in and out of the hull and lifting the top cap back onto the bottom deck .

So I started checking some stuff and now the driveshaft is coming in at a funky angle , more grinding, more fitting, etc and on and one and on.

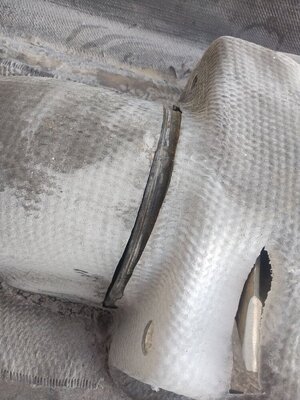
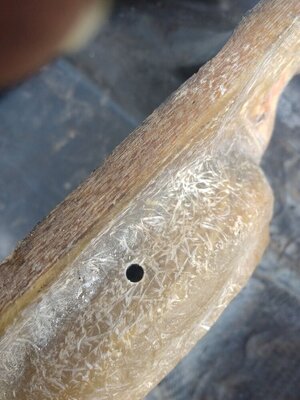
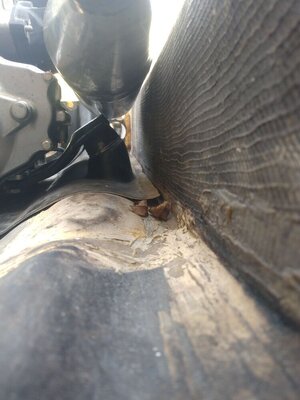
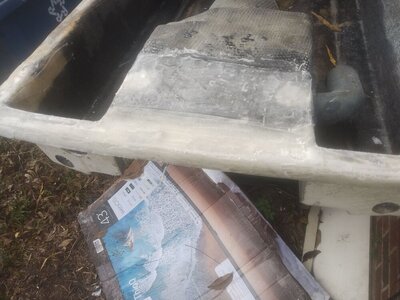
Here is where I am at, I now have numerous new holes in the pump tunnel , I had to grind down the rear pads where the pump tunnel mounts up , after a lot of shimming and grinding here is where I am at, pretty much dead in the middle of the bulkhead and the driveshaft is now coming in straight .

I will need to get a new pump seal and recheck it, all of these pump seals are ancient and very much compressed , basically I will duct tape around the new seal and lay glass directly on to the duct tape to form the new part of the tunnel , somewhere around here I have a 650 pump shoe that was cut off a 650 pump but I may not even need it , we will see , I may just do it all in glass and gelcoat and leave the pump shoe completely out , right now IDK .

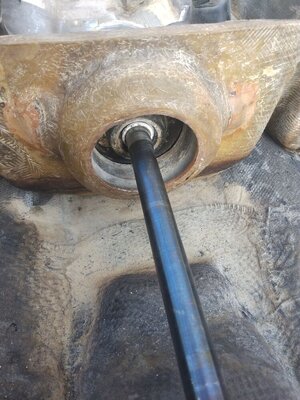
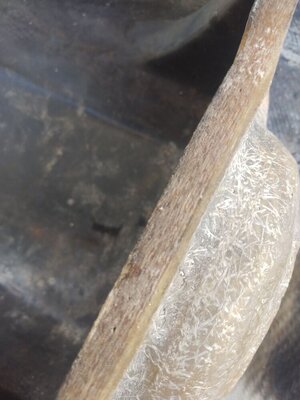
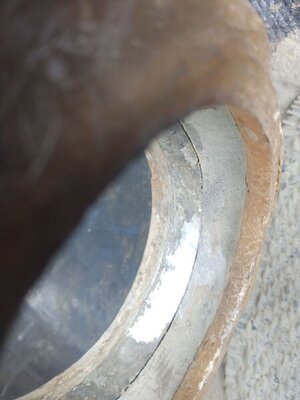
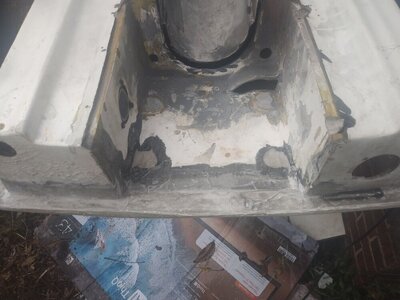
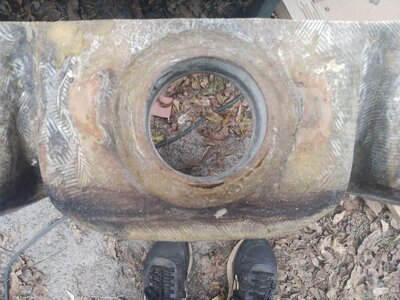
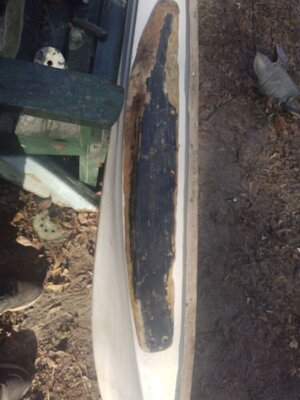
The last few pics are of the bulkhead, this is whay I say I have the upgraded bulkhead , that's almost 1/2" of fiberglass and the aluminum ring glassed into it is 1/2" thick , if I am lucky and I haven't been so far the ring is big enough that I can drill and tap it for the Kawasaki style bulkhead.
 

Attachments

  • image000000 - 2024-10-31T160917.346.jpg
    image000000 - 2024-10-31T160917.346.jpg
    178.1 KB · Views: 23
  • image000000 - 2024-10-31T160926.159.jpg
    image000000 - 2024-10-31T160926.159.jpg
    178.9 KB · Views: 11
  • image000000 - 2024-10-31T160930.798.jpg
    image000000 - 2024-10-31T160930.798.jpg
    100.4 KB · Views: 7
  • image000000 - 2024-10-31T160934.236.jpg
    image000000 - 2024-10-31T160934.236.jpg
    84.5 KB · Views: 8
Last edited:

WFO Speedracer

A lifetime ban is like a lifetime warranty !
Location
Alabama
A pic from yesterdays adventures in ski building , I just knew when I put the top half back on the hull it was going to hit somewhere , it didn't it looks like there is just enough room to get the pipe it in there , I am actually going to create some more room on the bottom half by growing the hull a bit , the top cap is bigger than the bottom deck, I am cutting pieces to span the inside and push the hull apart slightly making it match up to the top deck better , in the engine compartment I can leave the pieces in there while I glue and clamp up the hull, it won't create a lot of space , maybe an inch total , but more is better than less and it doesn't cost any extra.

Don't ask me what that big ledge is left there in the top deck ,while I do appreciate the extra room it's one of those Thunderjet mysteries that we may never know,
 

Attachments

  • image000000 - 2024-10-31T161525.170.jpg
    image000000 - 2024-10-31T161525.170.jpg
    158.5 KB · Views: 9

WFO Speedracer

A lifetime ban is like a lifetime warranty !
Location
Alabama
So I was trying to figure out how big the aluminum insert in the firewall actually is , I am of course assuming that it is round , I drilled a small hole at the top till I hit aluminum and measured the depth with the digital caliper, .46 " , then I used the calipers to measure the diameter of the bulkhead at the back and came up with 5.03 ", so I take the 5.03 inches and subtract .092" , now we are at 4.11 " , I measure the bolt circle diameter on the Kawasaki bulkhead bearing and I came up with 4.18 " , then I measured the bolt circle on the stock bulkhead bearing and came up with 3.83 " , we are only looking at a ..28 difference which is just over 1/4 ", also there is some slop in the stock Kawasaki bearing mounting holes , I believe they are 10mm so If I can get it aligned and clamped up and drill it just a fraction inboard I should be golden .
 

Attachments

  • image000000 - 2024-10-31T180737.473.jpg
    image000000 - 2024-10-31T180737.473.jpg
    128.9 KB · Views: 8

WFO Speedracer

A lifetime ban is like a lifetime warranty !
Location
Alabama
Sounds like a plan. Here's hoping it goes well!!
Me too I am going by the shop at the lake Saturday and I am grabbing every Kawi driveshaft I have to see if something I already have will work on this before I go buying a 550SX shaft.

I may have to do some actual work on a customers ski today , who knows the day is still young .
 
Last edited:

WFO Speedracer

A lifetime ban is like a lifetime warranty !
Location
Alabama
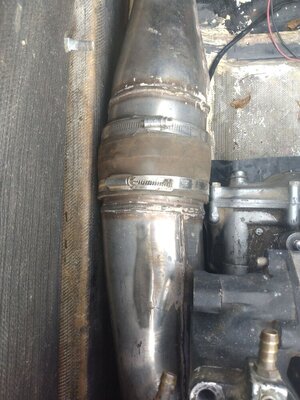
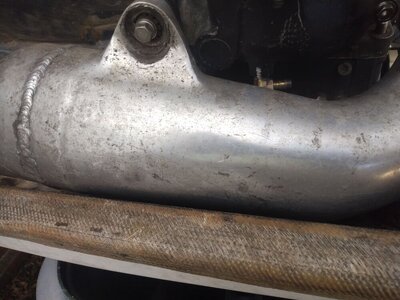
I got to thinking, (I do that sometimes ) the pipe I used in the 300SX has been welded together and has no coupler and it would probably fit quite well in here , so I had to pull the starter out of the 300SX anyway , I went ahead and pulled the pipe, this one is a b!tch because it's one piecet does not come out without removing the exhaust head pipe and the manifold, no biggie really.

I was correct it sits in there nicely, clears the hull and the motor and lines up nicely with the waterbox , it also sits high enough for the rubber hose or what ever I am going to use for the rear exhaust so that it will tuck in nicely under it , the other pipe fit in the 300SX well but I don't have the correct tailcone for it , I substituted in a Seadoo cone off of a 720 and it fits and lines up beautifully so that's the way I will run it.

I have no idea about all the differences on these Coffman pipes , some of them may be Yamaha pipes , for sure the one in the 300SX now is for sure a Kawi pipe , the one that's welded is supposed to fit a Yamaha but it fits in here just fine , the Aluminum versions are much fatter in the middle than the stainless one I have , even being fatter this one still fits better. It is still a little close to the hull but keep in mind that I am going to be pushing the lower hull out about 1/2" when I reassemble the ski .

While we are on the subject of pipes , that Coffman head pipe I had welded up , I gave the welder specific instructions and cut out a large section with a hole saw so he could get to the inside of the water jacket and weld the hole up , well he didn't do that , he just welded a plate over the outside , when I checked it today it is still getting water in the interior of the exhaust when you fill the cooling passages with water, what I may be able to do is just block off the hole under the fitting for the pisser and hope for the best , at least till I can locate another head pipe anyway.
 

Attachments

  • image000000 - 2024-11-04T145657.371.jpg
    image000000 - 2024-11-04T145657.371.jpg
    96 KB · Views: 5
  • image000000 - 2024-11-04T145652.518.jpg
    image000000 - 2024-11-04T145652.518.jpg
    135.2 KB · Views: 6
  • image000000 - 2024-11-04T145644.603.jpg
    image000000 - 2024-11-04T145644.603.jpg
    131.3 KB · Views: 9

WFO Speedracer

A lifetime ban is like a lifetime warranty !
Location
Alabama
I laid up some glass this morning and quite honestly I didn't post the pics because it was embarrassing , it just didn't lay down and stick despite my best efforts , so I ground off the crap that wasn't stuck and went at it again with fiberglass tape , quite frankly I love this stuff , the edges don't fray and it lays down very nicely and stays put , I think the problem this morning was it was too early in the day and no beer was involved , this time I mixed up the epoxy then drank a beer , this gave the epoxy some time to get sticky , at any rate it's done for today and now it's time for another cold one .

I will probably put a layer of carbon over this then flip it over and do the rest from the underside , I am adding the carbon to see if I can stiffen it up some without adding a bunch of layers of glass.
 

Attachments

  • image000000 - 2024-11-04T160240.283.jpg
    image000000 - 2024-11-04T160240.283.jpg
    152.1 KB · Views: 10

WFO Speedracer

A lifetime ban is like a lifetime warranty !
Location
Alabama
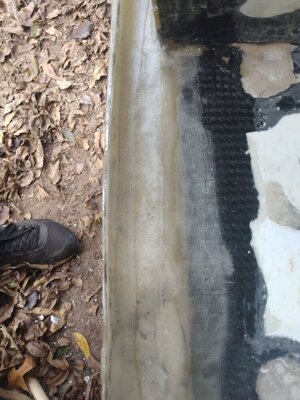
I pulled the parchment paper and duct tape this morning and I now have a very sturdy rear bond line , I flipped it over and soon I start working it from the bottom to add even more strength , as you can see I have a ton of work to do inside of the pump tunnel yet it's my least favorite thing to do ever.

I also have to build up those rear pump mounting tabs and lengthen the front ones a bit . Then we will worry about glassing the actual tunnel back up to fit the 750 pump .

I am sure some of you are wondering why use parchment paper , I used to use wax paper but sometimes it would stick because of the heat epoxy generates when curing , parchment paper is made to withstand high heat and it pulls off pretty smoothly compared to wax paper.

On the sides of the rub rail I have ordered up 4 " fiberglass tape, I want to do a couple of layers of the tape while the hull has the spreaders in it and then let it kick off , hopefully it will somewhat retain that shape to allow for easier gluing of the two halves , I also need to add a few layers of fiberglass or carbon to the inside of the engine compartment to eliminate flex in the sidewalls , I may have to leave the spreaders in the bottom when I glue it all up, I just don't know at this point..
 

Attachments

  • image000000 - 2024-11-05T081957.586.jpg
    image000000 - 2024-11-05T081957.586.jpg
    109.9 KB · Views: 6
  • image000000 - 2024-11-05T082018.597.jpg
    image000000 - 2024-11-05T082018.597.jpg
    127.5 KB · Views: 7

WFO Speedracer

A lifetime ban is like a lifetime warranty !
Location
Alabama
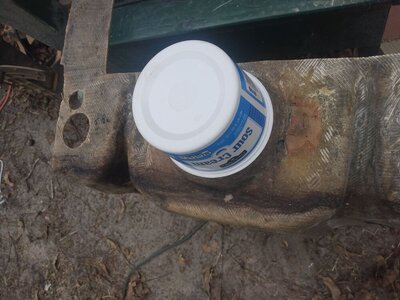
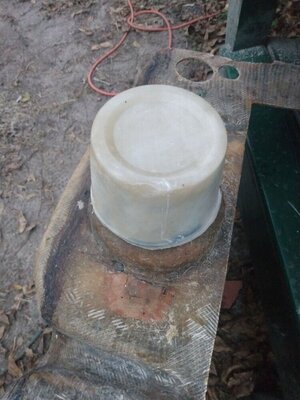
So I needed a transition piece from the bulkhead to the driveshaft tube , I could just glass the back of the bulkhead and call it a day but it's not the way I want to do it , this sour cream tub looks to be about the right size and has a nice taper, I thought about trying to glass the outside of it but that would be a nightmare.

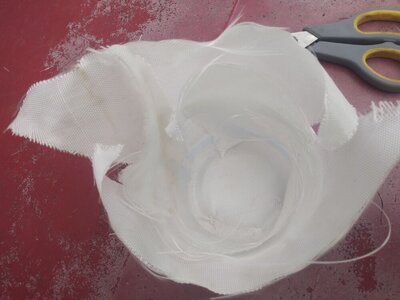
I cut the pieces out and cut slits from every corner to the bottom of the tub , then cut them in between each of the first cuts , eight cuts per piece total.

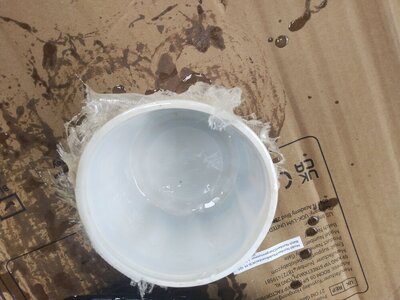
I put them on the inside then took another tub and pushed it into the first one, then I trimmed the fabric, I did this on all three pieces using the scissors to cut the excess off, then I took it all back apart and saturated each piece of cloth , not brushing here just dunk the cloth in the resin to saturate iI , I would say this part is defiantly resin rich , I overlapped the pieces as best I could , then I shoved the other tub into the first one as hard as I could so now we have a sandwich mold , I we will let that cure for a bit.

It won't be perfect because the overlapping pieces do bulge the plastic out in places but , it's inside the hull and no one will ever see it again, If I need to I can always add more glass to it later.
 

Attachments

  • image000000 - 2024-11-05T141827.009.jpg
    image000000 - 2024-11-05T141827.009.jpg
    170 KB · Views: 4
  • image000000 - 2024-11-05T141810.180.jpg
    image000000 - 2024-11-05T141810.180.jpg
    127.4 KB · Views: 5
  • image000000 - 2024-11-05T141822.354.jpg
    image000000 - 2024-11-05T141822.354.jpg
    99.3 KB · Views: 7
  • image000000 - 2024-11-05T141834.093.jpg
    image000000 - 2024-11-05T141834.093.jpg
    124.3 KB · Views: 6
Last edited:

WFO Speedracer

A lifetime ban is like a lifetime warranty !
Location
Alabama
I used up all the 1" fiberglass tape but this bond rail turned out really nice and really strong , the parchment paper leaves a really smooth finish that I can lightly sand and it's ready for gelcoat, like I said before , I love this stuff.
 

Attachments

  • image000000 - 2024-11-05T161220.403.jpg
    image000000 - 2024-11-05T161220.403.jpg
    136.9 KB · Views: 6

WFO Speedracer

A lifetime ban is like a lifetime warranty !
Location
Alabama
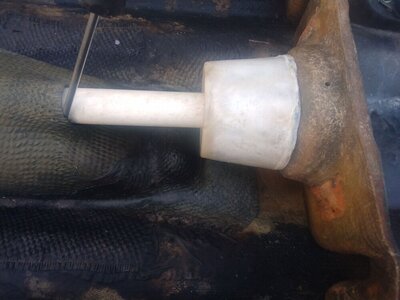
The transition piece actually turned out nicer than expected, I am happy with it , a little more trimming with the grinder and it will be good to go , you can't really see the taper in these pics but it is tapered .

Some epoxy , fiberglass tap and cabosil should get it mounted up nicely .
 

Attachments

  • image000000 - 2024-11-05T170334.565.jpg
    image000000 - 2024-11-05T170334.565.jpg
    123.9 KB · Views: 6
Last edited:

WFO Speedracer

A lifetime ban is like a lifetime warranty !
Location
Alabama
It is of course still just in mock up phase as I don't know exactly where the inner liner winds up at till I get a driveshaft ,but yeah you can get the idea and concept going on here .

I am going to find the center of that piece and drill a small hole , then I can feed in a piece of 1/4" all thread and a flat bar on the other side to hold everything in place while I glue it up and glass it in with the bulkhead .

Then I can use the hole as a pilot hole for the hole saw and install the driveshaft tube , although it is completely unnecessary I will be wrapping that PVC tube with fiberglass , that way I know that when I join it to the transition piece and to the pump tunnel that it will be bonded correctly , as you well know there can be no leaks here whatsoever .

Second photo , just looking and thinking which usually means I am about to do something really stupid , that tubbie is one that came out of the mold all funky and wonky and I just kept it around for stuff like this , I would of course make a new set in white gelcoat if I decide to do it , I will have to say it does fit on here really nicely and that extra chine surely can't hurt anything , thing is if I am going to do it I need to do it now before I gelcoat the hull then I can gelcoat over the tubbies so they perfectly blend into the hull like it was made that way.

This would also strengthen the sides of the hull so yeah I may just have to.
 

Attachments

  • image000000 - 2024-11-06T064418.055.jpg
    image000000 - 2024-11-06T064418.055.jpg
    96.7 KB · Views: 6
  • image000000 - 2024-11-06T081857.992.jpg
    image000000 - 2024-11-06T081857.992.jpg
    99.6 KB · Views: 10
Last edited:

WFO Speedracer

A lifetime ban is like a lifetime warranty !
Location
Alabama
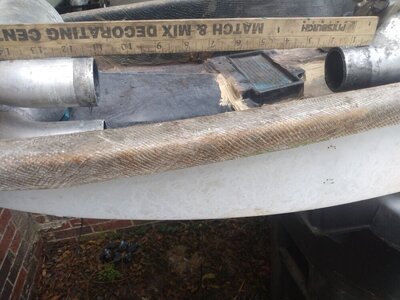
It's raining here today so not much happening , out of curiosity I did some measuring , the widest spot on the ski is 24' from the back of the hull , on the bottom deck I get 24 1/4" , on the top deck inside of the bond lip I get 26 1/4" , so yeah that's pretty much why it doesn't fit together correctly .

I put the tape across the bottom and pushing as hard as I can I can get the bottom to 26" .

The game plan is still the same , build up the bond rails on both top and bottom , I can use ratchet straps on the top to pull it back in to 24" while I glass the top rails and hopefully I can expand the bottom about 2" using the spreader bars allowing for about 1" of springback , then hopefully when the epoxy dries it will somewhat retain that shape top and bottom , truefully this is a guessing game at best , I see a lot of ratchet straps, c-clamps and spring clamps in my future , but that should get it close enough to bond it and clamp it all up .
 

Myself

manic mechanic
Location
Twin Lakes AR
Seeing as how the halves are completely de-stressed right now......is there no way to fill in the extra space instead of bowing the halves into stress?
 

WFO Speedracer

A lifetime ban is like a lifetime warranty !
Location
Alabama
Seeing as how the halves are completely de-stressed right now......is there no way to fill in the extra space instead of bowing the halves into stress?
I can't really tell how much the top has spread out , it has been apart a long , long time , also I don't know how stressed it would actually be , it pushes in fairly easily , I can try heating the bottom up using spreaders and see what shape it comes back to when it cools down and relaxes , at this point the whole bottom is getting regelcoated so messing up the gelcoat is of little concern to me.

I am going to be filling some of that in , I just don't know how much just yet but you don't want 1/4" thick fiberglass either , I would like it to still have some give and flex.
 

WFO Speedracer

A lifetime ban is like a lifetime warranty !
Location
Alabama
Ya, I can understand that.
Maybe I need to just bite the bullet and buy some of this , I have been wanting to try it out for stuff like seat bases and handlebar pad bases , there is a lot of stuff out there needing those type of parts right now , especially the type of plastic Yamaha uses for their sitdown seat bases literally falls apart after a number of years. I am still searching for a US supplier of flexible epoxy resin that doesn't cost a fortune.

Totalboat makes FlexEpox but it comes in 32oz for $70 plus shipping , no thank you !

In my searches I did run across a product from Smoothon called flexor , it's an epoxy additive that makes epoxy flexible, of course it works on their epoxies but who knows if it works on others an $13.99 it's probably worth it to test some out and find out for myself , I have wasted more than that at Wendys and Mcdonalds , you can also get a trial size of epoximite resin for about $40 for a quart .

Flexer Epoxy Flexibilizer​

PRODUCT OVERVIEW Flexer™ Epoxy Flexibilizer is a clear, low viscosity liquid additive that will lower the durometer (Shore hardness) of some Smooth-On casting and laminating epoxies. When added to the epoxy system in the proper proportion, the cured epoxy will be softer and, in some cases, can be made semi-rigid. Flexer™ will lower the viscosity of the epoxy system, improves wetting capability (for laminating) and filler load capacity.


Last edited:

WFO Speedracer

A lifetime ban is like a lifetime warranty !
Location
Alabama
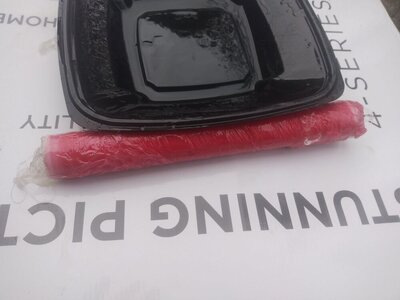
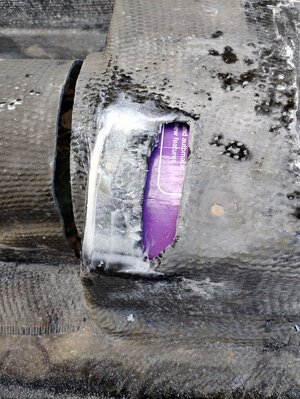
I scuffed up the driveshaft tube with 80 grit, then cut enough glass to get two full wraps on it, I saturated the glass with epoxy and wrapped the tube, then I wrapped the tube up in about 5 turns of saran wrap and squeezed out as much resin as I could , again another part that will never be seen again after the two halves are bonded .
 

Attachments

  • image000000 - 2024-11-07T152922.801.jpg
    image000000 - 2024-11-07T152922.801.jpg
    70.1 KB · Views: 8

WFO Speedracer

A lifetime ban is like a lifetime warranty !
Location
Alabama
Well I am armed with a new roll of duct tape , a box of brushes, new fiberglass rollers , a box of gloves , thinner and Cabosil so it's time to put Humpty Dumpty back together again. .

I removed a section of the pump tunnel that curved inward , I cleaned the gelcoat off the piece , flipped it over and glued it back in with epoxy -cabosil , when that kicks I will make a mold out of foam and use the pump and the styro mold to put everything back in place , I am thinking this may not be that pretty at least on the inside of the ski, it's a pump tunnel does it really matter ?
 

Attachments

  • image000000 - 2024-11-18T100417.074.jpg
    image000000 - 2024-11-18T100417.074.jpg
    212.6 KB · Views: 1
Top Bottom