Myself
manic mechanic
- Location
- Twin Lakes AR
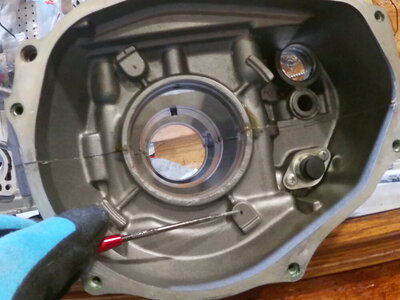
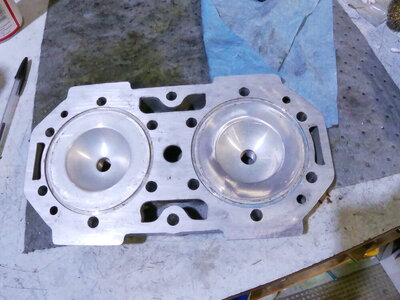
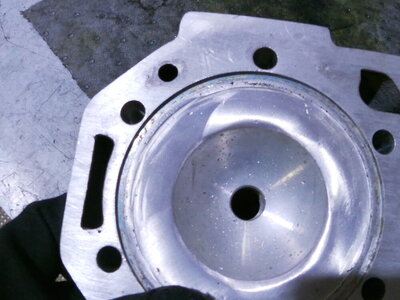
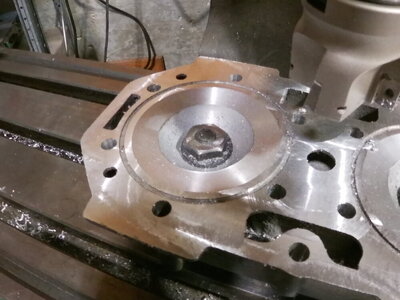
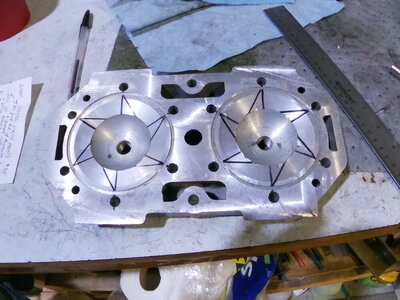
Kinda like the old Ocean Pro heads huhThis high compression R&D head had been previously damaged. And it looks like somebody took a sanding disc on a die grinder to clean it up. Which of course ruined the dome. The edge was also dinged up enough to allow leakage. So.... since it was basically scrap metal I reworked it today. I clamped it down in the mill, recut the squish to a slightly different angle, then milled the whole surface flat. After that I cut in "PWCr's fast burn mod". If you get it.......you get it. If not, it's my take on "Singhs grooves". This will allow more compression without risk of detonation AND allow lower octane fuel. In case anybody is wondering.........YES, I've done this before. Finally verified the cc to make sure I got it where I wanted it.
Sounds right to me lolSort of.... I feel like the 'pocker' of a dome will tumble and swirl a mixture all on it's own, and their design likely helped induce more swirl AFTER combustion. With my mod, the grooves will induce a swirl and increase velocity as the piston reaches TDC....'fast burn'. Then after combustion the same effect happens again as the increased energy forces the spent gasses outward. The swirling motion helps those gasses exit quicker than a tumbling/confused motion would. At least.........in theory lol! But hey, my stockish tuned 650sx is running almost 44mph with a 250# rider and tiny 28mm carb so it MUST work right?
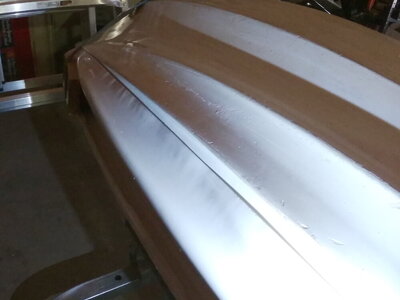
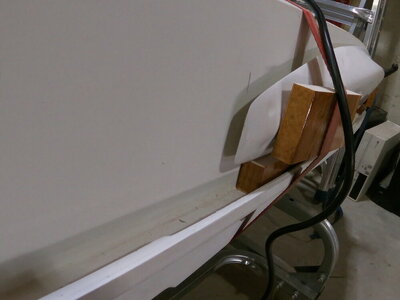
This is why I am considering making tubbies for 300SX's that actually fit the contours of the ski . I am not sure if there are enough 300SX guys out there to support that enterprise but we will see.I measured out and fit the front sponsons (tubbies) yesterday. The instructions tell you to start screwing them down in the center and work out. I think that's a TERRIBLE idea! That IS NOT the answer to mediocre quality parts. I cut some scrap wood blocks to position these, and used ratchet straps to hold them to the hull with slight tension. Then I cranked my heat gun to 700* and started going back and forth. You can hear them start creaking and popping. After a couple minutes I cranked the ratchet straps down and kept waving my magic wand until the noises stopped. Then just let it sit there and cool down for 30 minutes. Look at the wrinkling in those close-ups.......IF YOU screw these on like the manufacturer wants you to.....you're just asking for them to come loose in the long run. There will be A LOT OF TENSION on them like that! And all that glue holding them on......mostly attached to the foam which will just pull off from the inside. Just an all around hack job. One had a lot of tension in a small area. The other had the tension spread over 15" or so. They are destressed now and I sanded a slight concave shape into the back so they actually fit snug against the hull.
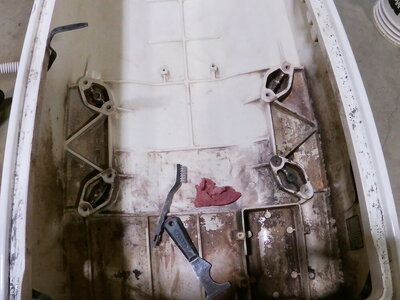
Of course........I keep it in stock, that Awesome cleaner is.......well.......AWESOME!Get yourself some LA awesome cleaner , it's cheap and pretty strong, I would say get some Mrs goodhands cleaner but I can't find that anymore , LA cleaner works well also just not as strong but a lot easier to find , Dollar General and Dollar tree usually carry it.


")