Super Jet Frosty's '98 dismantle and 2010 Freeride Superjet Build

then a big f'n screw driver and chip out the foam, piece by piece. It's a PITFA and takes a while...

A wire wheel attachment on the drill helps alot. I think harbor freight has cheap ones. Just go nuts with it and use your shop vac to suck up the foam dust that it creates. Still PITA either way.
 

NVJAY775

My home away from home.
It's so amazing how drastically different the weather can be in different parts of the states. And world for that matter. We don't travel much at all and are completely blown away when we drive for just a couple hours out of town. LOVE going to warmer climates.

Nice work on the ski by the way. She's looking friggin great!
 
here's what I used:

US Compsites:
4:1 Epoxy - I prefer the faster set up - especially for up here in colder weather http://shopmaninc.com/epoxy.html
Cloth - I used 26oz to reinforce from the inside and 18oz to wrap the outside http://shopmaninc.com/cloth.html

I used my circular saw to make two cuts - removing 2"s from back - leaving the transom in place... then used my dremmel with a cutting wheel to trim the transom plates off. I used Lord Panel fusor EZ101 to glue the transom plates back to the new cut location. But while the back was off I sanded the inside really good to remove the residue from the old foam.

I used Marine Filler (ebay) to go over the cloth - once I sanded - in order to smooth and feather everything out. sanded that smooth, then went over that with a thin coat of the same epoxy/hardener (from US Comp) to seal the marine filler.

Use the same cloth and epoxy to put the tray back together... I wedge blocks of wood in the tray to keep it lined up (as it will flex inward and not be even) - then I fill the gas with panel fusor - once that hardens then I use the fiberglass cloth to strengthen it...

Hope that helps...


Pump is in along with ride plate. Urethane motor mounts are in and shaft is being pressed into my new urethane mid housing... once I get that back I can drop the motor in and shim it. Then re-run new cooling lines. My pole is being painted early this week - should have the ski finished by the weekend.

Awesome, thanks!
 
Another question for you Frosty. I just started working on mine last week. I have it all defoamed now. What did you use to seal off the driveshaft and other lines coming through the hull from the engine compartment? And this may be a really stupid question, but what is the line on the left for (opposite the steering cable)? It seemed like there was some type of foam gaskets or something around the exhaust tube and water line. It was tough to tell though because whatever it was I pretty much destroyed it during defoaming.
 

Big Kahuna

Administrator
Location
Tuscaloosa, AL
use 5200 to seal with. it runny enough to get into cracks. Best to stand hull up on its tail. Uses silicone at the intermediate shaft housing. 5200 would make it a bear to remove. Use 5200 on all your waterlines and exhaust tube.
 

Frosty

New York Crew
Location
Western New York
Another question for you Frosty. I just started working on mine last week. I have it all defoamed now. What did you use to seal off the driveshaft and other lines coming through the hull from the engine compartment? And this may be a really stupid question, but what is the line on the left for (opposite the steering cable)? It seemed like there was some type of foam gaskets or something around the exhaust tube and water line. It was tough to tell though because whatever it was I pretty much destroyed it during defoaming.

Yup, 3M 5200 to seal everything. The left side line is the oem siphon bilge. I have my pump drilled and tapped for a second cooling line... so that's what I use the left side line for. Yeah, yamaha uses some crappy foam line substance to seal stuff... which is why it likely leaks. I scrape it off and reseal with 5200... much better.
 

Frosty

New York Crew
Location
Western New York
Frosty's 2010 Freeride Superjet - 2012 UPGRADE

Well, I decided to upgrade:

Blue is such a sad color - so I will be going back to orange - but with a new look for 2012

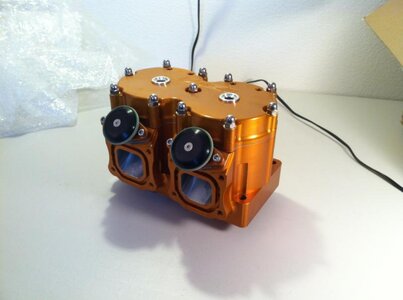
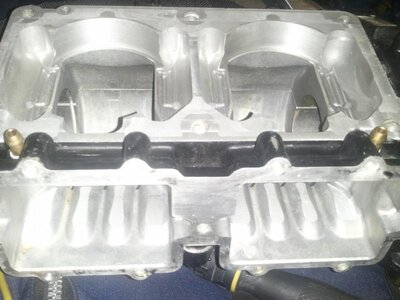
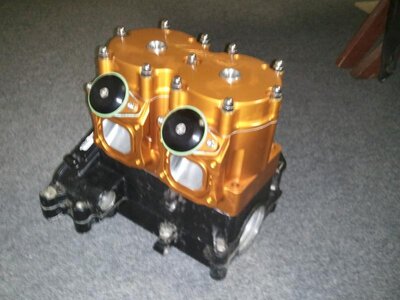
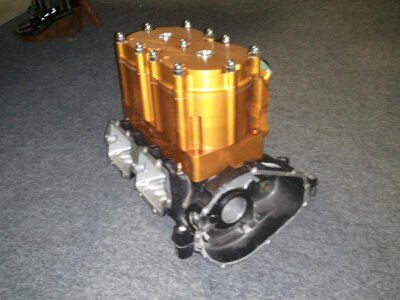
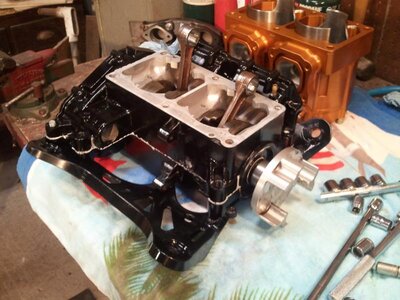
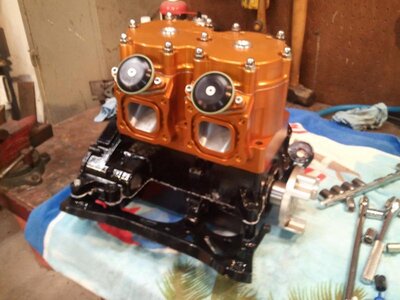
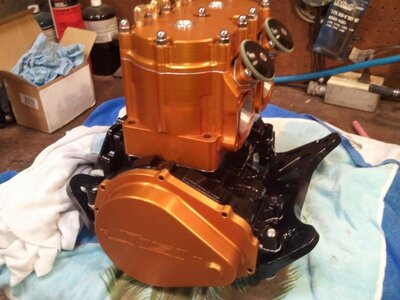
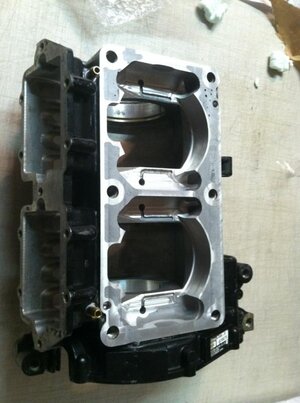
Finally bit the bullet and upgraded from my LPW ported 83.5mm piston motor to a nice new Dasa... = ) just got the cylinder and cases... so I have some work ahead of me.

More details to follow
 

Attachments

  • V__4B80.jpg
    V__4B80.jpg
    55.8 KB · Views: 94
  • V__F2AE.jpg
    V__F2AE.jpg
    38.7 KB · Views: 80
  • WP_000304.jpg
    WP_000304.jpg
    56.1 KB · Views: 96
  • WP_000305.jpg
    WP_000305.jpg
    56 KB · Views: 85
  • WP_000306.jpg
    WP_000306.jpg
    54.8 KB · Views: 77
Last edited:

Frosty

New York Crew
Location
Western New York
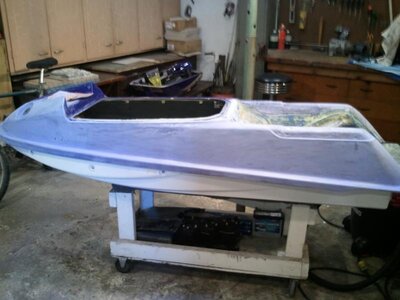
Gettin her ready for paint...

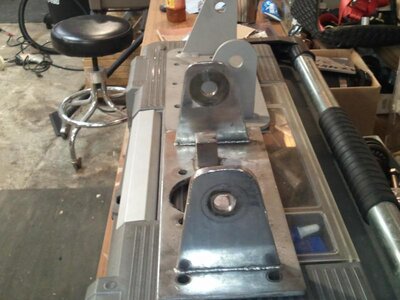
got a new custom pole bracket - moves pivot point ahead a full inch. Thanks Brian...

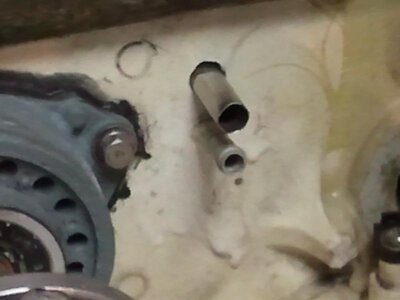
and installed a trim tube
 

Attachments

  • WP_000311.jpg
    WP_000311.jpg
    59.7 KB · Views: 112
  • WP_000314.jpg
    WP_000314.jpg
    52.9 KB · Views: 108
  • WP_000302.jpg
    WP_000302.jpg
    30 KB · Views: 91
Last edited:
Gettin her ready for paint...

got a new custom pole bracket - moves pivot point ahead a full inch. Thanks Brian...

and installed a trim tube

questions regarding the trim tube.

Stainless or aluminum?
Diameter of tube?
How will you seal it in the rear of the boat? (something like the steering cable uses)

I ask because I recently picked up an Xmetal trim system.
 

Frosty

New York Crew
Location
Western New York
questions regarding the trim tube.
I ask because I recently picked up an Xmetal trim system.

Bought the tube from Thrust - believe it's aluminum, 1/2". I'll squeeze some panel fusor in around the tube to fill it in, then seal it up with 5200 from the outside. as for sealing the tube/cable - my buddy found some 1/2 rubber caps that fit over the tube. just dill a small pilot hold through the end, squeeze the cable through and the rubber seals right around the cable. I will squeeze some 5200 into the tube itself before I install the rubber cap though.

NICE frosty! awesome buddy.

Thanks Zack...
 

Frosty

New York Crew
Location
Western New York
gettiing there
 

Attachments

  • WP_000389.jpg
    WP_000389.jpg
    72.4 KB · Views: 79
  • WP_000390.jpg
    WP_000390.jpg
    60 KB · Views: 81
  • WP_000391.jpg
    WP_000391.jpg
    61.4 KB · Views: 72
Top Bottom