Super Jet Frosty's '98 dismantle and 2010 Freeride Superjet Build

Frosty

New York Crew
Location
Western New York
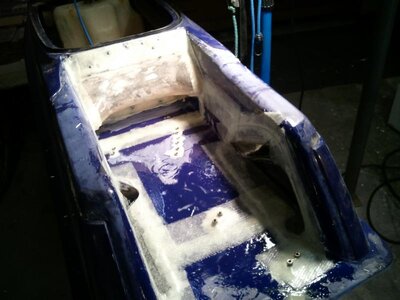
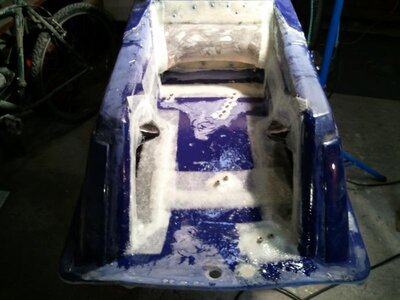
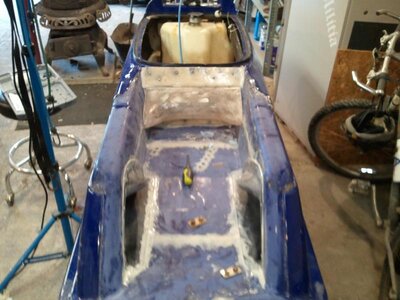
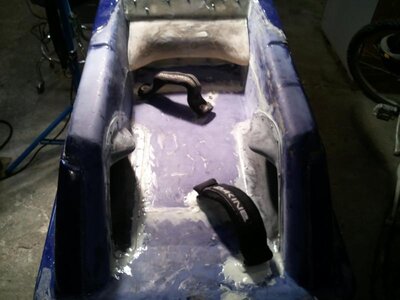
Tray is buttoned up... and now reinforced on the seams. Installed acorn nuts for rear strap as well... that way i have several options. New pump bearings will be in this week, along with motor mounts and mid housing.
 

Attachments

  • WP_000068.jpg
    WP_000068.jpg
    53.9 KB · Views: 131
  • WP_000067.jpg
    WP_000067.jpg
    54.4 KB · Views: 130
  • WP_000064.jpg
    WP_000064.jpg
    64.6 KB · Views: 139
  • WP_000066.jpg
    WP_000066.jpg
    47 KB · Views: 132
Wow, top notch work bro! Pardon my ignorance, but can I ask you why you use the clamps and cardboard (or whatever that is) on the fiberglass? The only glassing I've ever done was on my foot holds, and I'm about to tackle this project now so just curious.
 

Frosty

New York Crew
Location
Western New York
Wow, top notch work bro! Pardon my ignorance, but can I ask you why you use the clamps and cardboard (or whatever that is) on the fiberglass? The only glassing I've ever done was on my foot holds, and I'm about to tackle this project now so just curious.

The cardboard I used because it's easy to form - it's covered in duct tape because the epoxy doesn't stick to it, making it easy to pull off. I used all the clamps/carboard, and some cut up furring strips to squeeze everything together tight... that wasy I didn't have any pockets.

You done yet!!!????? Geeze!!!

Yeah, I know... feels like it's takin forever bro. Of course, it was 65 here yesterday, and 30 and snowing here today... so I'm not in any real big hurry. I did most of the turf last night...
 

Frosty

New York Crew
Location
Western New York
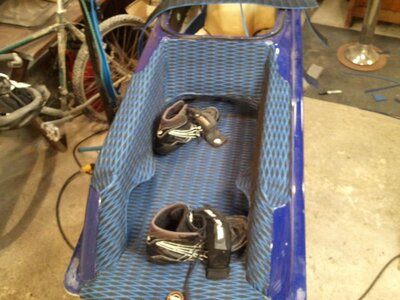
Tray is turfed... Cant wait to try the new surf stance footstraps. Got new drain plugs installed too.
 

Attachments

  • WP_000075.jpg
    WP_000075.jpg
    68.7 KB · Views: 193
  • WP_000073.jpg
    WP_000073.jpg
    47.5 KB · Views: 202
Last edited:

Frosty

New York Crew
Location
Western New York
You coming to Wavedaze? If not, could you guys at least send me some stickers so I can continue the tradition of tagging every f#@$ing thing?

I'm not... too busy these days... I've not discussed with the crew. I'll find out from Brian if he is going and if not, if he can get some stickers down.
 

Frosty

New York Crew
Location
Western New York
do those plugs help yo dry your foam or what... i like
no, I actually have polystyrene foam not typical two-part... so it will not absorb water. But the plugs allow me to drain any water that does make it's way into the hull. I have sealed up the bulkhead and all through hull fittings so water should not get in, but things crack, shift etc when you ride hard, and you cannot always prevent water intrusion.

your package should be there today or tomorrow..
Sweet bro! All's I need now is my new hood to come in, and my handlepole back from Brian (got rewelded and painted), and I will be able to ride.
 
hay i am out in Californian and want to ditch my foam. Ware do i git that poly foam and what tools will i knead,. thanks your build it is awesome i want go your wrought thanks for the build to give me ideas.
 
Last edited:

Frosty

New York Crew
Location
Western New York
hay i am out in Californian and want to ditch my foam. Ware do i git that poly foam and what tools will i knead,. thanks your build it is awesome i want go your wrought thanks for the build to give me ideas.

first time I did the foam swap I got blocks of poly foam for free from Tractor Supply - it's used in the transport of utility trailers. This time, i used 2" poly foam from home depot - it's easier to handle, and I used my band saw to cut it.

for tools... i used a jig saw and a cutoff wheel to cut the tray open... then a big f'n screw driver and chip out the foam, piece by piece. It's a PITFA and takes a while...
 
Could you give me a suggestion on what to order from US Composites for the materials needed for patching after shortening the hull, reinforcing the bottom section, and putting the tray back together? I know I have some stuff left over from my footholds and reinforcing the engine compartment, but I can't remember what I used for that stuff. I just want to make sure I get the right stuff to make the job go as smoothly as possible. I think I'm going to start this weekend. TIA
 

Frosty

New York Crew
Location
Western New York
here's what I used:

US Compsites:
4:1 Epoxy - I prefer the faster set up - especially for up here in colder weather http://shopmaninc.com/epoxy.html
Cloth - I used 26oz to reinforce from the inside and 18oz to wrap the outside http://shopmaninc.com/cloth.html

I used my circular saw to make two cuts - removing 2"s from back - leaving the transom in place... then used my dremmel with a cutting wheel to trim the transom plates off. I used Lord Panel fusor EZ101 to glue the transom plates back to the new cut location. But while the back was off I sanded the inside really good to remove the residue from the old foam.

I used Marine Filler (ebay) to go over the cloth - once I sanded - in order to smooth and feather everything out. sanded that smooth, then went over that with a thin coat of the same epoxy/hardener (from US Comp) to seal the marine filler.

Use the same cloth and epoxy to put the tray back together... I wedge blocks of wood in the tray to keep it lined up (as it will flex inward and not be even) - then I fill the gas with panel fusor - once that hardens then I use the fiberglass cloth to strengthen it...

Hope that helps...


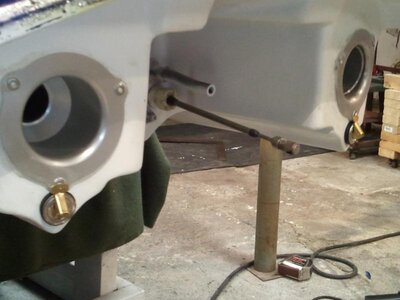
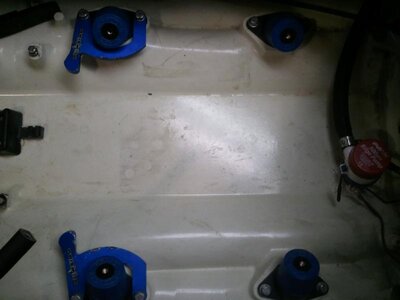
Pump is in along with ride plate. Urethane motor mounts are in and shaft is being pressed into my new urethane mid housing... once I get that back I can drop the motor in and shim it. Then re-run new cooling lines. My pole is being painted early this week - should have the ski finished by the weekend.
 

Attachments

  • WP_000080.jpg
    WP_000080.jpg
    58.8 KB · Views: 116
  • WP_000083.jpg
    WP_000083.jpg
    33.4 KB · Views: 118
  • WP_000079.jpg
    WP_000079.jpg
    72.6 KB · Views: 122
Last edited:
Top Bottom