You are using an out of date browser. It may not display this or other websites correctly.
You should upgrade or use an alternative browser.
You should upgrade or use an alternative browser.
Super Jet LegDrag Lightweight SuperJet Build
- Thread starter MikeyB
- Start date
air blair
you are the reason
- Location
- thumb, mich again
Nice glassing, do whatever you want man, change it later if you like. Nice to have options or plan b if you decide to go rear again later. Lookin snappy.
Sent from my SPH-D710 using Tapatalk 2
Sent from my SPH-D710 using Tapatalk 2
DarkWater
Down Side Up
- Location
- waterford, MI
The noise is not an issue at all, as long as its far enough back to be in the water. The smoke was a little bit of an annoyance when I was dialing the lows on the trailer. But that was it.
- Location
- amarillo ,tx
dam man looks good how u get the edges cut perfect.
- Location
- amarillo ,tx
Ah nice
Jeremy
Jeremy
Quinc
Buy a Superjet
- Location
- California
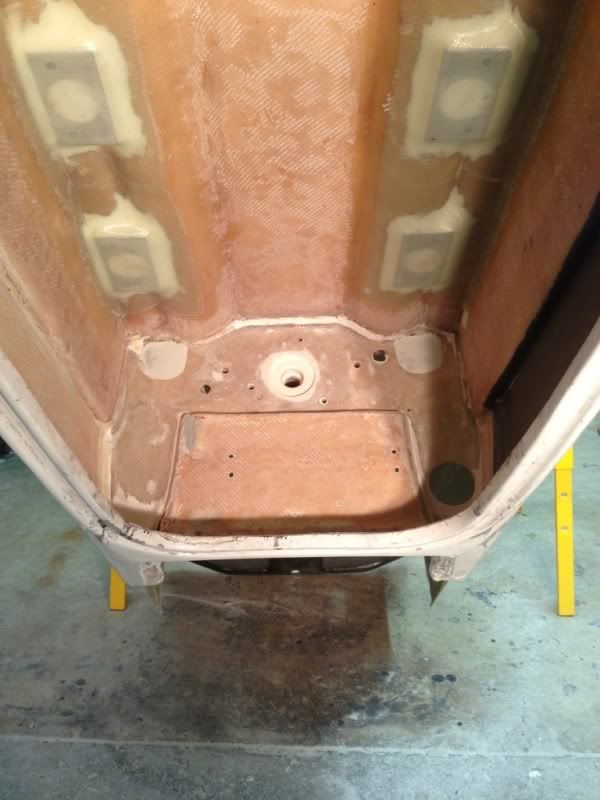
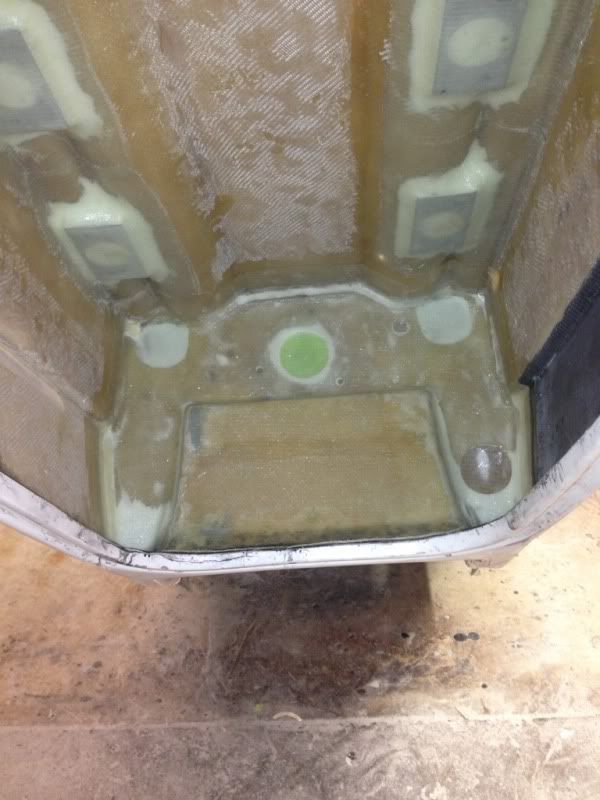
Great looking build! What are your plans for the engine mounts? Are you going to cut them out or put the mounts over the fiberglass?
- Location
- Jackson MI
I envy your carbon skills, everything looks killer man keep it up.
Great looking build! What are your plans for the engine mounts? Are you going to cut them out or put the mounts over the fiberglass?
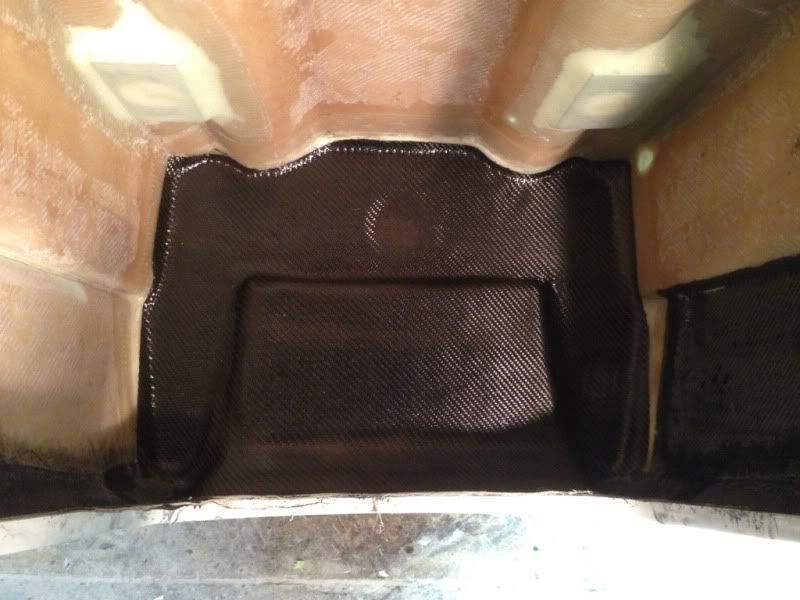
Thanks! I was planning to leave the glass over the engine mount plates and drill the holes out once I'm done. I waxed the threads before I wiped everything down and did the two layers of biax so I'm hoping I can run a tap through them to clean them up.
I envy your carbon skills, everything looks killer man keep it up.
Thanks a lot, that certainly helps to keep me going!
Last edited:
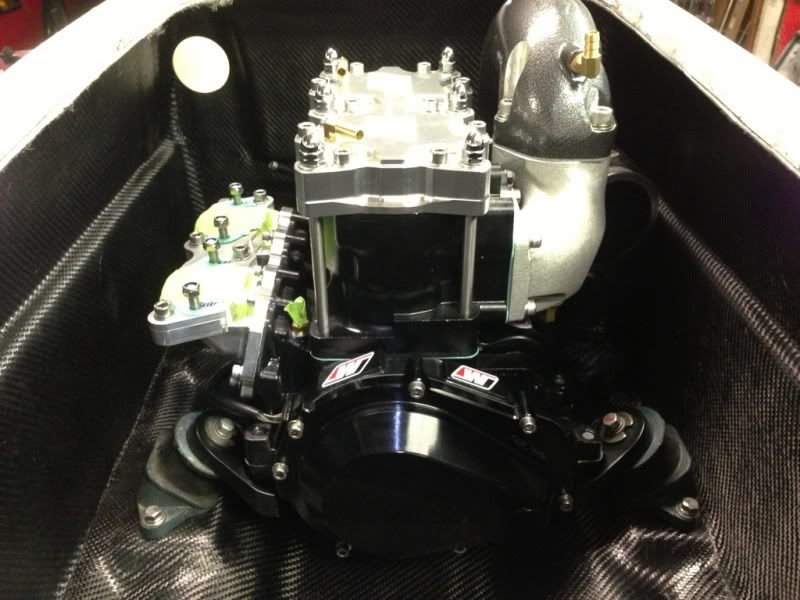
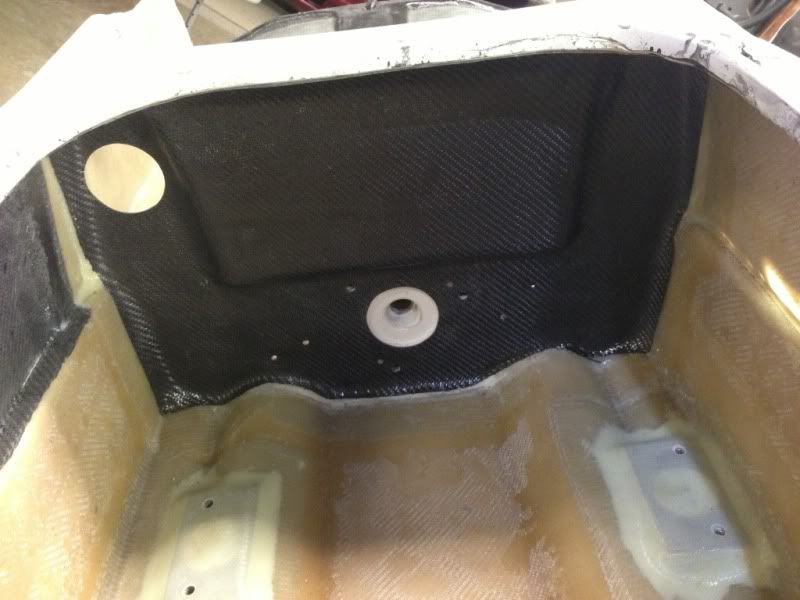
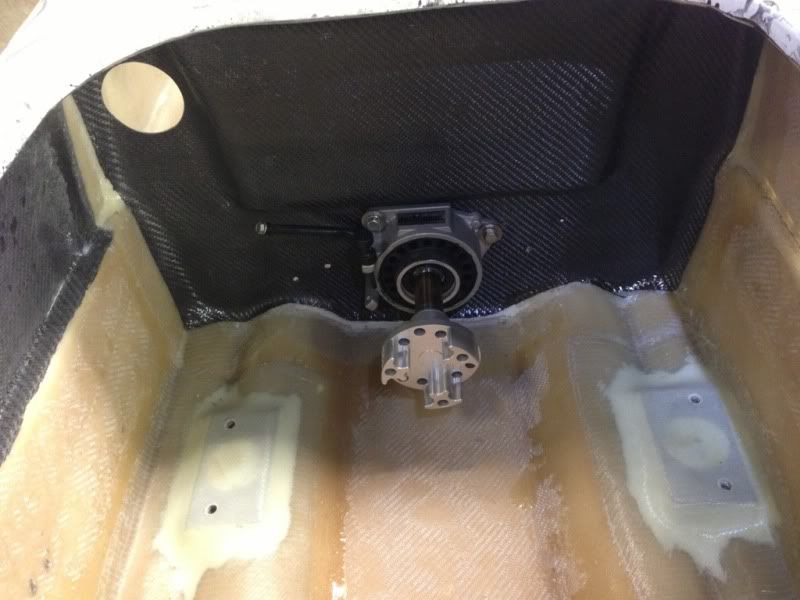
I was starting to run low on resin and didnt want to get caught short in the middle of glassing so I decided to hold off until I could get more. Ill finally be picking a gallon up tomorrow and I also found a local supplier for plexus as well as a company to mandrel bend the exhaust. Today I decided to finish up the bulkhead and check the fitment of the midshaft.


VXSXH20
Sionis Industries
- Location
- Mid-Atlantic
Super Dope Mike! Ive been watching awhile and you got skills second to none SAE is an awesome program!
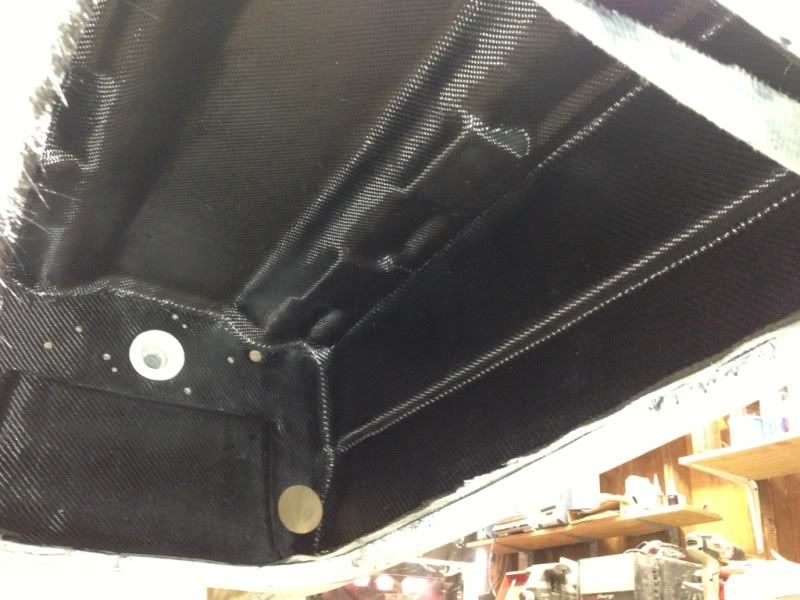
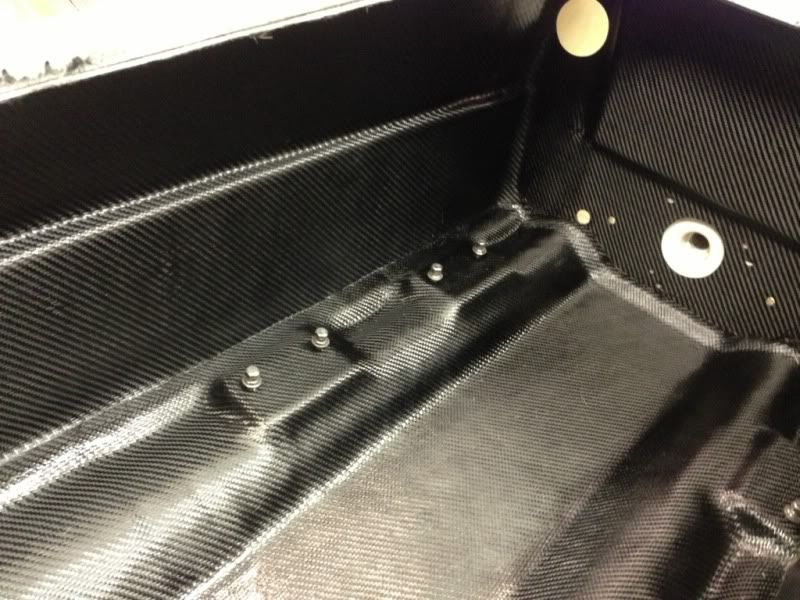
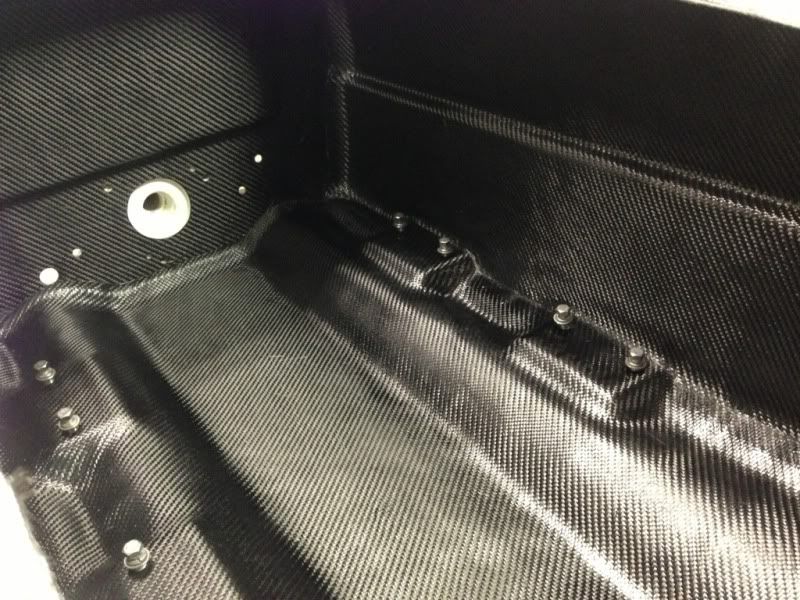
I ran out to check on the ski this morning before work. It seems to be very solid, the sides of the engine bay had a lot of flex before mainly along the top deck, but I cant get any movement out of them now. I started out with the 2 layers of biax over the motor mounts and under the pole bracket area and a layer over the bulkhead then added 6 layers to the very front of the nose, 2 layers over the rockered section followed up by 2 layers on the bottom from the nose to the bulkhead, 2 layers along the sides and then 2 layers of carbon everywhere. I think I over shot my weight goal by quite a bit but I figured Im better off overbuilding it so I dont break anything. Im guessing I will be in the 100-110lb range once its done but we'll see.
VXSXH20
Sionis Industries
- Location
- Mid-Atlantic
Better safe than sorry with all time and effort and material put into the build! The strength is what you were after anyways right?
(-The Hand Pole is great by the way. Still sitting in the box, i checked it over and as a bonus it was already pre-drilled for my fatbar plate and umi stem-Thanks! part of my winter build in the works...)
(-The Hand Pole is great by the way. Still sitting in the box, i checked it over and as a bonus it was already pre-drilled for my fatbar plate and umi stem-Thanks! part of my winter build in the works...)
Yep better off going a little on the heavy side to make sure it holds up after all that has been invested thus far. I have to admit I am a little bit worried about the motor mounts with so much material added on. I took some dimensions before hand so I think I can find the mounting holes again, but when I mocked up the motor before it sat just about perfect in height with the couch mounts on top of the bare aluminum plates in the hull. Its going to be higher now with 4 layers of biax and 2 layers of carbon on top. Hopefully I can make it work.
VXSXH20
Sionis Industries
- Location
- Mid-Atlantic
I glassed over my flat alum plates with 3 layers of 1708 Biax when I reinforced my hull, the mounts sat too high as I knew it would but I let it cure and took a small cut off wheel and cut the mount areas back out.. Waxing the mount areas only so the resin wouldn't stick there. My alum plates were also roughed up with 60 grit and 5200'd to the original plate bottoms. Then glassed over, the motor mounts may fail or he threads would strip out but he alum plates are not going anywhere! You should be fine looks killer! Keep on keepin on!

