Super Jet Project Dance-floor

Req

Location
SW Tenn
Busy busy day. I am surprised I was able to get it all done.

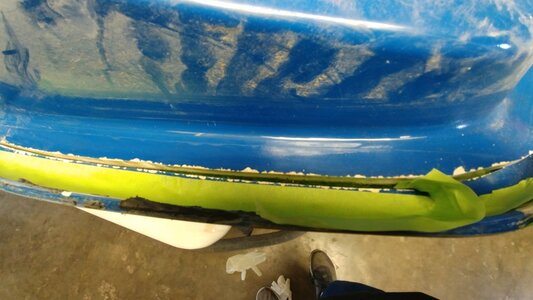
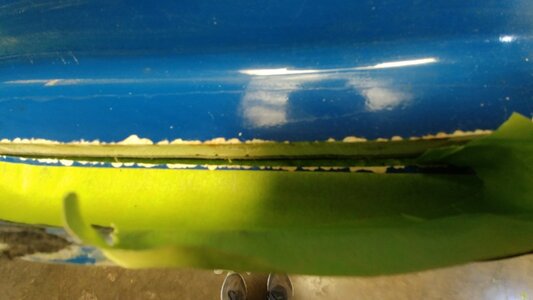
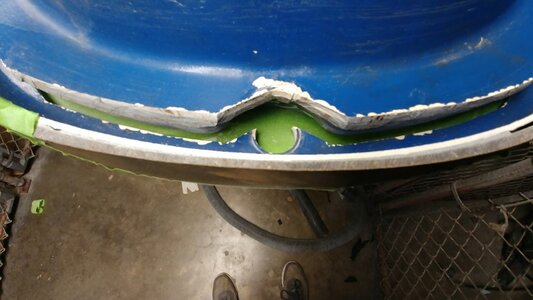
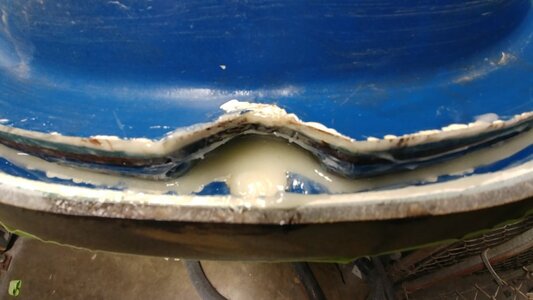
I needed to fill in the gap created so I flipped it upside down so I could pipe thickened epoxy in the gap. I needed to do it in two pours to account for the change in angle toward the front. I have some grinding to do under the bond rail to ease the transition but thats for another day. I simply want to affix the bond rail to the hull.

20190227_115834.jpg

I saw a thread recently that used a ziploc bag to pipe thickened resin instead of making a mess. Stole that idea

20190227_135129.jpg

Squirted that white stuff in the gap.

20190227_140305.jpg

20190227_140312.jpg

Continued.....
 

Attachments

  • 20190227_115840.jpg
    20190227_115840.jpg
    91.4 KB · Views: 12
  • 20190227_120313.jpg
    20190227_120313.jpg
    60.3 KB · Views: 13
  • 20190227_120320.jpg
    20190227_120320.jpg
    83.1 KB · Views: 14
  • 20190227_140325.jpg
    20190227_140325.jpg
    72.7 KB · Views: 15

Req

Location
SW Tenn
Timing was everything.

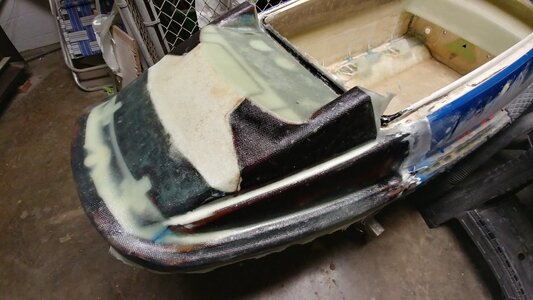
Once I was able to tap on the resin from underneath (about 3hrs ) and it felt hard, I flipped the hull over and peeled the tape exposing the resin bridge. I thickened another small batch of resin and shaped and filled mildly where it was needed, leaving as much original hull exposed as possible to ensure a good bond.

I then waited about 1.5 hrs till it was the consistency of a gummy bear. I wetted the surface out and draped two layers of 9oz Sglass over the joint and half of the nose. This turned out better than expected, I would have been happy to simply affix the bond line and fix any issues by grinding and faring later but this is quite accurate already.

20190227_191406.jpg20190227_193037.jpg20190227_221822.jpg20190227_221927_HDR.jpg20190227_221933.jpg20190227_221952_HDR.jpg20190227_222001.jpg20190227_222031.jpg
 

Req

Location
SW Tenn
No, maybe I should have. The gap is pretty small considering. I just plan on putting a few more layers over time as I shape the nose. I think it will be plenty strong once I glass the bottom of the joint with 1708 as well.
 

Req

Location
SW Tenn
Well I spent part of the day finishing reinforcing a small section of the nose before I taped it all off so I could pour two-part foam.

I think the nose is shaping up wonderfully, I will be cutting the hump in front of the pole bracket off and leveling all that out.
20190228_144524_HDR.jpg20190228_145926.jpg20190228_150928.jpg20190228_153434.jpg
20190228_162838_HDR.jpg20190228_190154.jpg20190228_190038_HDR.jpg20190228_190011_HDR.jpg20190228_190004_HDR.jpg
 

Req

Location
SW Tenn
The 90s were fun and weird, the engineers were close on the SN design though, it just takes a hack here and there to update it to AM hull levels.

Hell, the smell of melting metton reminds me of one of the early 90s kid toys every time I smell it. Anyone else remember that plastic welder thing they sold for a while? Im sure I killed some brain cells with that thing and probably have some rare cancer forming lol.
 

Req

Location
SW Tenn
And continues my Marathon to finish the nose...

I spent about an hour truing the surface to ensure that the pole bracket would not wobble and has a nice flat surface to mount too. I then smeared thickened epoxy over the foam and in the gaps. Once it firmed up I laid four layers of 1708 over the new bracket area.

I will trim the edges tomorrow and wrap the entire nose in cloth.

20190301_165552_HDR.jpg20190301_165557_HDR.jpg20190301_203716_HDR.jpg20190301_203700_HDR.jpg
 

Req

Location
SW Tenn
I finish sanding the area. I used two to one epoxy so it took a while to cure. I sanded and draped a layer of S glass and a layer of e glass over it and wetted it out.

20190303_142456.jpg20190303_142442.jpg20190303_142437.jpg20190303_161657.jpg20190303_182447_HDR.jpg20190303_182402_HDR.jpg20190303_182437_HDR.jpg20190303_182402_HDR.jpg20190303_182347_HDR.jpg
 

Attachments

  • 20190303_182447_HDR.jpg
    20190303_182447_HDR.jpg
    110.9 KB · Views: 26
  • 20190303_182323_HDR.jpg
    20190303_182323_HDR.jpg
    120 KB · Views: 25

Req

Location
SW Tenn
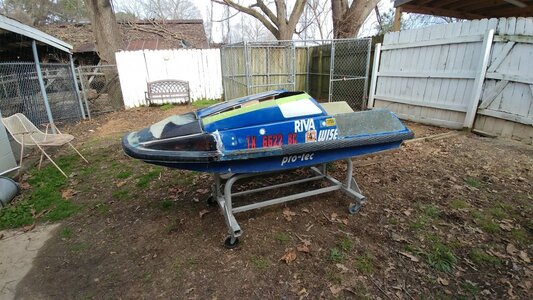
I took her outside and put the hood on To take some pictures and get a perspective of how she's looking. I do believe she doesn't resemble a super jet any more.

20190306_150541.jpg20190306_150547.jpg20190306_150553.jpg20190306_150601.jpg20190306_150634.jpg20190306_150641.jpg20190306_150627.jpg20190306_150608.jpg20190306_150619.jpg
 

Attachments

  • 20190306_150541.jpg
    20190306_150541.jpg
    202.2 KB · Views: 17

Req

Location
SW Tenn
You may be right, it looks like it could be a few degrees off, I will take a straight edge to it to see if the angle is different or if its an optical illusion. Oddly I remember checking that several times before I made the cut but who knows.

Unless you are talking about its height and not its angle, in which case I think the hood seal will help with that. Also the green masking tape could be throwing us all off, I kept it on the edge where I cut.

Thanks for looking out!

Now I am just waiting for a gallon of resin to finish her up. Im going to start working on bulking up the gunwales with blue foam so I have someplace to put my elbows and hogging out under the bond line where I changed the profile.
 

yamanube

This Is The Way
Staff member
Location
Mandalor
I think it's the little ramp in front of the pole bracket that makes it look off, but only from the side. Should come together once it's all one color and has a pole on it.
 
  • Like
Reactions: Req

Big Kahuna

Administrator
Location
Tuscaloosa, AL
I think it's the little ramp in front of the pole bracket that makes it look off, but only from the side. Should come together once it's all one color and has a pole on it.
Yes, I think when you finish the top of the hood it may come together. Sanoman used foam, then shaped it and applied glass over it. this would give some shape and body to it.
 
  • Like
Reactions: Req

Req

Location
SW Tenn
Yes, I think when you finish the top of the hood it may come together. Sanoman used foam, then shaped it and applied glass over it. this would give some shape and body to it.

That is a great idea. I steals that.

Edit: I just checked and the angle is pretty darn close, optical illusion it seems.
 
Last edited:
I'm interested in seeing what you do to accommodate the 155 pump. Are you planning a bigger pump tunnel? I have a square nose hull that I've contemplated widening the tray and opening up the tunnel for an oem 155, but other projects and laziness have so far kept that only a "maybe some day".
 

Req

Location
SW Tenn
I'm interested in seeing what you do to accommodate the 155 pump. Are you planning a bigger pump tunnel? I have a square nose hull that I've contemplated widening the tray and opening up the tunnel for an oem 155, but other projects and laziness have so far kept that only a "maybe some day".

I got a plan, well see if it all falls apart. I am going to wrap the old tunnel from under the tray with neoprene foam since it will follow the contour, shape it a bit, and then glass over that, making sure to tab to key areas of the tunnel like the pump shoe and driveshaft hole as well as the hull.

Once finished I can flip the hull over and pie cut out the old pump tunnel and neoprene foam exposing my much large pump tunnel inlet. Sand and fare that in and glass it to the hull to finish the tunnel.

We will see how it turns out, I really dont want to make a mold and I dont want to screw with the symmetry of tunnel so using the old tunnel as a guide seems like a decent idea.
 
Top Bottom