FX-1 Purple Madness

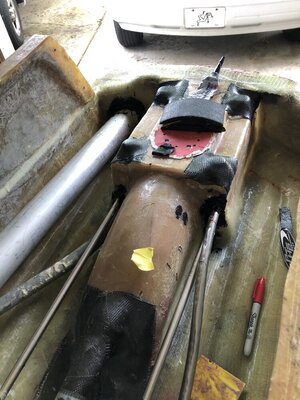
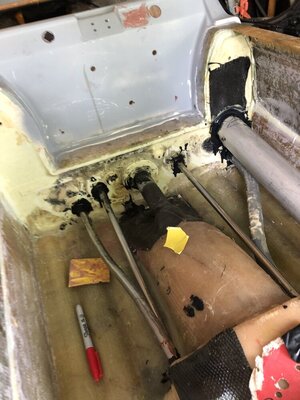
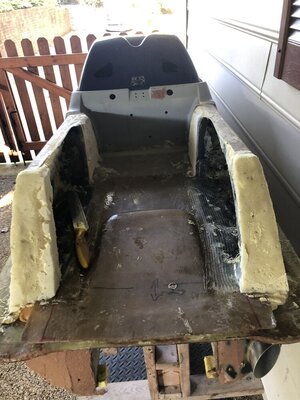
Exhaust going in this weekend,just need to finish sanding the skim coat of fairing before.Then l can start cutting and placing the polypropylene in the tray.

Wanted to thank @SALTDOG for sending me a fire ext holder that is in excellent condition! Thinking how long this plastic part has been in existence is unreal the condition of it.
Been in a box in the attic for years!
 

Sanoman

AbouttoKrash
Location
NE Tenn
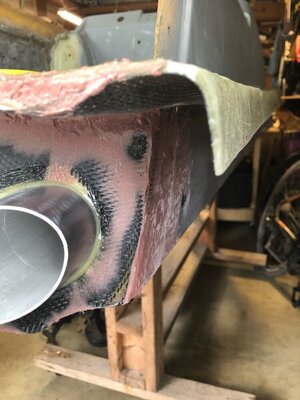
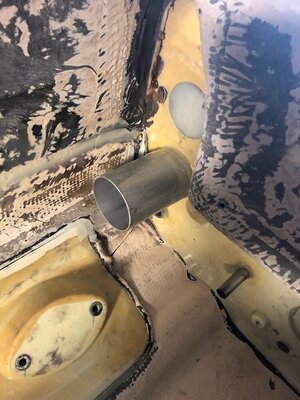
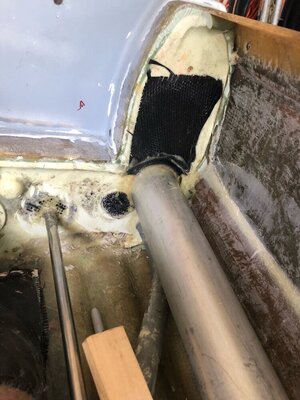
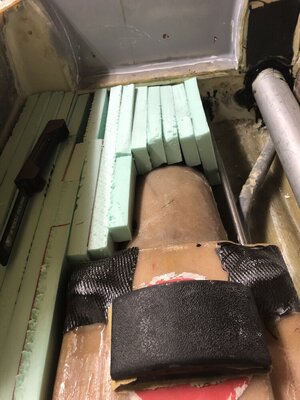
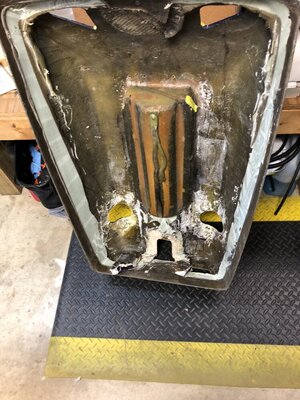
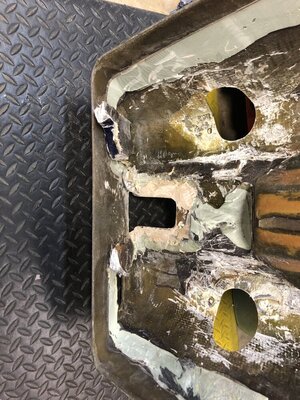
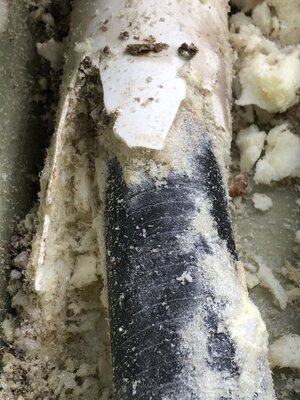
Had some other projects going on this weekend,but managed to get the thru hull exhaust (2.5”) glued into the ski.Now l can fill in with foam.Maybe this week l can get the tray installed..
 

Attachments

  • 15023378-C24B-44F7-8724-7D13591FAD98.jpeg
    15023378-C24B-44F7-8724-7D13591FAD98.jpeg
    120.2 KB · Views: 209
  • 37EC1248-5662-402D-A961-2F3B9AFB0592.jpeg
    37EC1248-5662-402D-A961-2F3B9AFB0592.jpeg
    149.1 KB · Views: 131
  • 79B46B59-CF45-4B3A-8ED8-2ECBCC94AC38.jpeg
    79B46B59-CF45-4B3A-8ED8-2ECBCC94AC38.jpeg
    147 KB · Views: 133

Sanoman

AbouttoKrash
Location
NE Tenn
Some 5200 added today.Nasty stuff
 

Attachments

  • 0707E2AB-EDF5-4EC0-A06F-C01D2E1EB4AE.jpeg
    0707E2AB-EDF5-4EC0-A06F-C01D2E1EB4AE.jpeg
    167.5 KB · Views: 111
  • 5BF90542-FC90-4AAC-B38F-F96916357B60.jpeg
    5BF90542-FC90-4AAC-B38F-F96916357B60.jpeg
    131.5 KB · Views: 121

Sanoman

AbouttoKrash
Location
NE Tenn
Gflex.l like it cause it will epoxy dissimilar metals, glass, carbon fiber, and plastics.But it will also allow some flexing. l added a little cabisil to thicken it up a little.It won’t run that way
 

Sanoman

AbouttoKrash
Location
NE Tenn
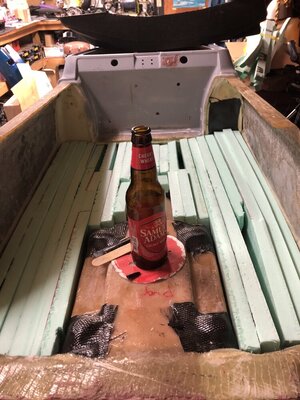
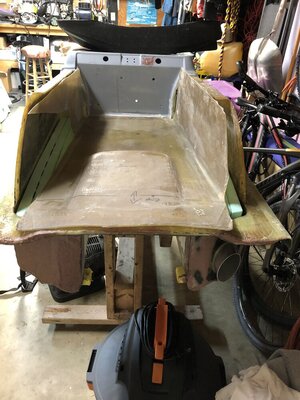
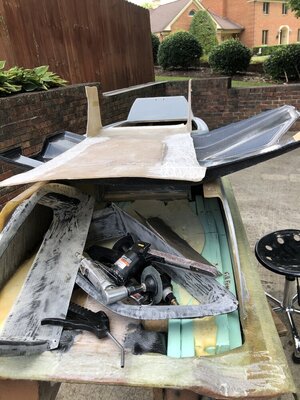
Some headway this week.Polystyrene cut and fitted and was able to set the tray in it and get it lined up.Feel like the ski is getting a lot closer to the finish line.l was going to pour some two part foam inside the tray,but after some discussion with @ScottS,decided to pass.The tray sits well right on top of the poly.
My next step is to number and take all of the flotation back out and clean up the pieces.There is little bits and pieces that will eventually make their way down to the bottom and clog up the small drains.Nothing fancy for the drains,just a couple of drilled holes with two screws.
The next step is to fasten the tray down,close off the cut out section on the left side (in the tray) and start some small pours of the 2 part foam till it gets filled and coming out the gaps all around.Then l can sand and start glassing.
 

Attachments

  • CCD03648-7D9B-466A-936C-B9CDF6692DDD.jpeg
    CCD03648-7D9B-466A-936C-B9CDF6692DDD.jpeg
    137.6 KB · Views: 107
  • 96657995-91B3-4C9F-AFB4-61EE8FD24FB9.jpeg
    96657995-91B3-4C9F-AFB4-61EE8FD24FB9.jpeg
    152.1 KB · Views: 106
  • B32333F5-96E6-4085-96E9-6274EA53F531.jpeg
    B32333F5-96E6-4085-96E9-6274EA53F531.jpeg
    152.2 KB · Views: 123

Sanoman

AbouttoKrash
Location
NE Tenn
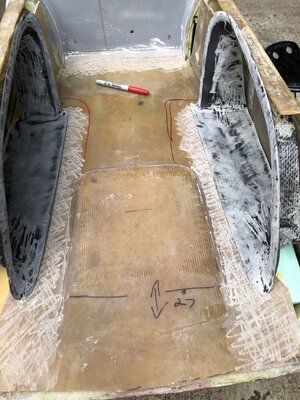
Got some things worked out the last couple days.Got the tray to fit a little better.But going to do several things to the tray area and not enough time today. Need to do some sanding,just didn’t feel like putting on the tyvek suit. it was 87° here. Which is not hot to a lot of you guys,but unless l do it early,it ain’t gonna happen.

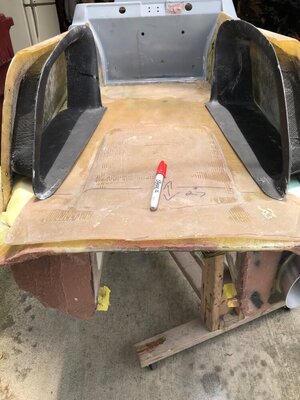
Cut the sides out of the tray insert in order to allow the rrp foothold boxes to fit.Also cut the back side of the boxes off in order to keep a wider tray.Basically cutting the depth down.Can’t take credit for the idea,but it worked great.l’ll end up bonding them with carbon tape to the inside of the sides.Once the tray and boxes are epoxied in,then the 2 part foam will be added to stabilize everything.More pics coming soon.

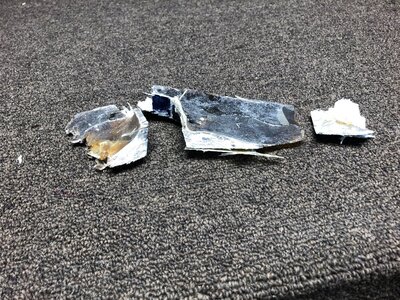
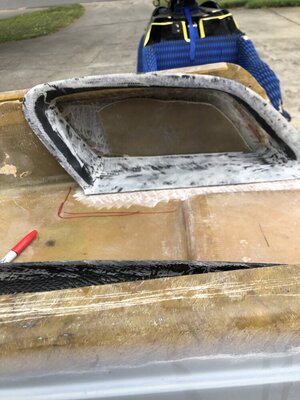
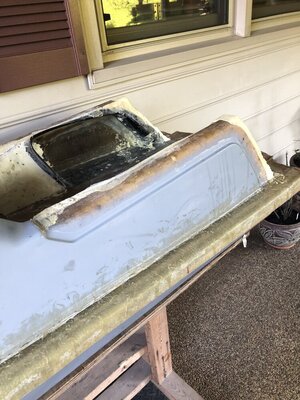
Ok,gonna gripe again about the way people do chit.Been working on removing the handholds in the hood since l bought this project.lf you look closely,you can see the thickness of them was ridiculous.Used a number of tricks trying to get them separated from the hood.Probably got 3 hours total doing this.But they finally broke loose.Going to make some carbon hand holds to replace them.But the hood is finally ready to build back.
 

Attachments

  • 1B92D731-FFFE-41F3-9D76-3AAABD9A51B6.jpeg
    1B92D731-FFFE-41F3-9D76-3AAABD9A51B6.jpeg
    156.8 KB · Views: 95
  • 89D829EA-CA19-47B1-BF0D-AF7BC2B30B20.jpeg
    89D829EA-CA19-47B1-BF0D-AF7BC2B30B20.jpeg
    177.9 KB · Views: 87
  • 9B60F1E8-63ED-4962-A4CC-EBAB0C6294B6.jpeg
    9B60F1E8-63ED-4962-A4CC-EBAB0C6294B6.jpeg
    221.2 KB · Views: 85
  • DA131617-BCC5-48F3-9D45-AE3BA3AF9C53.jpeg
    DA131617-BCC5-48F3-9D45-AE3BA3AF9C53.jpeg
    318.7 KB · Views: 91

Sanoman

AbouttoKrash
Location
NE Tenn
Almost 2 months without an update.My lazy butt.

But today got back started on the project,thanks to @brapperdoodle getting me inspired again.Thanks bro.
Most of what l was dreading was the sanding,a tyvec suit and basically getting airtight to keep the fiberglass off of me.Had a lot to do,about an hour and a half roughly.Soaked with sweat when l got thru,but no itching tonight.
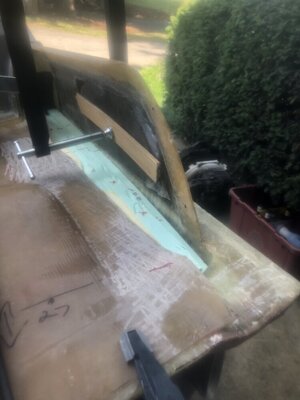
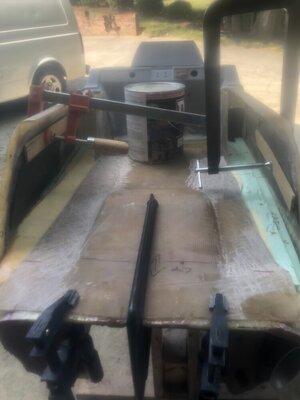
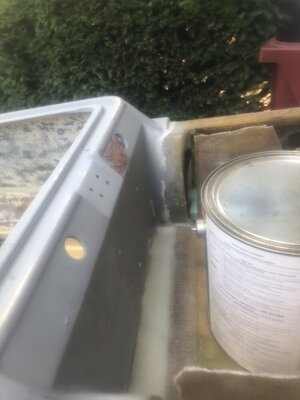
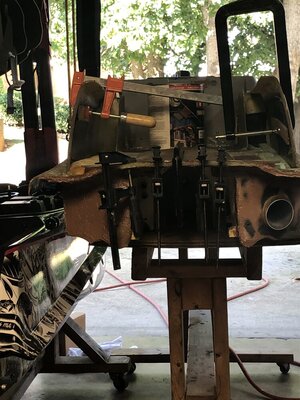
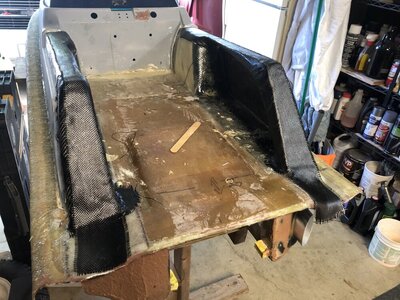
Parts of the tray,the rrp foothold surrounds, and some reinforcement for the sides.The tray needed to be bonded on what was left of the front,about 2.5” and also at the rear bond rail.Some thickened epoxy with glass strands.The reinforcement mentioned earlier was for the side gunwales to make them more stout because of using rrp adj footholds.As you can see from the pics,l weighted the front with a gal paint can and then clamped the rear rail and also the sides.More thickened epoxy with glass strands added there too.
Tomorrow the plan is to epoxy the foothold surrounds with some added glass to seal them to the inside of the gunwales.Then l’ll be adding foam in the sides to form them out.Then more sanding….
 

Attachments

  • 72EBB869-2D5E-410C-ABD2-FB3FFDD6A417.jpeg
    72EBB869-2D5E-410C-ABD2-FB3FFDD6A417.jpeg
    138 KB · Views: 75
  • 61320939-93C2-4938-A9AB-E74E980CDE40.jpeg
    61320939-93C2-4938-A9AB-E74E980CDE40.jpeg
    193.2 KB · Views: 72
  • 914967FB-7018-4B32-8175-0B7E6AAE0322.jpeg
    914967FB-7018-4B32-8175-0B7E6AAE0322.jpeg
    79.6 KB · Views: 73
  • 1D2373CA-1E14-4308-99E0-7A877D6115F9.jpeg
    1D2373CA-1E14-4308-99E0-7A877D6115F9.jpeg
    187.3 KB · Views: 75
  • 1DDB8F1D-3447-45B2-8660-915E9E5B93F1.jpeg
    1DDB8F1D-3447-45B2-8660-915E9E5B93F1.jpeg
    75.5 KB · Views: 73
  • B8E24A58-1A9E-405F-BFB8-A5D583E6D784.jpeg
    B8E24A58-1A9E-405F-BFB8-A5D583E6D784.jpeg
    81.5 KB · Views: 77
  • F039A27B-ED58-41F4-A2ED-8D3F713B930C.jpeg
    F039A27B-ED58-41F4-A2ED-8D3F713B930C.jpeg
    165.5 KB · Views: 86

Sanoman

AbouttoKrash
Location
NE Tenn
Everything went as planned from yesterday’s work.The panels that l epoxied to the inside of the sides are rock solid.The tray feels strong.
This morning l got the foothold surrounds epoxied in and some glass wrapped around them.lf time permits tomorrow,l plan on mixing some small batches of 2 part foam to fill the voids between the gunwales and inside the tray.
Hoping to wrap the rest of it up this week.
 

Attachments

  • B019F080-DB76-4494-AD53-D1EF5BA7AC67.jpeg
    B019F080-DB76-4494-AD53-D1EF5BA7AC67.jpeg
    176.8 KB · Views: 99

Sanoman

AbouttoKrash
Location
NE Tenn
Some progress with all the other things going on at home.We had a water damage about 5 weeks ago that warped our wood floor in the dining/family room.Guys got here yesterday pulling up all the damaged area.Had to empty out the entire area.They should be done by saturday.

About two weeks ago l redid some turf on a air blair dart.

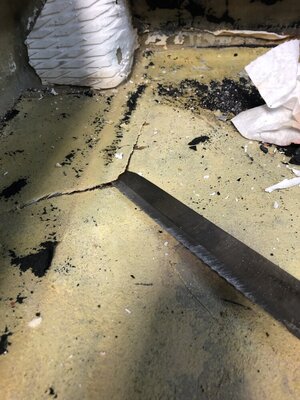
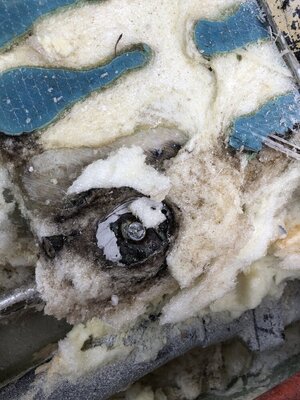
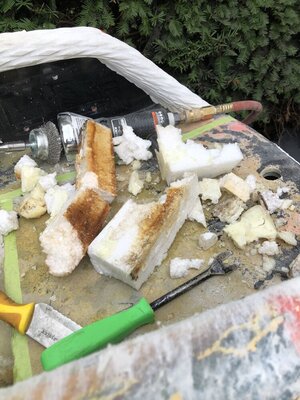
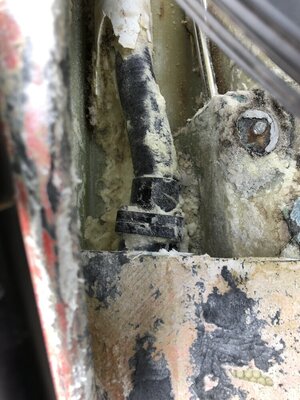
Got it done and returned to the owner.Now l have a 2014 fs2 Ricktor with a bad water leak under the tray.Several suspect areas including a blowsion scupper (they installed) and a pump bolt that has been leaking for a while.A large crack in the tray too.But not sure if this is the root of the issue/leak.I still need to get the rest of the foam out and run some water through the cooling system to see if there are more leaks.

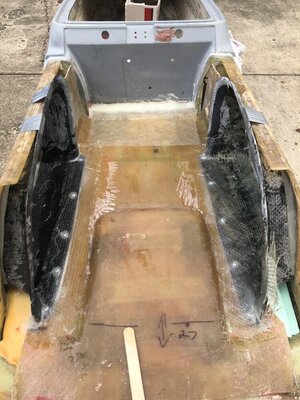
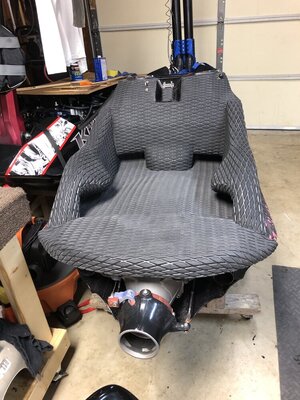
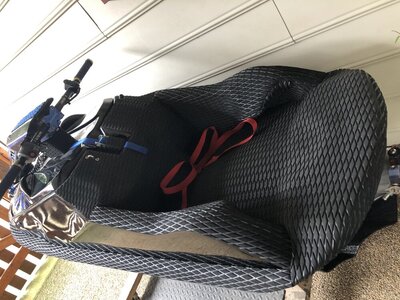
And finally we return to “progress” on the Madness Build. Tying in the foothold surrounds to the gunwales is the last major area in the build.l need to sand and skim coat some thickened epoxy to smooth everything thing out where l laid the carbon.Now time to go back and really tidy up all the areas where l worked.And make a battery tray.The hood needs some work too.
 

Attachments

  • FDA6776E-5D80-4740-971E-093FA24AC993.jpeg
    FDA6776E-5D80-4740-971E-093FA24AC993.jpeg
    175 KB · Views: 74
  • F9B7D8F7-2FF8-4187-9FD3-7BD8B84780AB.jpeg
    F9B7D8F7-2FF8-4187-9FD3-7BD8B84780AB.jpeg
    176.2 KB · Views: 72
  • FCF0929E-803A-48B5-B615-E82269FDD3CB.jpeg
    FCF0929E-803A-48B5-B615-E82269FDD3CB.jpeg
    164.7 KB · Views: 68
  • B0808781-D8E1-4CBD-82E1-7E841D3D6E2D.jpeg
    B0808781-D8E1-4CBD-82E1-7E841D3D6E2D.jpeg
    188.8 KB · Views: 64
  • 6972E461-C60F-4048-95EB-CE2CE3B92289.jpeg
    6972E461-C60F-4048-95EB-CE2CE3B92289.jpeg
    202.3 KB · Views: 64
  • FEC43A44-310D-4A06-935A-90947C00CA92.jpeg
    FEC43A44-310D-4A06-935A-90947C00CA92.jpeg
    171.8 KB · Views: 62
  • BE8CC05B-154F-4E57-8663-AA51214532EF.jpeg
    BE8CC05B-154F-4E57-8663-AA51214532EF.jpeg
    158.3 KB · Views: 66
  • 7BE7A979-8AF9-460A-970E-AA366EBD87E4.jpeg
    7BE7A979-8AF9-460A-970E-AA366EBD87E4.jpeg
    190.9 KB · Views: 76

Sanoman

AbouttoKrash
Location
NE Tenn
Nice one Jon!
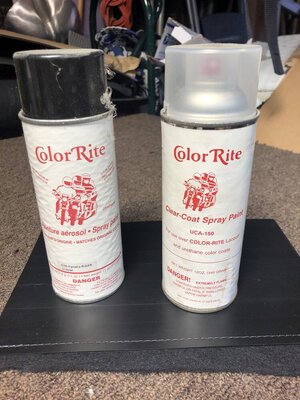
Was looking for some other paint today and came across these cans l got from yamaha years ago (maybe 12 or so).Left the dust on for effect :)
 

Attachments

  • FB4BDCDC-05A6-4421-ACD4-02C15C02A10E.jpeg
    FB4BDCDC-05A6-4421-ACD4-02C15C02A10E.jpeg
    157.1 KB · Views: 59
Top Bottom