You are using an out of date browser. It may not display this or other websites correctly.
You should upgrade or use an alternative browser.
You should upgrade or use an alternative browser.
Superjet - Project RS *Build Complete (for now)*
- Thread starter Mud-Nut
- Start date
Nice build, I've never seen somebody keep a ski foam-less! Definetly has its perks, but if you get a leak, or your ski is hit and is sinking..... There's no foam to hold it up. If I were you, before glassing get some polystyrene extruded foam and cut some chunks up and stuff em in there.. Foam is also to reinforce the tray, it helps with the structure and durability. I'm surprised the tray isn't cracked at all!
- Location
- Jackson MI
Nice build, I've never seen somebody keep a ski foam-less! Definetly has its perks, but if you get a leak, or your ski is hit and is sinking..... There's no foam to hold it up. If I were you, before glassing get some polystyrene extruded foam and cut some chunks up and stuff em in there.. Foam is also to reinforce the tray, it helps with the structure and durability. I'm surprised the tray isn't cracked at all!
Superfreaks are foam less......I think most waterdawg skis are too. It's happened probably a lot more than you know.
Most WDK hulls are foamed but you are right, there are a lot of hulls that have no foam. Kwakhead is new around here, he just acts like he knows everything.Superfreaks are foam less......I think most waterdawg skis are too. It's happened probably a lot more than you know.
- Location
- Jackson MI
Most WDK hulls are foamed but you are right, there are a lot of hulls that have no foam. Kwakhead is new around here, he just acts like he knows everything.
I guess I thought that they were all open all the way back. Maybe that was just A certain build.
- Location
- LaSalle, ON
Right now, my plan is to foam the tray.
As it was, the tray leaked a lot, but that's why the ski had drain plugs installed. I'd empty the tray while filling up with fuel (had to fill up often with the small kart tank). I could also feel the tray flex quite often, which had me concerned at times.
As it was, the tray leaked a lot, but that's why the ski had drain plugs installed. I'd empty the tray while filling up with fuel (had to fill up often with the small kart tank). I could also feel the tray flex quite often, which had me concerned at times.
Swap the drain plugs for versiplugs, I had refoamed a hull with polystyrene and found myself draining it every time I came in as well. I swapped in a couple versiplugs and it made a noticeable difference. Will you be able to continue to use the stock gas tank with that much nose rocker?Right now, my plan is to foam the tray.
As it was, the tray leaked a lot, but that's why the ski had drain plugs installed. I'd empty the tray while filling up with fuel (had to fill up often with the small kart tank). I could also feel the tray flex quite often, which had me concerned at times.
- Location
- LaSalle, ON
Thanks for the advice, versiplugs are part of the plan. As for the fuel tank.... I need to test fit a stock one before buying. I'm not 100% sure if it'll fit, but I'm not too concerned (I'm okay with the kart tank).Swap the drain plugs for versiplugs, I had refoamed a hull with polystyrene and found myself draining it every time I came in as well. I swapped in a couple versiplugs and it made a noticeable difference. Will you be able to continue to use the stock gas tank with that much nose rocker?
At least I'm not a nube lolMost WDK hulls are foamed but you are right, there are a lot of hulls that have no foam. Kwakhead is new around here, he just acts like he knows everything.
- Location
- LaSalle, ON
I decided the next step is the ride plate area.... The ski has already been cut back 7 inches in the rear, and it's too short. I want to add a little bit of length, and I'm thinking I may do that with a full-width ride plate.
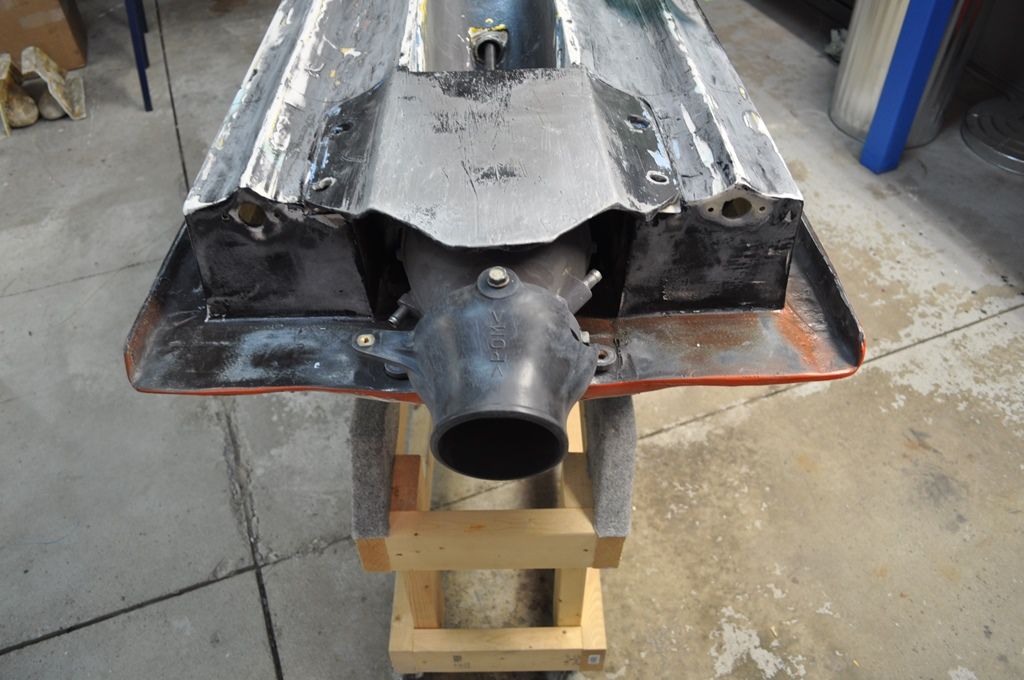
Here's how the rear started....really don't like it. The rearmost ride plate bolts were threaded into plates that were riveted in place, and were barely holding.
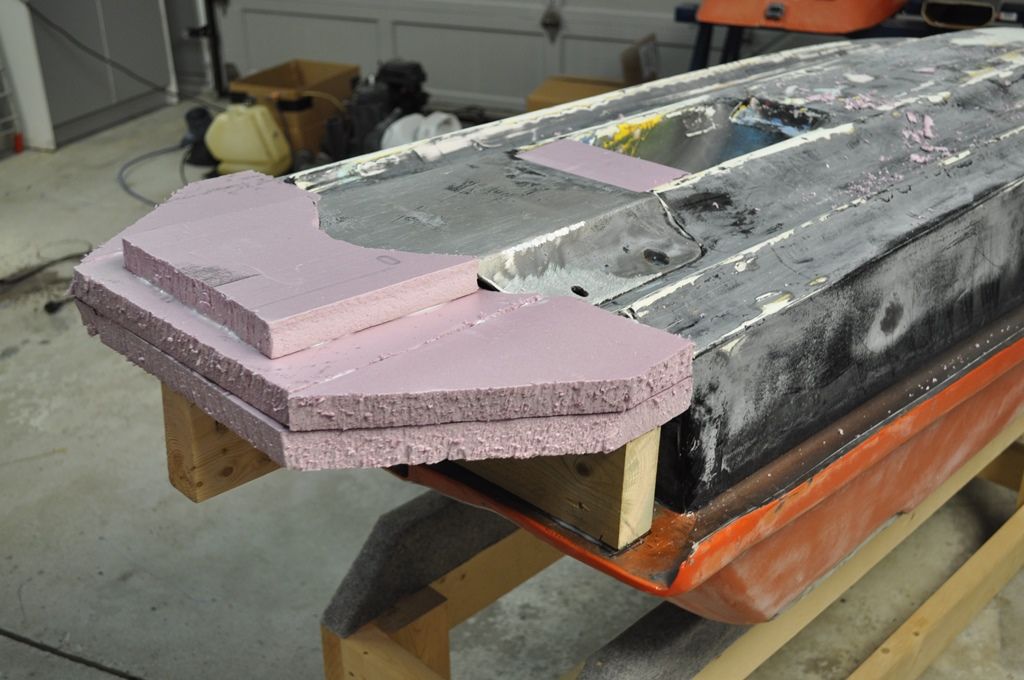
So, the first step is to build the plug. I used wood and foam to get the shape roughed in.
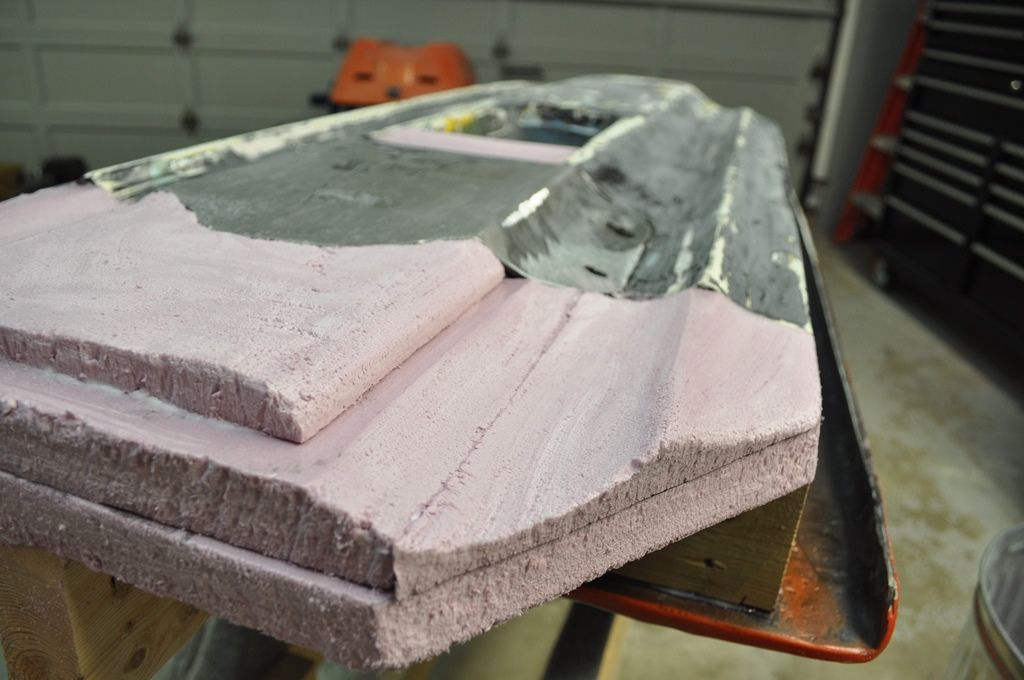
And then my wife and I played with Bondo..... Here's the result of hours and hours of sanding! I was glad to have her help.
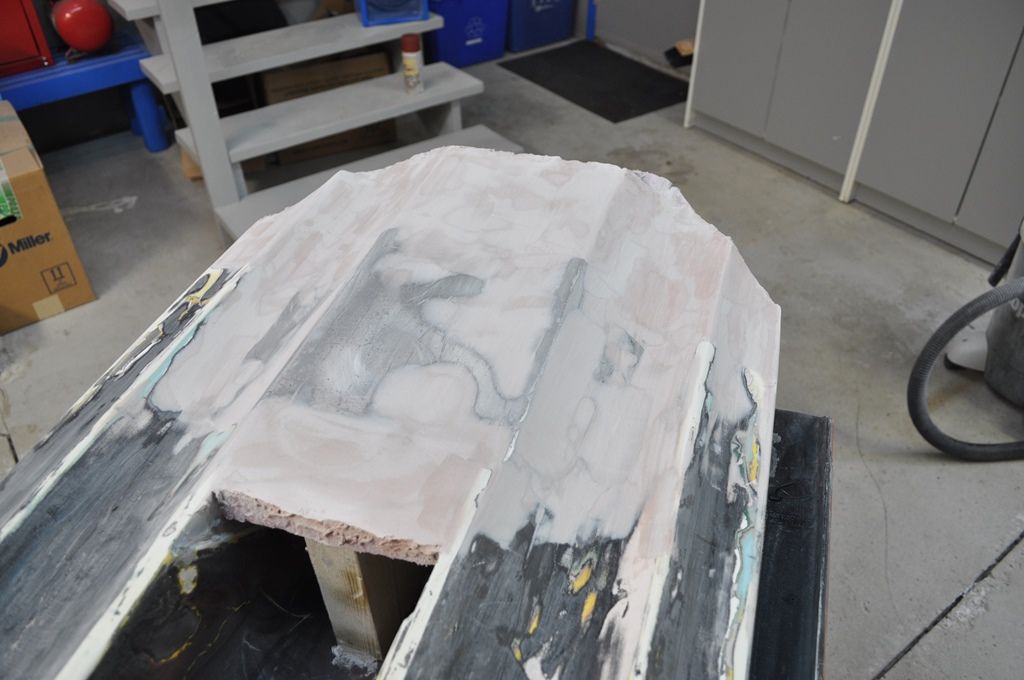
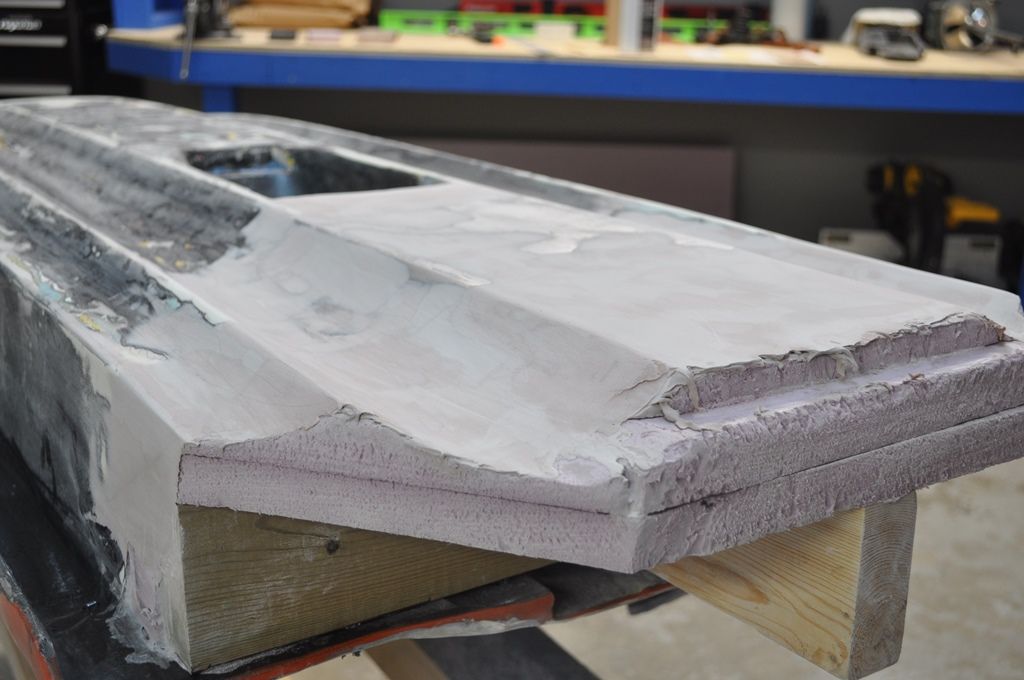
It's not 100% perfect, but it's as good as it's going to get. We'll see how the mold turns out I guess.
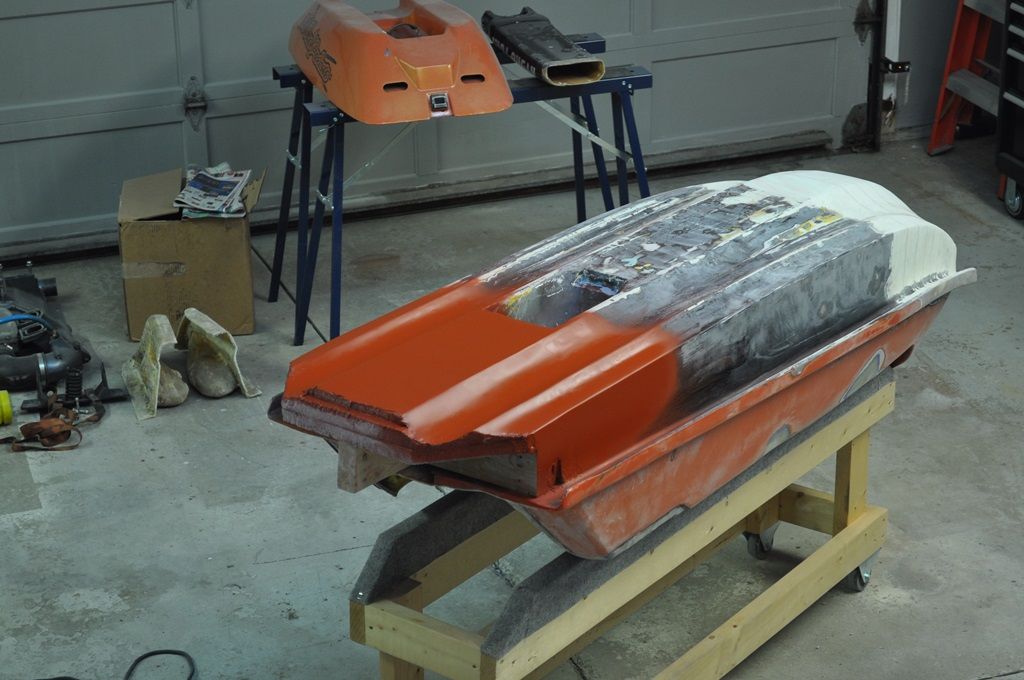
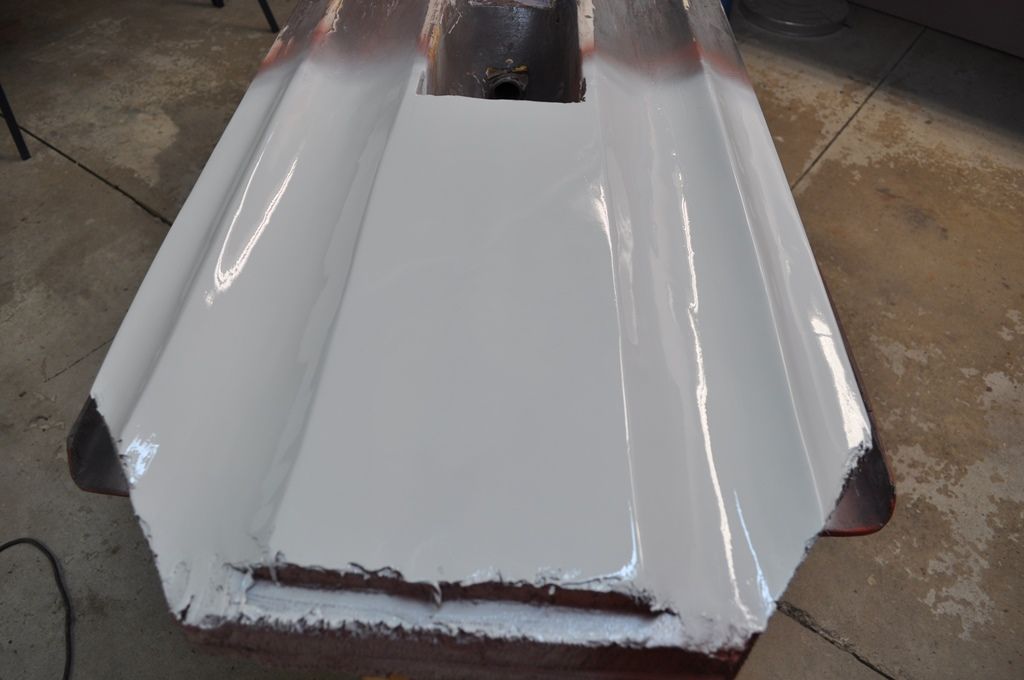
Here's how the rear started....really don't like it. The rearmost ride plate bolts were threaded into plates that were riveted in place, and were barely holding.

So, the first step is to build the plug. I used wood and foam to get the shape roughed in.


And then my wife and I played with Bondo..... Here's the result of hours and hours of sanding! I was glad to have her help.


It's not 100% perfect, but it's as good as it's going to get. We'll see how the mold turns out I guess.


- Location
- Houston, TX
Looking good
Sent from my iPhone using Tapatalk
Sent from my iPhone using Tapatalk
KTM434
Jamie FN Hickey
- Location
- Palm Coast FL
Better to be fearless than a perfectionist that doesn't even attempted this build. Looks good, you'll definitely learn a lot during the build and appreciate riding it more when you're done
- Location
- LaSalle, ON
Thanks guys!
It's been awhile since I posted an update, I had a busy holiday and then I spent most of January tinkering around while I waited for supplies. Anyway, here's an update from the weekend.
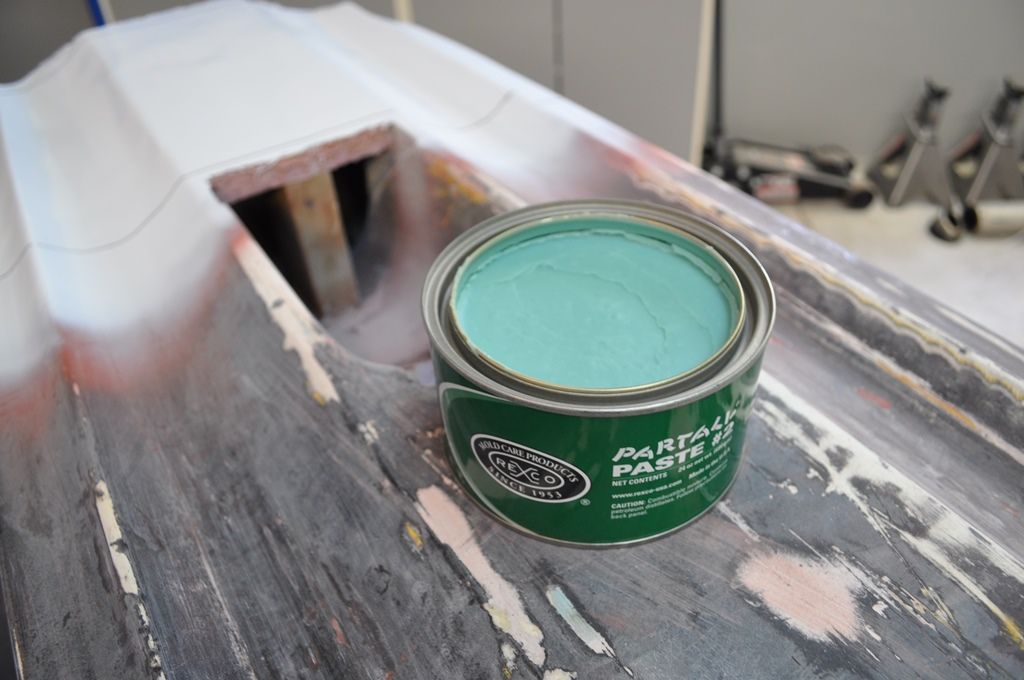
Waxed the plug surface with 3 coats of Partall Paste #2.
Then built a wall using cardboard and duct tape. Then I used hairspray as a PVA.
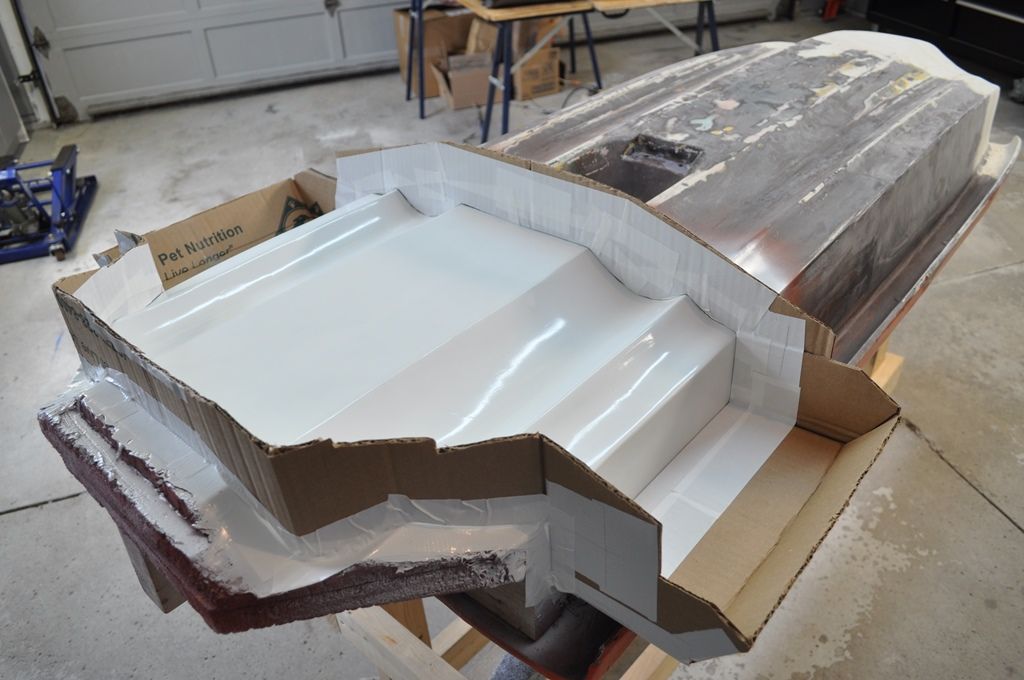
I applied a "catsup" mixure of epoxy resin/aluminum powder/cabosil. It worked really well for the flat surfaces. The edges requires more cabosil in the mixture, so that it wouldn't run down.
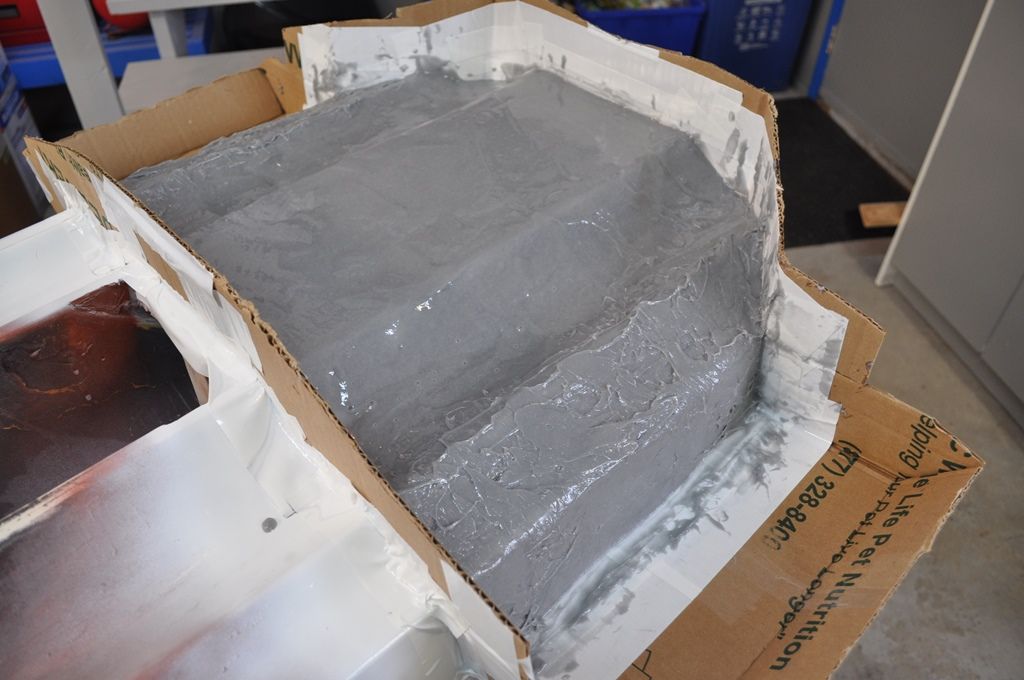
After letting that dry for a bit, I then applied a few layers of glass.
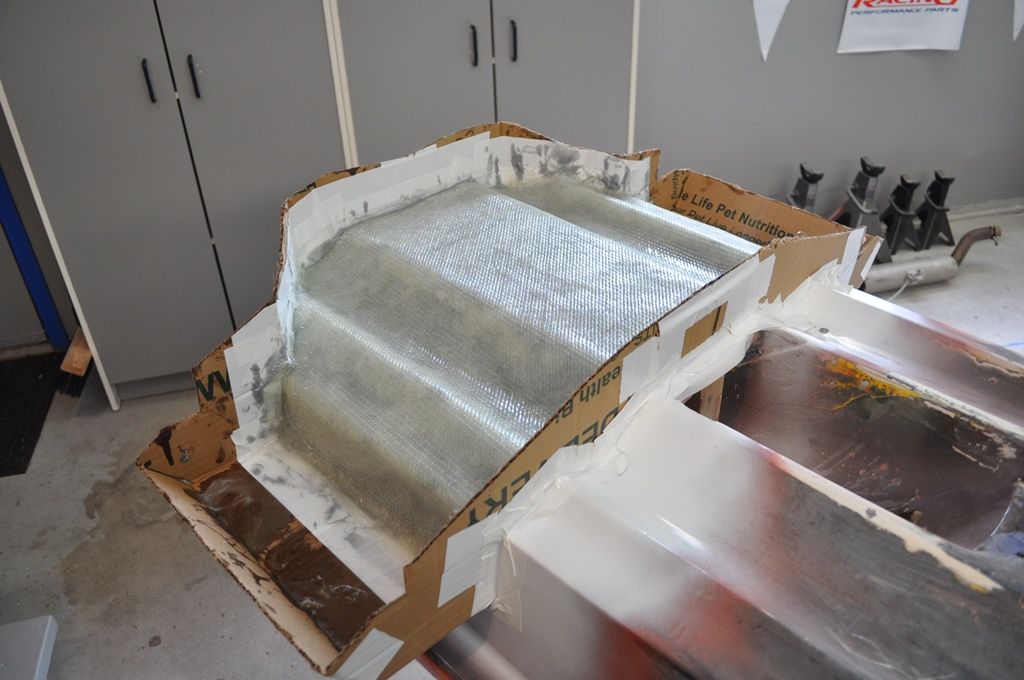
Yanked off my "wall" after everything was dry.
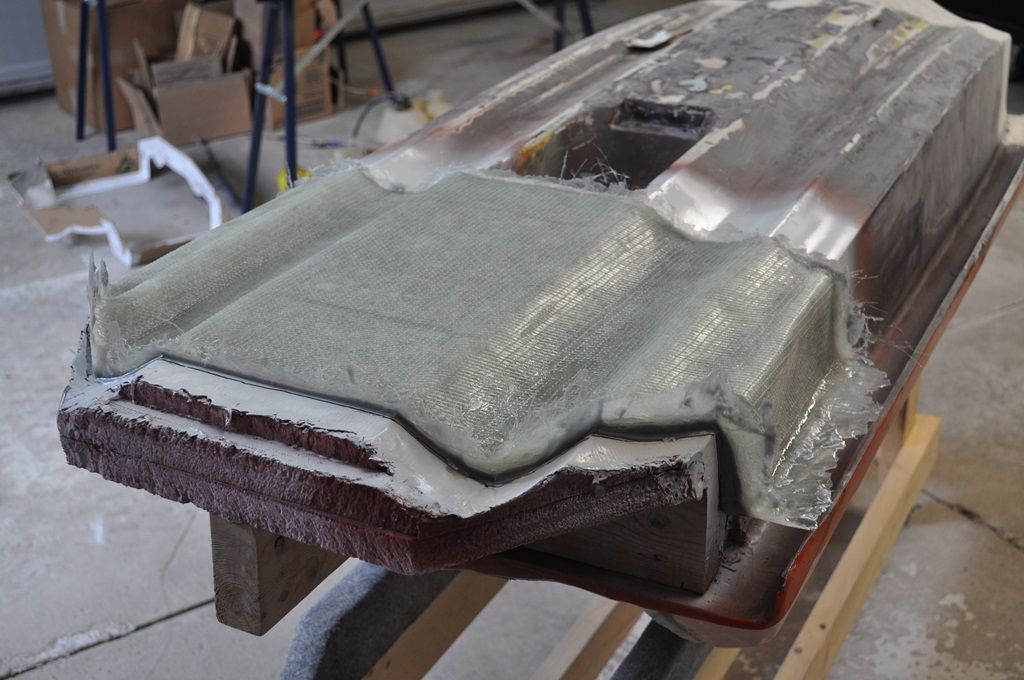
And surprisingly, it released pretty easily!
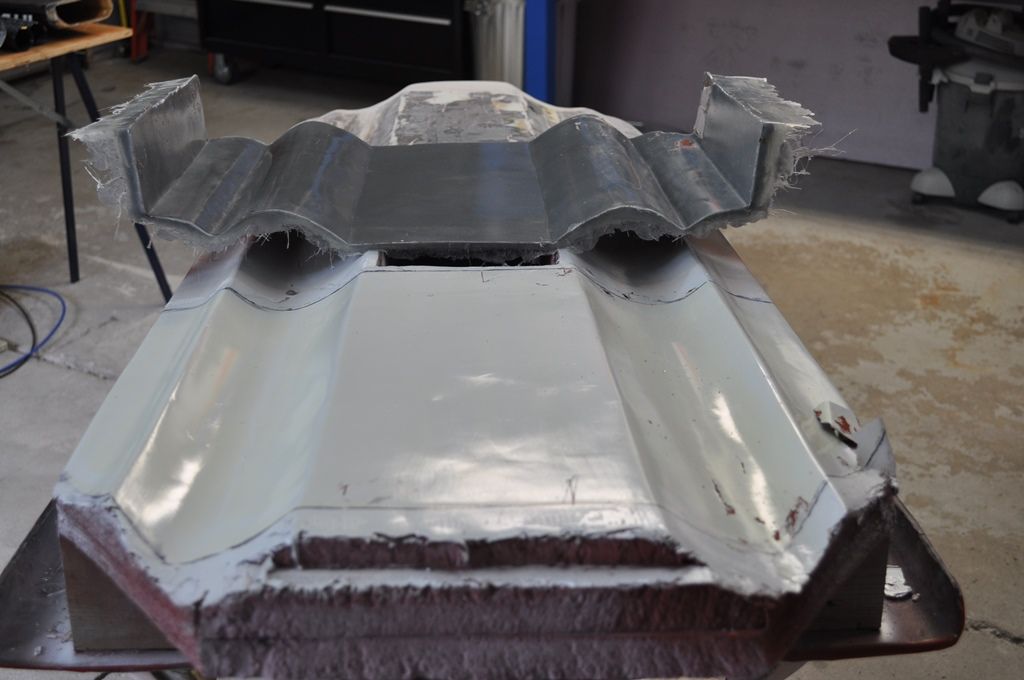
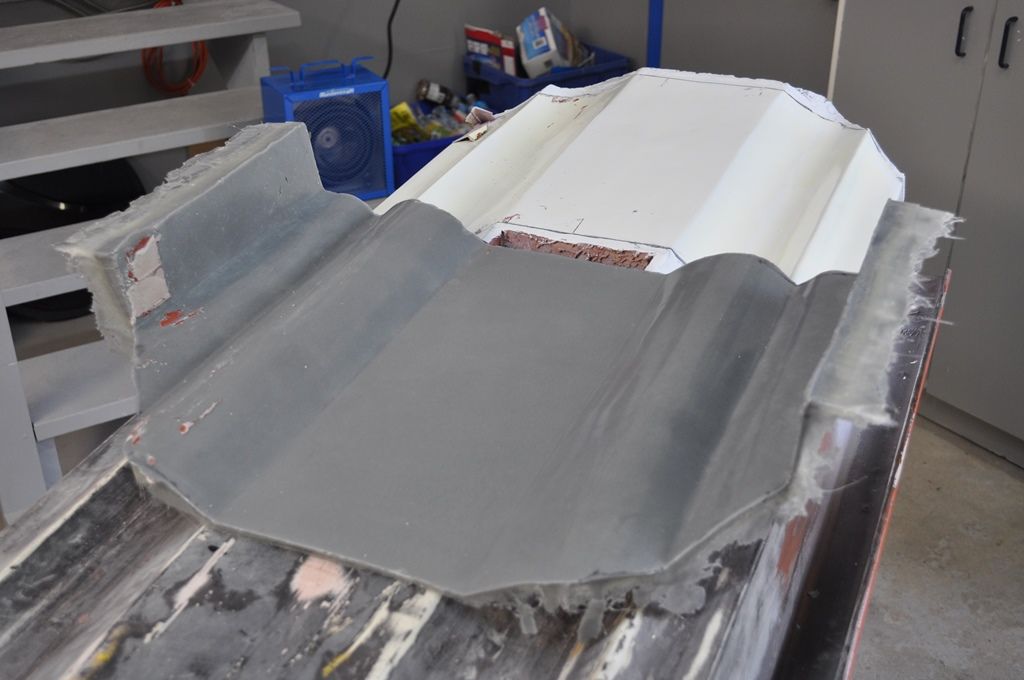
The mold turned out pretty nice. I'm really happy with it, and it really only needs minor touch-ups, mostly on the vertical edges where I had to mix in more cabosil (little air bubbles that need to be filled).
So I built a little wooden stand to stabilize the mold and called it a weekend.
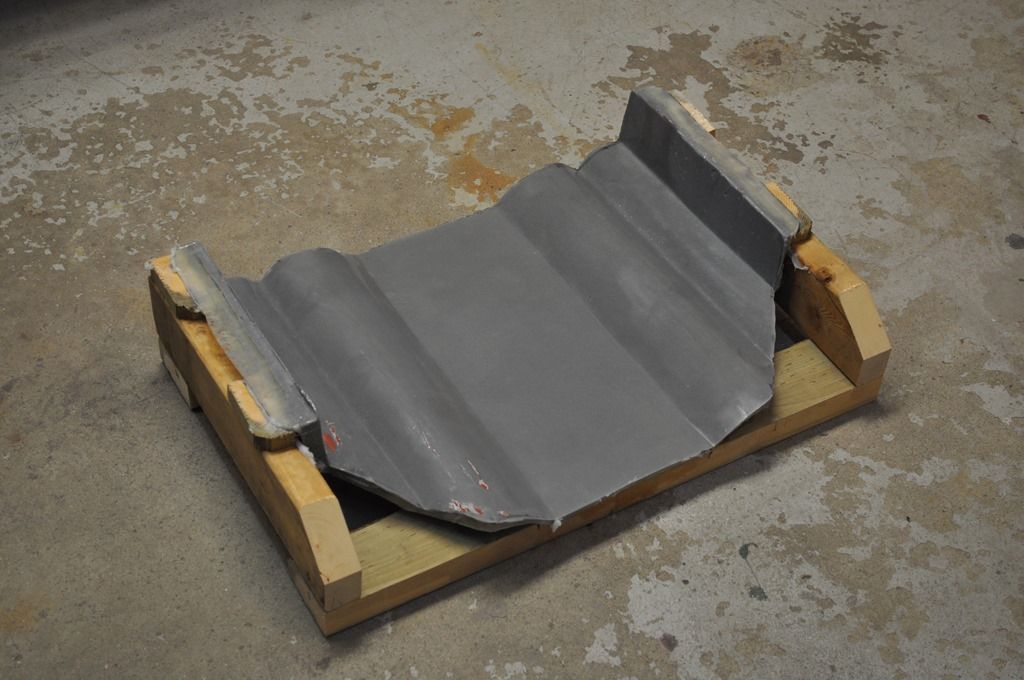
It's been awhile since I posted an update, I had a busy holiday and then I spent most of January tinkering around while I waited for supplies. Anyway, here's an update from the weekend.
Waxed the plug surface with 3 coats of Partall Paste #2.

Then built a wall using cardboard and duct tape. Then I used hairspray as a PVA.

I applied a "catsup" mixure of epoxy resin/aluminum powder/cabosil. It worked really well for the flat surfaces. The edges requires more cabosil in the mixture, so that it wouldn't run down.

After letting that dry for a bit, I then applied a few layers of glass.

Yanked off my "wall" after everything was dry.

And surprisingly, it released pretty easily!


The mold turned out pretty nice. I'm really happy with it, and it really only needs minor touch-ups, mostly on the vertical edges where I had to mix in more cabosil (little air bubbles that need to be filled).
So I built a little wooden stand to stabilize the mold and called it a weekend.

BruceSki
Formerly Motoman25
- Location
- Long Island
Nice work! I always forget how much effort it takes to build a plug, mold, pop a part out.
krawler98
Always wrenchin'
- Location
- Roanoke, VA
Sub'd nice build
Sent from my iPhone using Tapatalk
Sent from my iPhone using Tapatalk
- Location
- clark lake, MI
Nice work!
- Location
- Bemidji, MN
What made you decide on that "catsup" mixture?
Looks good man, we gotta meet up this summer for a ride, been almost 2 years!!
Looks good man, we gotta meet up this summer for a ride, been almost 2 years!!
- Location
- LaSalle, ON
Thanks everyone.
Basically mixed enough to make sure it wouldn't just flow to the lowest spots, while still completely settling against the plug. Didn't work well for the vertical edges, the resin would just run down onto the cardboard. Mixing in more cabosil fixed that issue, but also made it more difficult to apply smoothly (and I ended up with some air bubbles that require some touching up) . I would have liked to use a tooling gelcoat, but there's a lack of a big air compressor and HPLV gun in my garage right now.
It's how West System describes it... Tons of good info on their site: http://www.westsystem.com/ss/fillers-and-additives/What made you decide on that "catsup" mixture?
Basically mixed enough to make sure it wouldn't just flow to the lowest spots, while still completely settling against the plug. Didn't work well for the vertical edges, the resin would just run down onto the cardboard. Mixing in more cabosil fixed that issue, but also made it more difficult to apply smoothly (and I ended up with some air bubbles that require some touching up) . I would have liked to use a tooling gelcoat, but there's a lack of a big air compressor and HPLV gun in my garage right now.
Agreed!Looks good man, we gotta meet up this summer for a ride, been almost 2 years!!
