Trevorbm
“Only full sends, we’ll fix it later”
- Location
- Xenia Ohio
Killer job. Mind if I ask you a few questions about your build? I’m building a xi just like yours from the ground up.
Thanks Trev ! Ask away brother ! Are you building from one of the kits ? When I got mine Tony was real reluctant to sell kits, but since then I’ve seen a couple of XI kits and M1 kits out there .Killer job. Mind if I ask you a few questions about your build? I’m building a xi just like yours from the ground up.
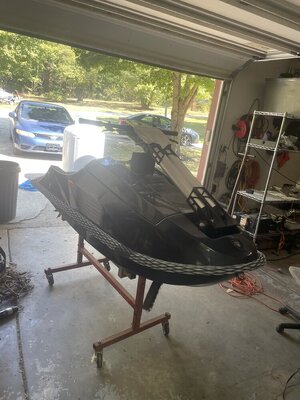
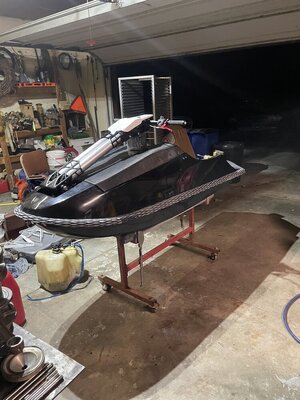
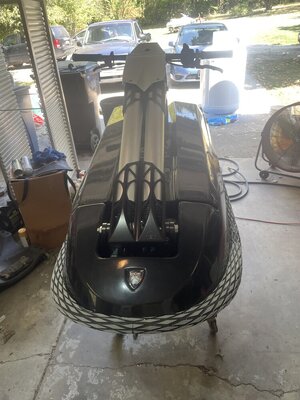
Yep me and my buddy bought his 2 xi kits. I already assembled the first one. Over the winter I want to refine the build.Thanks Trev ! Ask away brother ! Are you building from one of the kits ? When I got mine Tony was real reluctant to sell kits, but since then I’ve seen a couple of XI kits and M1 kits out there .
NICE!!!! How did you bond the first one ?Yep me and my buddy bought his 2 xi kits. I already assembled the first one. Over the winter I want to refine the build.
What product did you use to fill in the mounts? I just glued them in and glassed over them.
Did you sand the engine bay down with 120grit and uv epoxy over it? What’s that process look like and what product did you use? Mine looks functional but I want it to look nice like yours.
Getting clear epoxy to look right takes a little doing, lol, to say the least. I've experimented with vacuum pots for off gassing, different temps, you name it, I tried it.Yep me and my buddy bought his 2 xi kits. I already assembled the first one. Over the winter I want to refine the build.
What product did you use to fill in the mounts? I just glued them in and glassed over them.
Did you sand the engine bay down with 120grit and uv epoxy over it? What’s that process look like and what product did you use? Mine looks functional but I want it to look nice like yours.


Instead of writing up a whole dissertation, just call me bro, WAAAAAY to much to type, lol ! 609 352 1323.Yep me and my buddy bought his 2 xi kits. I already assembled the first one. Over the winter I want to refine the build.
What product did you use to fill in the mounts? I just glued them in and glassed over them.
Did you sand the engine bay down with 120grit and uv epoxy over it? What’s that process look like and what product did you use? Mine looks functional but I want it to look nice like yours.
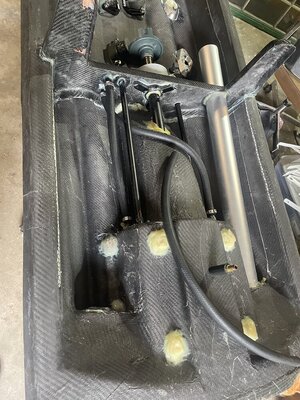
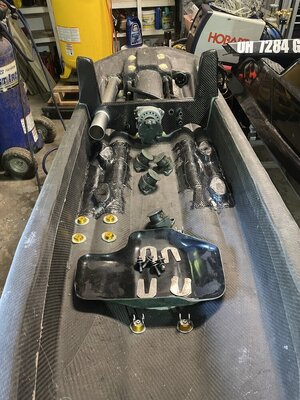
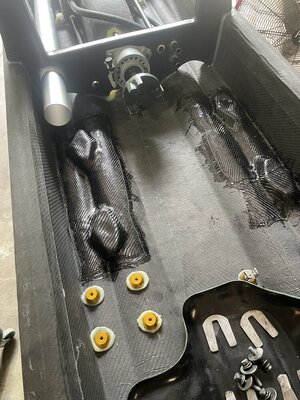
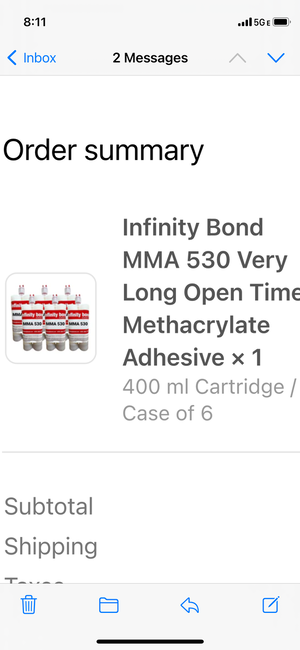
I used the EXACT stuff Tony uses, and I got it from Tony. I friggen stressed over bonding on that top deck ! The stuff Tony uses is FAST. And even with his air powered dispenser ( which he lent me ) it took 8 mins. per tube to dispense. I used 3 3/4 tubes even though Tony said 3 would do. 30 mins. just holding the trigger, DEFINITELY NOT A ONE MAN JOB! I called in one of my buddies to help and a good thing another buddy tagged along! Flash-Fx and Wavehog. Flash made a carbon FX1 from scratch, check out his build, and Wavehog assisted him with it so I was fortunate to have 2 guys with putting hulls together experience. The meth was a first for all of us though. And a QUICK lesson ! You could easily turn a bunch of expensive carbon pieces into a bunch of carbon scrap, lol !Ask what product glue did you use? Tony said any methacrylate adhesive would work
Cool got the strongest stuff they hadLooks comparable to what Tony supplied me, 40 min work time. The stuff I had didn't have equal size tubes, it had 1 big tube and a smaller piggy back tube.
The stuff Tony gave me came out of bulk packs, never got a brand name. Must’ve been secret spec kind of stuff, lol. This is one of the spent tubes.I used this

Yeah I didn’t tell me what brandThe stuff Tony gave me came out of bulk packs, never got a brand name. Must’ve been secret spec kind of stuff, lol. This is one of the spent tubes.
View attachment 454213