Yamaha Lightweight X-2 Version 2.0 - ***TOPDECK MOLD POPPED!!

shawn_NJ

Chasing waves.
Location
Daytona Beach
Just finished cutting up all the glass patterns for the mold. Took about 3x longer then I estimated.

SATURDAY IS GO TIME!!

PVA application to the plug starts 8am. I will have a ton of pics of the tooling process for anyone interested. Wish me luck!
 

shawn_NJ

Chasing waves.
Location
Daytona Beach
Finally after months of thinking about it and planning....The X-2 topdeck mold is actually starting to come together!!! Please note, this may or may not be the right way to do it...but here is how I am building it.

First off before you do anything type of project like this GET YOUR S__T TOGETHER!! First thing I did was clean my shop....LOL. Organize everything and removed EVERY SINGLE THING that is not need for the project. All my EPOXY related supplies got packed up in a box and removed from my bench with a bunch of other crap. New plastic is layed down on top of the table.

mold1.JPG


Next I spent a few hours trimming up 4oz cloth in many different sized patterns to use in all the tight corners.

mold1a.JPG


Now here is my PVA trick. I always found myself touching my molds to check the the PVA drying progress and texture. What I ended up doing was messing up one of my parts. I knew there was a better method. This is what I came up with. Glue a small piece of aluminum to the mold so that it gets sprayed whenever you spray the mold. BUT HERE IS THE "CARD UP YOUR SLEEVE"....ONLY DO THIS AFTER ALREADY APPLYING (3) COATS OF PVA. This way no matter how your aluminum piece looks, you have MORE PVA on your mold....and the rule is MORE PVA IS BETTER THEN LESS PVA. Now you can touch this and see if your pva is dry and you dont :):):):) up your mold.

mold2.JPG


Thanks to Alex for this tip, use el cheapo harbor frieght $14 touchup gun for pva @ 90PSI. Depending on the humidity outside (if less then 70%) I always add a few drops of water to the PVA. This makes the texture smoooth as glass on the plug.

mold3.JPG


Next I use these handy solvent proof measuring tubes for all the checmicals that have to get mixed. Here is the duratec @ 2%MEKP and 5% Lac thinner.

mold4.JPG


1/2" barb fittings....I am glassing these INTO the mold to allow ports to inject water and air to help pop parts out....AND for wetsanding drains.

mold5.JPG


Remember the aluminum plate for the PVA. Well here is where you get to check your spray work and make sure you have a good barrier to remove your part/mold, ect. Check this BEFORE laying anything up.

mold6.JPG


Here is all the MEKP for the actual tooling resin that I am using to lay the mold up. All ready to go.

mold7.JPG


When working with polyester ANYTHING make sure you have good ventalation. This :):):):) is deadly.

mold8.JPG


I LOVE this stuff!!!

mold9.JPG


100oz of Duratec ready to rock. And in tastefully decorated fruit cups!!

mold10.JPG


Drill mixers....I do not know how I ever lived without them.

mold11.JPG


Before spraying duratec make sure your surface temp is over 70F. If not you will get orange peel OF DEATH!!!

mold13.JPG


Dump gun makes this go FAST.

mold14.JPG


Positioning the barb fittings on the plug to be glassed in.

mold15.JPG


Making sure the duratec drying process is kept above 70F.

mold16.JPG


ughhuhuh huhuh.....thats cool...

mold17.JPG


Get you poly resin right around 70F, use with 1%MEKP and get a pretty good gel time.

mold18.JPG


And after a few hours you end up with this. (2) layers of 4oz cloth, and 2 layers of .75oz CSM!!! Tomorrow I will be adding more layers.... But the X2 mold is coming along!

mold19.JPG
 
Last edited:
P

PancakePete

Guest
Shawn you rock... I will see you tomorrow. telling Gordon he needs to come with for the trip up.:bananapowerslide:

Super nice work.
 
P

PancakePete

Guest
Gordon needs his own THANK YOU thread from me. This would look like a pile of paper mache and plaster.

yA... I Think we should keep him as out ski guru... LMAO !:Banane09:

I just know we gunna bake the Caker Brap cave when its time to layup hull one.

Im stoked on that !!!!
 

Flash-FX

No Square..No Round..FX-1
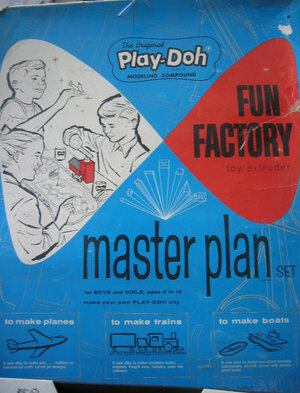
:hail: I see you discovered my "master plan", it really helps a project go smoothly. :hail:

Killer job!!!


You'd better keep an eye on that Pete guy...I've heard he's on the lookout for some Play :doh: and Pixie Stix....:poke: Speaking of another Pete, a project like this might draaag him out of the woods.


Keep up the good work!!
 

Attachments

  • funfactory1.jpg
    funfactory1.jpg
    103.9 KB · Views: 66

shawn_NJ

Chasing waves.
Location
Daytona Beach
So 8 MORE hours of mixing resin and laying mat, and I still have no end in sight...lol :banghead::banghead: I have NEVER been covered in fiberglass to the extent I was today....wow.

Anyway....I switched from .75oz CSM to 1.5oz. This created a problem for the layup. X-2's have TONS of 90d angles, and thicker mat just does not like to make these sharp turns, even when properly wetout. So after doing 2 layers on the flange, I started preping the mold to allow me to get some bulk glass on there much quicker then the .75oz layers.

See here all the sharp 90d turns the glass has to make...


mold21.JPG


Well to make this easier, I took BATCHES of 10oz of resin and added west 403 and 406. Just freestyle it but make sure you go HEAVY on the 403. These are microfibers of glass, and they are the structural element of the filler that chains it together and makes it "one piece". The 406 is cabosil and it stops the resin from sagging and dripping down on vertical surfaces. Make SURE you have a good respirator when handling this stuff. Take a good hit of 406 and you'll be dead quick (its silica). Whip this mixture up into a nice thick paste...save your wrists, use drill mixers....keep adding 406 until the paste defies gravity and will not spill out when the container is upside down.


Razor blades and white powder! Its a party!

mold22.JPG


Next take your RADIUS tool, and make a smooth radius'd bead of the paste around all tight spots. Flat plastic "squeege's" work great for any spot that does not need a radius to be formed. Its been over a month since I did anything like this in the plug preperation process. When I was laying bondo on the plug I was SOOOO careful not to spill anything or make flawless radius', ect. It was quite refreshing working on the mold where it really doesnt matter if I spilled anything or left a glub of resin here or there. I plan on sanding away these imperfections before I lay any additional glass, so nothing to worry about. Here is the finished filling waiting to dry.

mold23.JPG


Thats as far as I got today. Cannot work on it the mold until Thursday so hopefully I will make some substancial progress later this week.
 
Last edited:

shawn_NJ

Chasing waves.
Location
Daytona Beach
:hail: I see you discovered my "master plan", it really helps a project go smoothly. :hail:

Killer job!!!


You'd better keep an eye on that Pete guy...I've heard he's on the lookout for some Play :doh: and Pixie Stix....:poke: Speaking of another Pete, a project like this might draaag him out of the woods.


Keep up the good work!!

I just clicked the picture...LMAO!!! Thats funny as hell.
 
P

PancakePete

Guest
Shawn, I will be there this Friday ! Sorry, I did not make it back. Had some visitors and pasted out ! I will be around this upcoming weekend to layup some more with you... :fing02:

Looks freakin awesome in person. :Banane01:
 

shawn_NJ

Chasing waves.
Location
Daytona Beach
Pancaker and Joe (flashsj) came by to help me with the mold. We logged around 8 strait hours of no joke glassing. Made SOOOOO much progress, I am freaking stoked! I have no idea how many yards we burned through...but its ALOT! We are a well oiled fiberglassing machine.

:Banane13:

We broke out the big gun rolls and layed ALOT of 1.5oz.
mold24.JPG


Pete taking strait resin fumes to the dome.
mold25a.JPG


And the result! Great quote when I asked him if his respirator was helping. "I've been :):):):)ED up for the past 4 hours"

mold25b.JPG


More filling. ALOT of freaking filling.

mold26.JPG


Resin fumes continued.

mold27.JPG


We added 2 more layers AFTER these pics were taken but I forgot to take a pic.

mold28.JPG


We added 2 more layers AFTER these pics were taken but I forgot to take a pic.

mold28a.JPG


Now that we have some solid layers on there. Its time to add THICKNESS. Here is Balktek 2mm Coremat. Polyspun poly material filled with microballons to stop it from absorbing too much resin. Its an amazing material that weighs NOTHING and changes color to let you know its properly wetout. VERY cool product! Going to lay a layer of this down to get some quick lightweight thickness....then top with more glass. Thicker = Good.

mold29.JPG


And here is as far as I got with the coremat.

mold30.JPG
 
Top Bottom