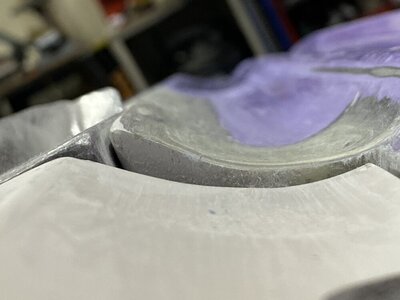
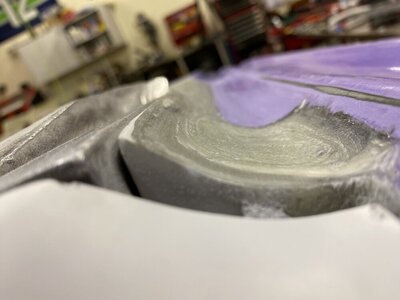
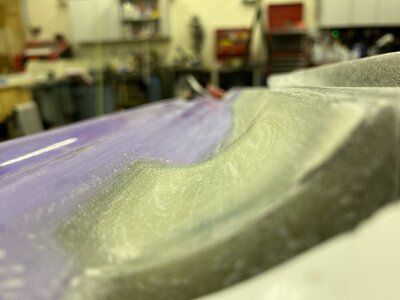
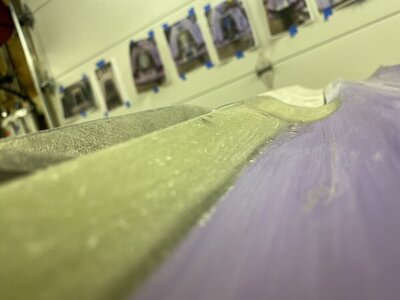
NW FX1 Build w/TOM 21 144 pump tunnel swap.

Drew, are you setting up any sort of tuneable/adjustable (not the lever operated kind) trim?
I’m not sure yet. Was looking into it. There’s a few people that have mentioned after swapping pumps in the fx-1 they “permanently trimmed” their exit nozzle. However some of those pump swaps keep stock driveshaft length , different pumps (im running 144), and stock tunnel so there are a lot of variables. So I was going to just see how it rides first. My pump is set back 2” roughly and runs a 96-07 driveshaft, with an sj tunnel (Tom 21).

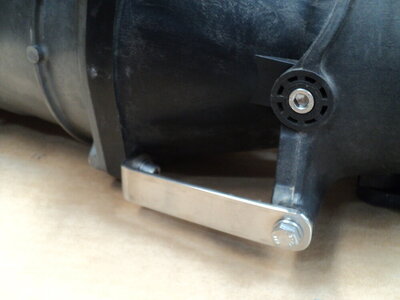
As far as the adjustable trim you’re talking about. I have a reduction nozzle that is permanently trimmed, and I can post a picture of it later. But Im sure there are other setups.

Any advice or info you want to put out there is definitely wanted and appreciated. Thanks.
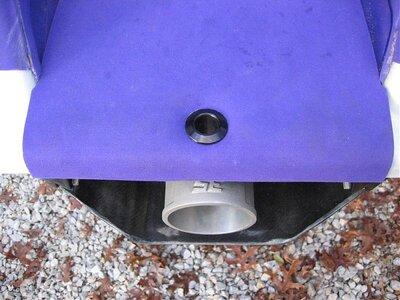
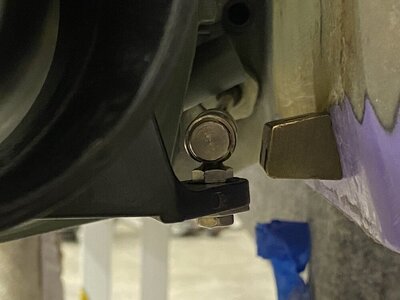
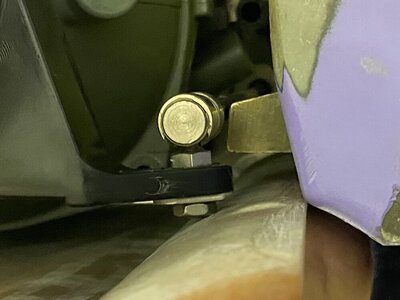
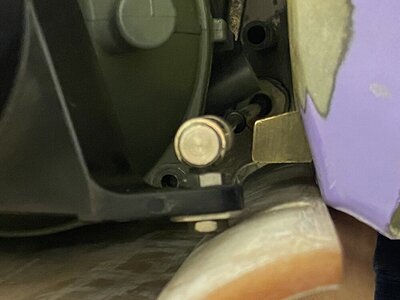
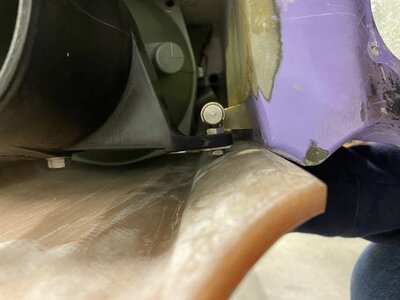
You're gonna want some kind of adjustable nozzle that you can tune to a fixed position. All the FX guys I rode with had some kind of adjustable nozzle that they used to trim the boat with and end up leaving in one spot. Going to a bigger pump in that hull always seems to cause it to "plow". After screwing around with different adjusting scenarios on the few conversions I did I eventually just settled on full tilt up. I even had an active variable trim at one point, it actually worked though it had some push back friction. The last pic is where I ended up, locked, full tilt, fixed. Sometimes the simplest solutions are the best.
DSC06777.JPGDSC06778.JPGDSC02557.JPG
 
Last edited:
Location
dfw
I usually end up about 1 degree down trim on play boats. Makes it easier to recover when Im at the tipping point without affecting full speed handling too much. This can change a lot with conditions so Its often best to have a default setting with a handlebar lever.
 
I usually end up about 1 degree down trim on play boats. Makes it easier to recover when Im at the tipping point without affecting full speed handling too much. This can change a lot with conditions so Its often best to have a default setting with a handlebar lever.
Do you have any pictures or links?
 

Flash-FX

No Square..No Round..FX-1
In the beginning, I was on the path of a Superjet setup in the nozzle department. That turned out to be not optimum. The first nozzle I tried was a stock SJ reduction nozzle, with a Saito adjustable steering nozzle. That worked ok in the surf and at lower speeds. But tuning that nozzle required disassembly and didn't offer enough "up" trim. After dumping out the big box of nozzles and steering parts, I finally cobbled together a Pro-Tec blaster max flow nozzle and a Kawi X-2 trim/nozzle assembly. This arrangement can offer adjustability during the ride for the lighter FX hull (gotta stop and turn the knob) .

On an average ride, I fill my tank to the top (6.5gals). That weight of fuel up front helps plant the nose down. Full trim up balances things out in the beginning of the ride. About 1/2 way through the ride, (in about 12-15 miles) I back off the trim knob a bit to keep things in balance.
In all plastic nozzle parts, there is a little "flex" in the trim. In other words you can grab the steering nozzle and pull it down a couple degrees from full up.

All this stuff can be fine tuned after you get your boat together. Don't get crazy!
 

Attachments

  • tail2404.jpg
    tail2404.jpg
    78.2 KB · Views: 32
  • IMG_5655[1963].jpg
    IMG_5655[1963].jpg
    152.2 KB · Views: 31
  • IMG_5657[1962].jpg
    IMG_5657[1962].jpg
    114.1 KB · Views: 40
Alright. So at this point I've reinforced all of my hull. And installed my pump tunnel and aligned my pump.

To anyone using a Tom 21 tunnel. I would go the route I did the 3rd time to glue it in place.

Yes I aligned and glued my tunnel in 3 times. Third time is the charm and what I found to be the easiest route.
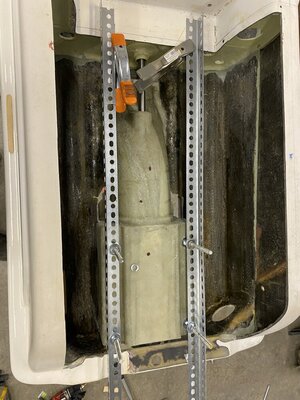
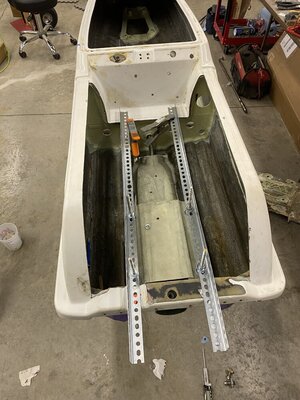
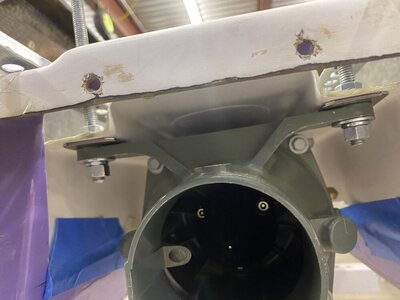
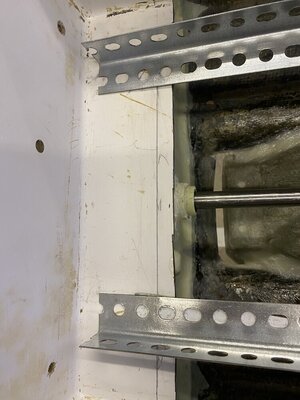
This is basically my first project of this kind and as I was told by several people anything fiberglass can be fixed. The first two times installing the tunnel with the pump aligned it was a headache. I was shimming, balancing, adding weights and clamps. This was a total headache, the slightest bump, and Id have to start over. I was browsing through Brapperdoodles Back From the DEAD FX-2 thread when I saw his pump mounted to the tunnel with allthread which I assumed he has using for his alignment. I later found out he was just using it to mount his pump to the tunnel. But seeing that is what gave me the idea for this.IMG_5080.jpegIMG_5082.jpegIMG_5085.jpegIMG_5086.jpegIMG_5088.jpegIMG_5080.jpegIMG_5082.jpegIMG_5085.jpegIMG_5086.jpegIMG_5088.jpeg
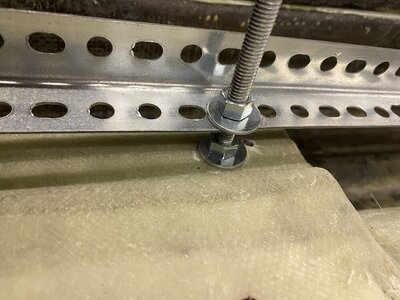
You'll have open up some of the holes on the angle iron so the allthread can go through. I chose the allthread which was standard size (no metric althread) that was closest to size of oem superjet pump mounting bolts. I used a washer spread out the weight on the tunnel on top. It then torqued the pump to tunnel using the washers nuts and bolts to superjet torque specs 12/24 ftlbs. I am using brass yamaha SJ inserts for final installation as well as sj pump bolts hence SJ torque specs.

The Tom 21 tunnel has mounting hole marks. I lined my pump up to these before drilling and squared pump up to them. I set mine back a few millimeters to get the positions right.

With the pump hanging from the allthread you can adjust the four bolts for pitch up top as well as slide the angle iron forward or back. One thing to keep in mind when aligning is to keep an eye on the back of back of you pump and tunnel to make sure you axis of rotation is correct.

You can properly align you drives shaft, and have your tunnel be at 4 o'clock Instead of 12 o'clock where it needs to be. Make sense?

I used a cold fusion alignment tool. Placed locator pins in the bulk head. Installed cold fusion tool. Then torqued the alignment tool to FX-1 midshaft torque specs (I did this the third time lol).

I'm running a 96-07 SuperJet drive shaft in my 144 pump. I aligned it to the same depth into the engine bay as my stock Fx-1 Drive shaft.

More to come...
 
Last edited:
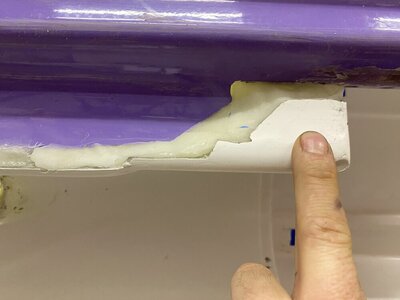
I used thickened epoxy an hop strand to glue my tunnel in to place after my alignment. On the inside of the hull I tried to stream line my epoxy as much as possible for laying glass over the top once dried.

I made sure to build up extra glue to fill all voids around the tunnel. ( this can be removed later)

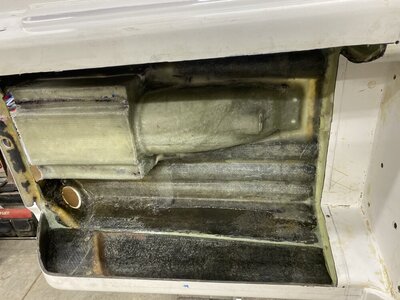
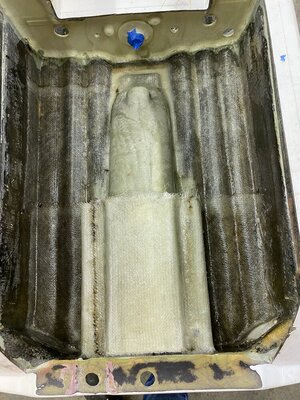
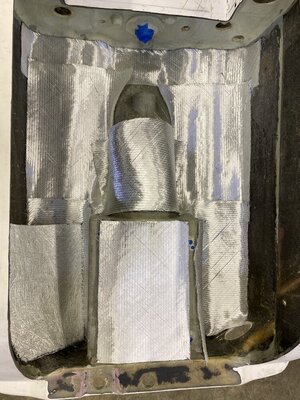
Once dried I sanded down any uneven spots and started glassing my tunnel in. I used 1708 with a back mat. As well as some 17oz for reinforcement.


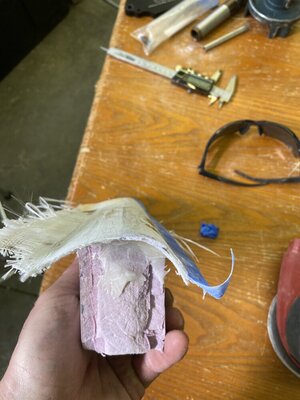
I then flipped the ski upside down and ground down all the epoxy until I hit fiberglass. I then glasses the bottom of the tunnel to the bottom of the hull. Building my way out with glass.
 

Attachments

  • 4D236D37-6B4C-41D9-8541-21254172076D.jpeg
    4D236D37-6B4C-41D9-8541-21254172076D.jpeg
    228.1 KB · Views: 40
  • EC931616-AD93-4DD2-8974-D4062509CAF5.jpeg
    EC931616-AD93-4DD2-8974-D4062509CAF5.jpeg
    134.8 KB · Views: 41
  • 177EEAEB-DD30-44A7-9DE5-B70590DF760C.jpeg
    177EEAEB-DD30-44A7-9DE5-B70590DF760C.jpeg
    139.7 KB · Views: 43
  • A6A3E5DB-9582-4C7D-A3C7-AEF47ED7F468.jpeg
    A6A3E5DB-9582-4C7D-A3C7-AEF47ED7F468.jpeg
    74.5 KB · Views: 40
  • CE33383F-27DD-48A1-A84A-464A1CE2DCEC.jpeg
    CE33383F-27DD-48A1-A84A-464A1CE2DCEC.jpeg
    149.9 KB · Views: 37
  • 5A00F4D0-F2B2-437A-ACE1-30C7049CF280.jpeg
    5A00F4D0-F2B2-437A-ACE1-30C7049CF280.jpeg
    237.1 KB · Views: 37
  • CBD56005-7D0A-488E-8DEA-02C66C8988BC.jpeg
    CBD56005-7D0A-488E-8DEA-02C66C8988BC.jpeg
    221.6 KB · Views: 32
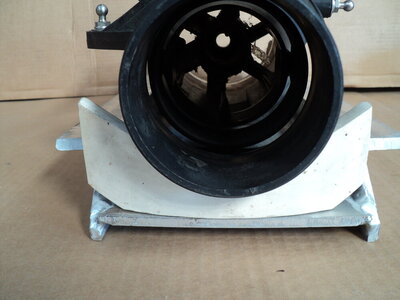
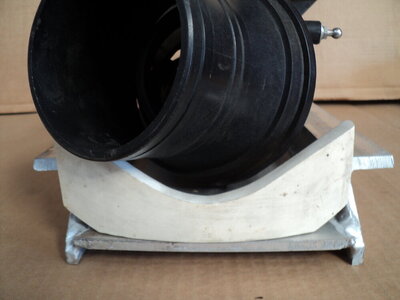
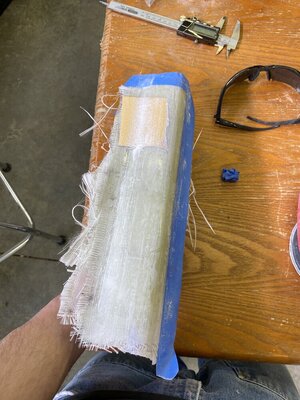
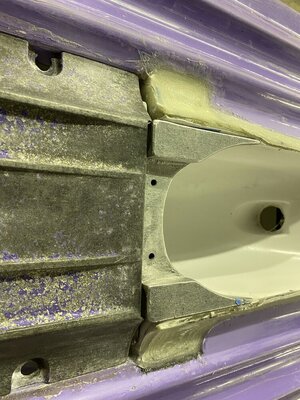
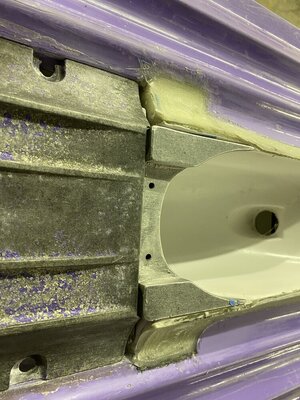
After glassing in the tunnel I started shaping my chines and tunnel in again.image.jpgI made a sanding block from a mold of the bottom of the hull which helped a bit.

But using this sanding block let me give it the best shape.
image.jpg

I used a ride plate to keep an eye on my shaping.

Here’s how it turned out.
 

Attachments

  • image.jpg
    image.jpg
    159.3 KB · Views: 33
  • 76185442-C822-4C7B-9905-F3D87D641D58.jpeg
    76185442-C822-4C7B-9905-F3D87D641D58.jpeg
    197.7 KB · Views: 32
  • 91A8461B-2E96-40D0-AA98-696A0B33B157.jpeg
    91A8461B-2E96-40D0-AA98-696A0B33B157.jpeg
    192.7 KB · Views: 33
  • BF440AA6-39BE-4042-818E-DF9BDBD3D01F.jpeg
    BF440AA6-39BE-4042-818E-DF9BDBD3D01F.jpeg
    83.6 KB · Views: 28
  • C278EA66-8906-488B-B376-AE869748E219.jpeg
    C278EA66-8906-488B-B376-AE869748E219.jpeg
    74.4 KB · Views: 26
  • A30F9D8D-47DF-49D0-AE35-8BE947D524B6.jpeg
    A30F9D8D-47DF-49D0-AE35-8BE947D524B6.jpeg
    72 KB · Views: 28
  • 66FA2000-51FF-43E1-A6AB-2E84EF30D486.jpeg
    66FA2000-51FF-43E1-A6AB-2E84EF30D486.jpeg
    73.8 KB · Views: 31
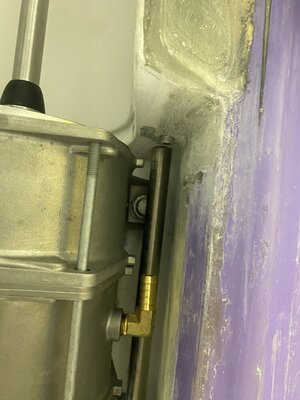
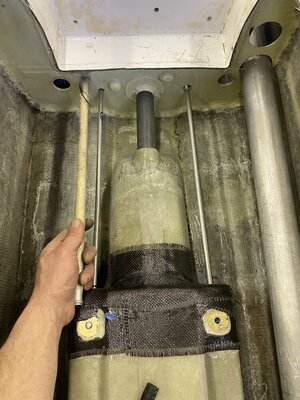
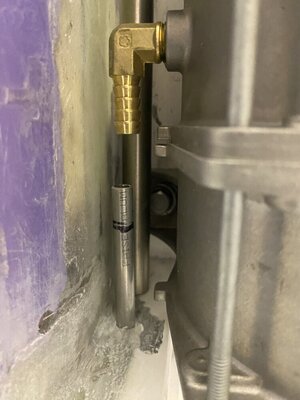
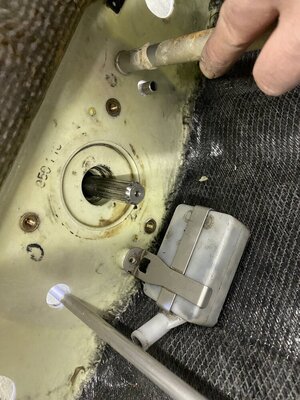
I’m to the point where I’m installing my exhaust tube cooling lines, steering tube etc.

At this point I don’t think I’m going to run trim. However I plan on riding this in the surf so I wanted to keep the stock siphon bilge ( I will also be running dual electric bilges).

At this point I’m also thinking about deleting the siphon bilge. There isn’t a ton of space around the pump.

The 144 siphon bilge tube goes on the left side of the pump, and the 122 goes on the right side.

So I’d have to run the in hull hard line on the opposite side if I do keep it.
I’d have to modify my bracket. And change hose routing.

Anyone have any thoughts on this?
 

Attachments

  • FFAC5C07-B492-4BDE-8E00-3836AB06B228.jpeg
    FFAC5C07-B492-4BDE-8E00-3836AB06B228.jpeg
    126.4 KB · Views: 31
  • 74952E73-CA12-4260-BA95-1FA1CFA244E1.jpeg
    74952E73-CA12-4260-BA95-1FA1CFA244E1.jpeg
    191.1 KB · Views: 34
  • 52801A47-AD53-4B72-980F-C1E8004EFD20.jpeg
    52801A47-AD53-4B72-980F-C1E8004EFD20.jpeg
    145 KB · Views: 32
  • 3BA44834-0959-4B6A-89BC-5D02DF1143DF.jpeg
    3BA44834-0959-4B6A-89BC-5D02DF1143DF.jpeg
    135.5 KB · Views: 27
  • 76492ADB-BAE2-4507-B617-A22556B169D8.jpeg
    76492ADB-BAE2-4507-B617-A22556B169D8.jpeg
    98.7 KB · Views: 28
  • 22E16F6E-0B31-4BA2-A1D5-4B9E26845FA1.jpeg
    22E16F6E-0B31-4BA2-A1D5-4B9E26845FA1.jpeg
    175.9 KB · Views: 27
  • 1F484CC1-63D8-495B-A243-0C5D48575193.jpeg
    1F484CC1-63D8-495B-A243-0C5D48575193.jpeg
    75.5 KB · Views: 28
I’m to the point where I’m installing my exhaust tube cooling lines, steering tube etc.

At this point I don’t think I’m going to run trim. However I plan on riding this in the surf so I wanted to keep the stock siphon bilge ( I will also be running dual electric bilges).

At this point I’m also thinking about deleting the siphon bilge. There isn’t a ton of space around the pump.

The 144 siphon bilge tube goes on the left side of the pump, and the 122 goes on the right side.

So I’d have to run the in hull hard line on the opposite side if I do keep it.
I’d have to modify my bracket. And change hose routing.

Anyone have any thoughts on this?

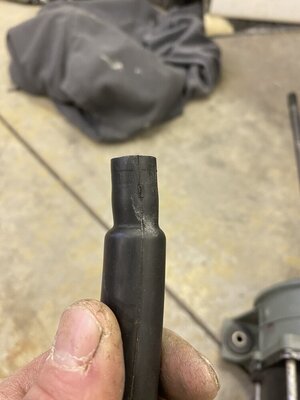
It doesn't matter what through hull line you use for siphon bilge or cooling. I know the stock siphon bilge through hull line has a larger tube, but when you are replacing them you will probably just be using 1/2" OD on both sides. So it doesn't matter what you use the lines for, they will do either job. Trim isn't necessary, but its one of those things you really might want to add while its easy, just incase you ever change your mind! You can just cap both ends if you aren't gonna use it... Also I would make sure your lines aren't sticking too far through the pump tunnel. Mine could have been 1/4"-3/8" shorter because its gonna be snug when trying to install my front 2 pump bolts!

By the way, you ski looks great, you're doing awesome! The chines look perfect dude! I wouldn't add any glass mat to the bottom of the hull... too much chance of delaminating unless you vacuum bag it.
 
It doesn't matter what through hull line you use for siphon bilge or cooling. I know the stock siphon bilge through hull line has a larger tube, but when you are replacing them you will probably just be using 1/2" OD on both sides. So it doesn't matter what you use the lines for, they will do either job. Trim isn't necessary, but its one of those things you really might want to add while its easy, just incase you ever change your mind! You can just cap both ends if you aren't gonna use it... Also I would make sure your lines aren't sticking too far through the pump tunnel. Mine could have been 1/4"-3/8" shorter because its gonna be snug when trying to install my front 2 pump bolts!
Thanks for the tip on the tube length/bolt clearance. I was trying to be aware of this when mocking up.

I'm going to run the through hull siphon tube on the "Drivers Side" will run 5/8s that way if I decide to run trim I can. I'll just disconnect the siphon bilge and run my trim through the same tube.

I feel like I wasted most of my weekend mocking up my lines. I used your 3/4 to 1/2 threaded pvc coupler trick for the through hull steering fitting. What a good idea!

I have to finish this. I need to be riding by next month!

You aren't running dual cooling lines + trim tube? You never know what engine you might run in the future... or if you ever sell the hull you want it to be able to be set up however. Running dual 1/2" cooling lines and a 5/8" trim tube is "covering all the bases" for any engine/pump&trim combo. However you do it will be great, I just know that now is the time to do it while you've got it open! Either way, you're doing great work!!!


P.S. If you do run a trim tube, it doesn't need to be angled as much as mine. You can run it straight from the tunnel, through the bulkhead above the cooling line. Trim cables are SUPER long and you can route your cable anywhere.
 
You aren't running dual cooling lines + trim tube? You never know what engine you might run in the future... or if you ever sell the hull you want it to be able to be set up however. Running dual 1/2" cooling lines and a 5/8" trim tube is "covering all the bases" for any engine/pump&trim combo. However you do it will be great, I just know that now is the time to do it while you've got it open! Either way, you're doing great work!!!
I am running dual cooling, however I’m going to run two lines 3/8s. And the siphone bilge tube 5/8 (on drivers side) I can delete siphone bilge and run trim through the same line in the future if needed.

I was initially going to run half inch cooling lines but didn’t want to reduce them. Friend I talked to said I would be fine running a dasa engine with that setup.

Are you still running half inch for cooling? Are you tying them into a manifold?
P.S. If you do run a trim tube, it doesn't need to be angled as much as mine. You can run it straight from the tunnel, through the bulkhead above the cooling line. Trim cables are SUPER long and you can route your cable anywhere.
I basically have my lines in the same positions as yours and Sanoman’s. Except my “trim tube” is my siphone bilge tube. Which you both deleted.
 
HELP


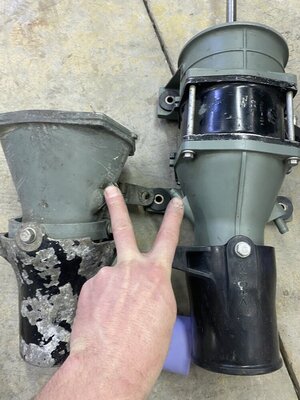
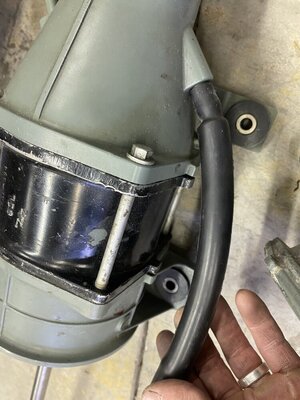
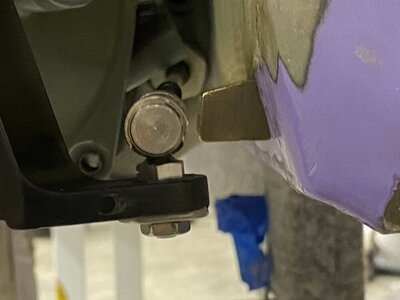
Ok so I installed a oem 144 pump today with superjet steering nozzle.

Note: An Oem pump wear ring, and a solas stainless steel ring have slightly different sized mounting holes. The solas is larger. Went to install this oem pump without driveshaft I had to step up the size in mounting holes on the oem wear ring mounting holes by two bit sizes.


Now to the main point. I mounted a superjet nozzle to my OEM pump which aligns just as my solas pump does. My tunnel alignment is basically perfect.

The oem Superjet steering nozzle bottoms out on the ride plate. I tried the Fx1 nozzle and the steering arm clears the ride plate but the steering nozzle itself binds on the reduction nozzle making it unable to turn.

Thanks for the help!
 

Attachments

  • 56D4EC32-4FD2-4FB6-BCB2-6230D023B419.jpeg
    56D4EC32-4FD2-4FB6-BCB2-6230D023B419.jpeg
    98.2 KB · Views: 17
  • 9E19B438-B8D0-40EC-91ED-3C285DDBA25B.jpeg
    9E19B438-B8D0-40EC-91ED-3C285DDBA25B.jpeg
    101.6 KB · Views: 17
  • 46745F36-840E-4C5B-9F5D-D6B9BF70EEE5.jpeg
    46745F36-840E-4C5B-9F5D-D6B9BF70EEE5.jpeg
    109 KB · Views: 15
  • B1480607-2048-4D24-B58A-9AC3A8030A4D.jpeg
    B1480607-2048-4D24-B58A-9AC3A8030A4D.jpeg
    108 KB · Views: 18
  • 607920E1-6B7F-40F5-9E4F-7826EA10BD05.jpeg
    607920E1-6B7F-40F5-9E4F-7826EA10BD05.jpeg
    89.1 KB · Views: 18
Last edited:
You're gonna want some kind of adjustable nozzle that you can tune to a fixed position. All the FX guys I rode with had some kind of adjustable nozzle that they used to trim the boat with and end up leaving in one spot. Going to a bigger pump in that hull always seems to cause it to "plow". After screwing around with different adjusting scenarios on the few conversions I did I eventually just settled on full tilt up. I even had an active variable trim at one point, it actually worked though it had some push back friction. The last pic is where I ended up, locked, full tilt, fixed. Sometimes the simplest solutions are the best.
Do you have any recommendations on what nozzles would best to run a permanent or adjustable trim on the 144 pump? Makes sense what you're saying for sure. Hoping to piggy back off of someone else previous work. I still have to rebuild my ebox, build my pole, finish the hull, then install/configure everything. I'm working 10-12 hr days and commuting about three so that eats up alot of my time and bandwith.

Thanks
 
I usually end up about 1 degree down trim on play boats. Makes it easier to recover when Im at the tipping point without affecting full speed handling too much. This can change a lot with conditions so Its often best to have a default setting with a handlebar lever.
What of trim do you run kevbo? Any recomendations for the 144
 
Top Bottom